Theme: Creator Expert
Age: 16+
Release Date: Jan 1st, 2017 –
Why I bought this set
Once I decided to build a Lego city, buying the modular buildings was a no-brainer. It’s an obvious starting point to create a main street and the initial focal point of any city. Beyond that, though, I watched Youtube reviews of the modular buildings, and their look and internal detail riveted me. I was fascinated by the construction method, which meant each floor could be easily removed, and you could access each floor’s interior. I want a city that will not only looks good but can also be played with. After all, first and foremost, Lego is a toy, and I am a storyteller.
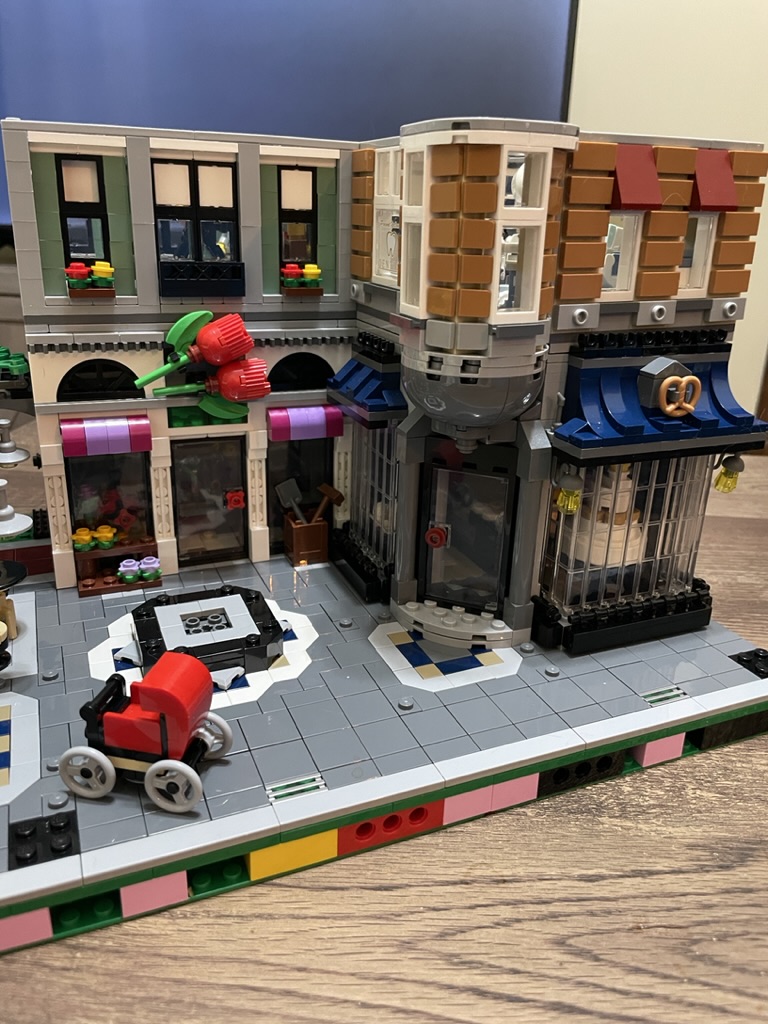
Assembly Square was the obvious place to start my modular journey as it was the oldest of the series still retailing in stores. I was also in the Lego store deciding what set to treat myself to, and they had them in stock. The helpful Lego employees became animated when they suggested I buy it. They only had it in stock sometimes and were adamant that it was the best place to start a city. Coincidence that it is also the most expensive modular building? Perhaps, but I did see their point, as it was the anniversary set of the line. Whatever the ultimate motivation, Assembly Square became my first modular building.
The build
This massive set comes in only six building stages. As a new builder, I am used to a much smaller piece count per stage. The entire build is covered a beautiful 308-page instruction booklet. Unlike other sets I have assembled, this one did not have any interviews with the designers at the beginning or additional insight into the sets’ conception. It’s a shame, as this anniversary edition has plenty of Easter eggs to the previous entries to this theme. Alas, I won’t spot them as a new builder.
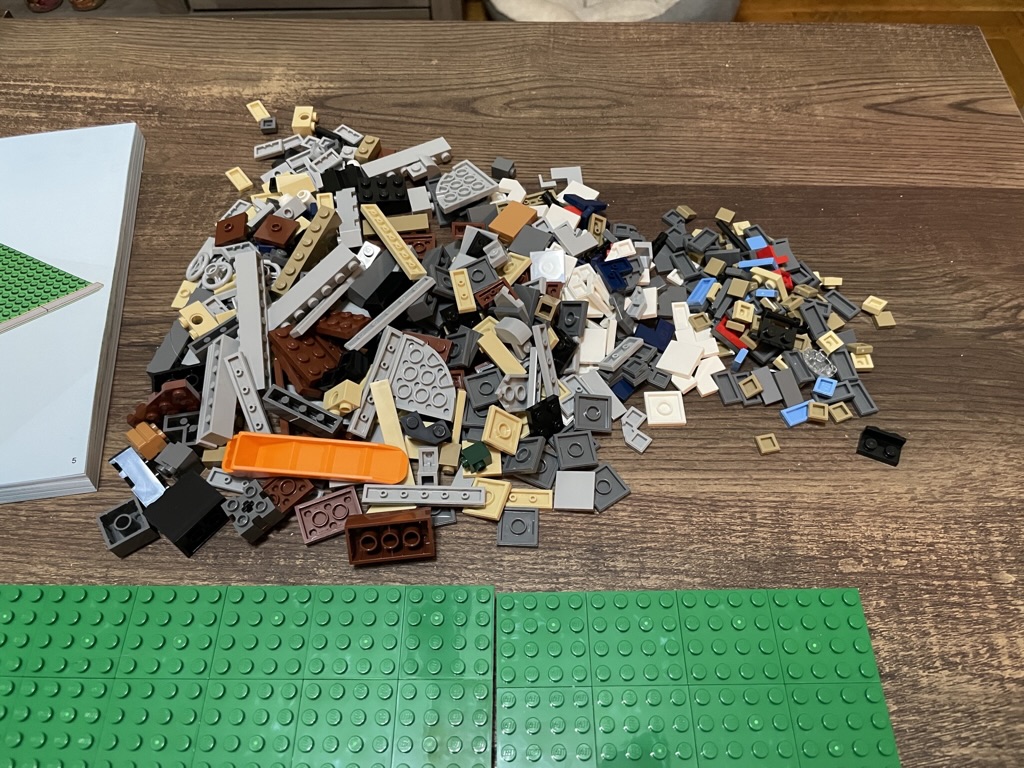
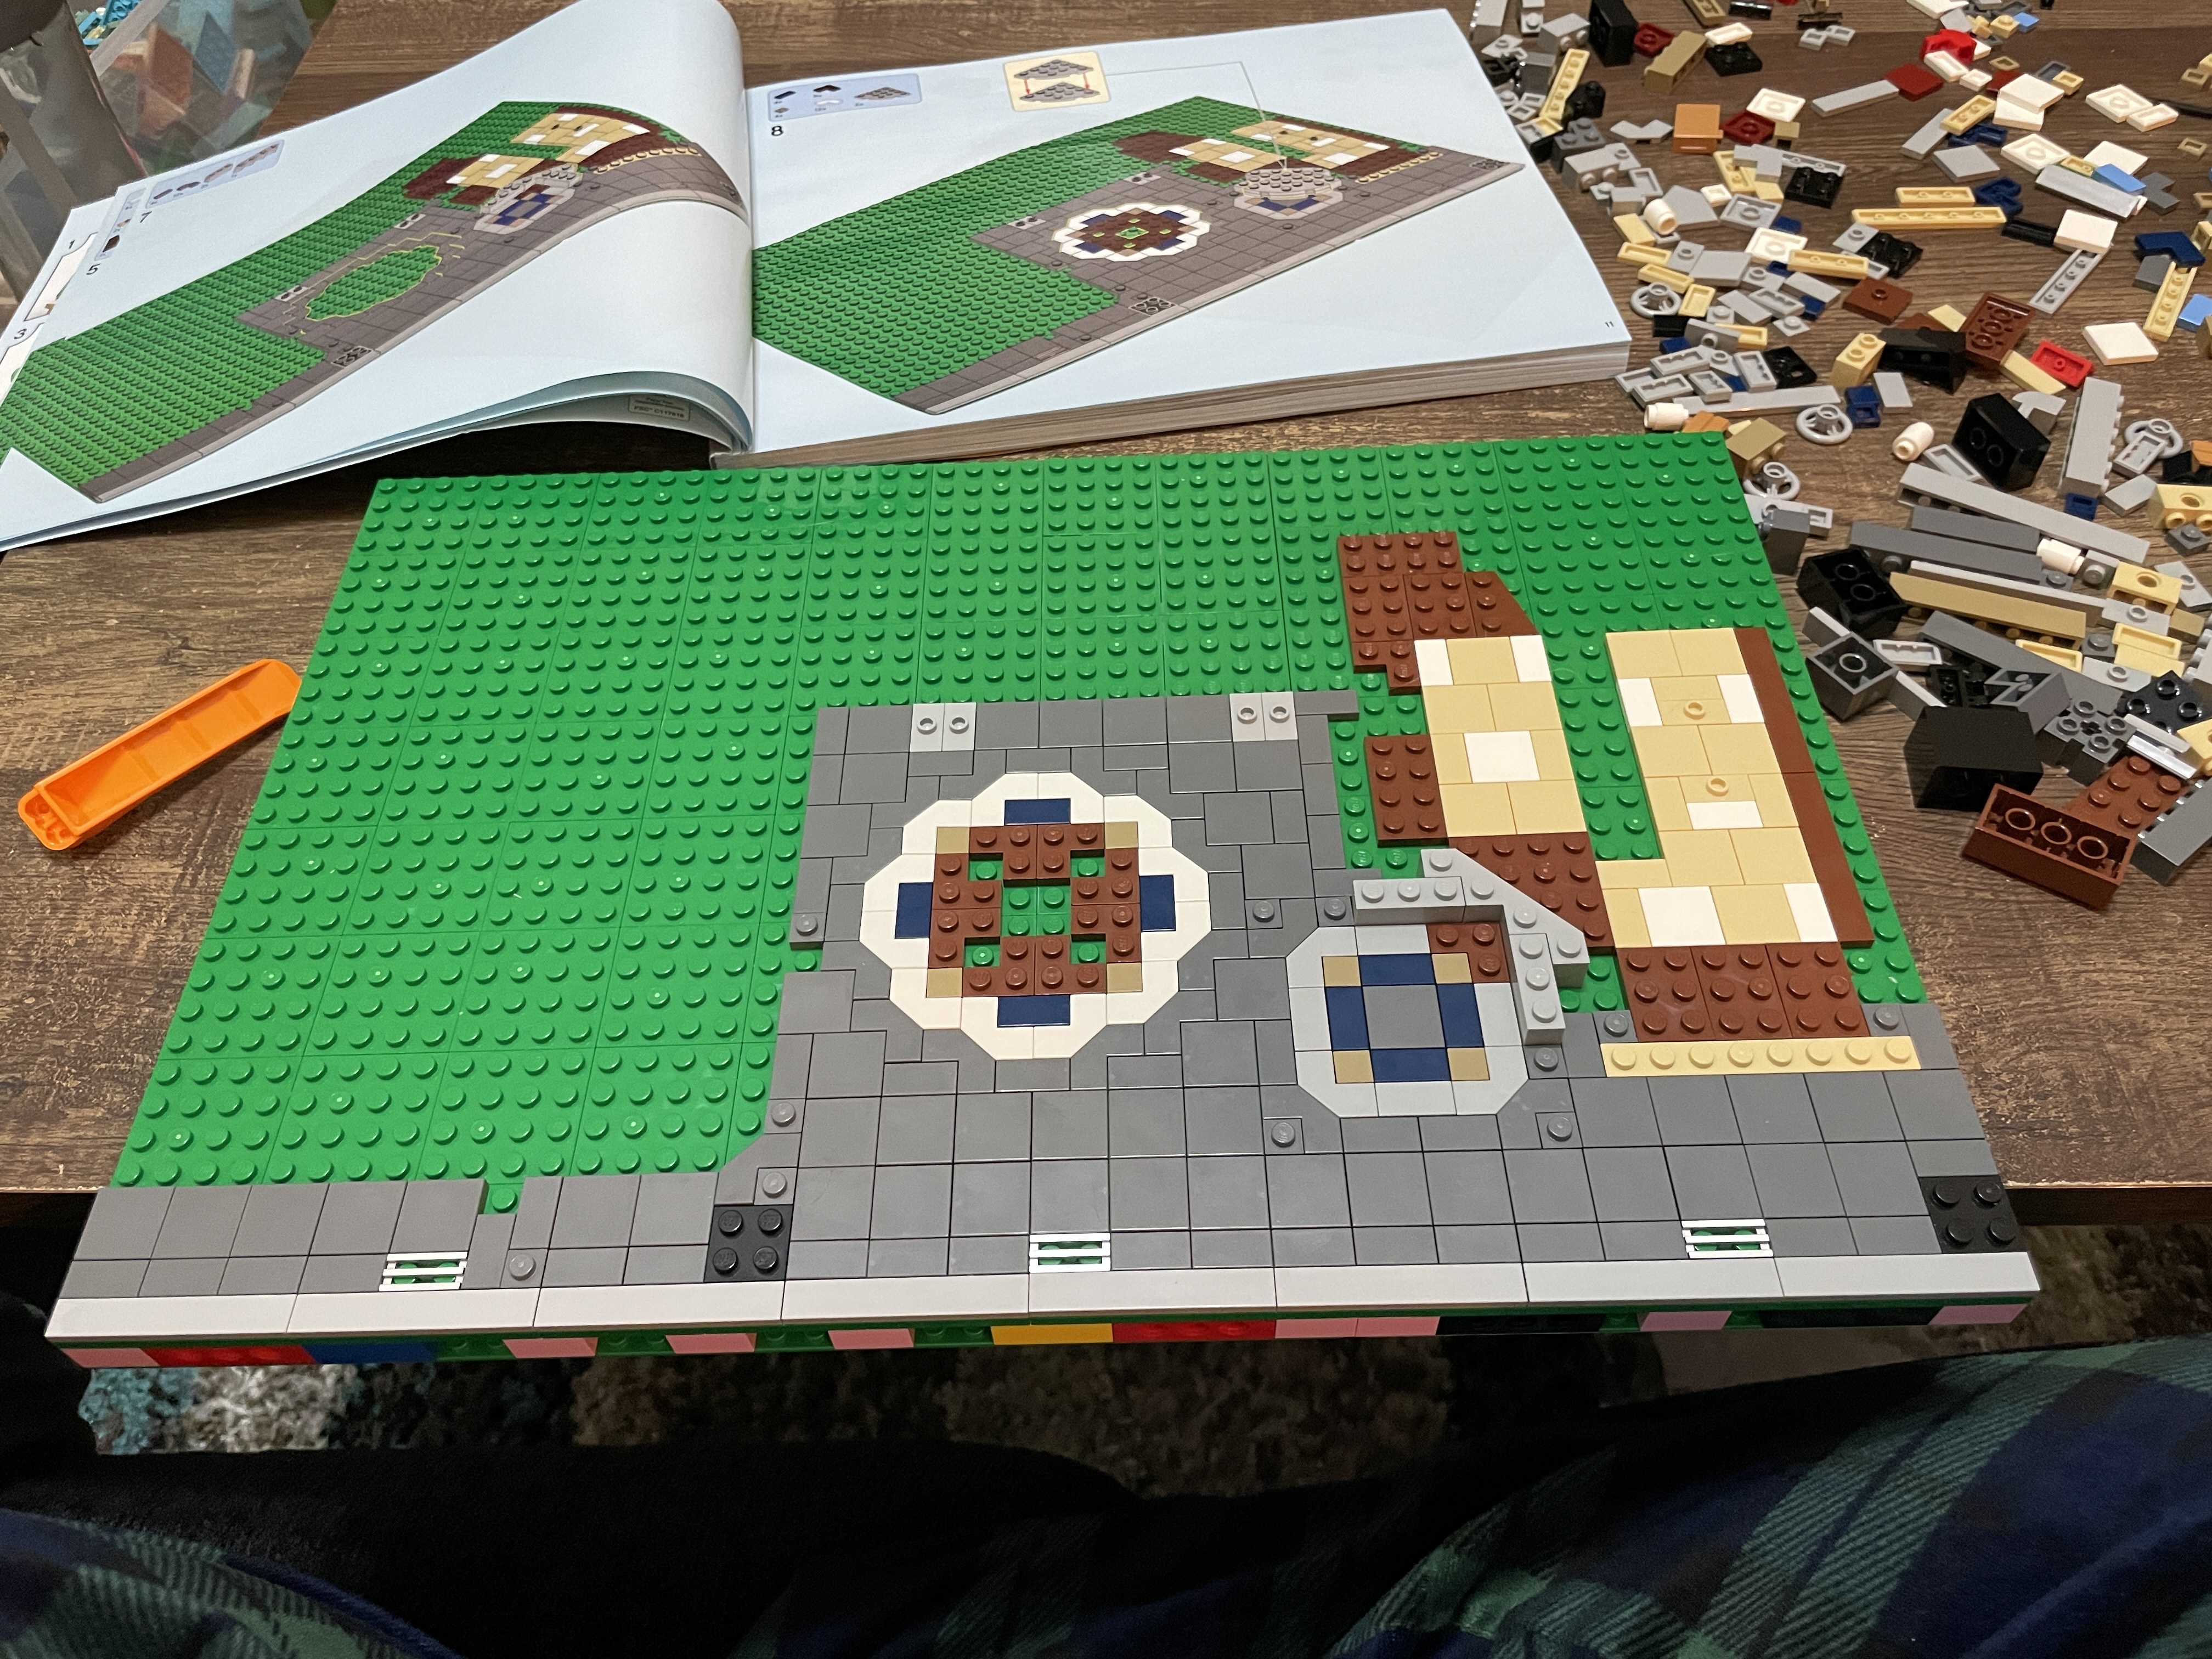
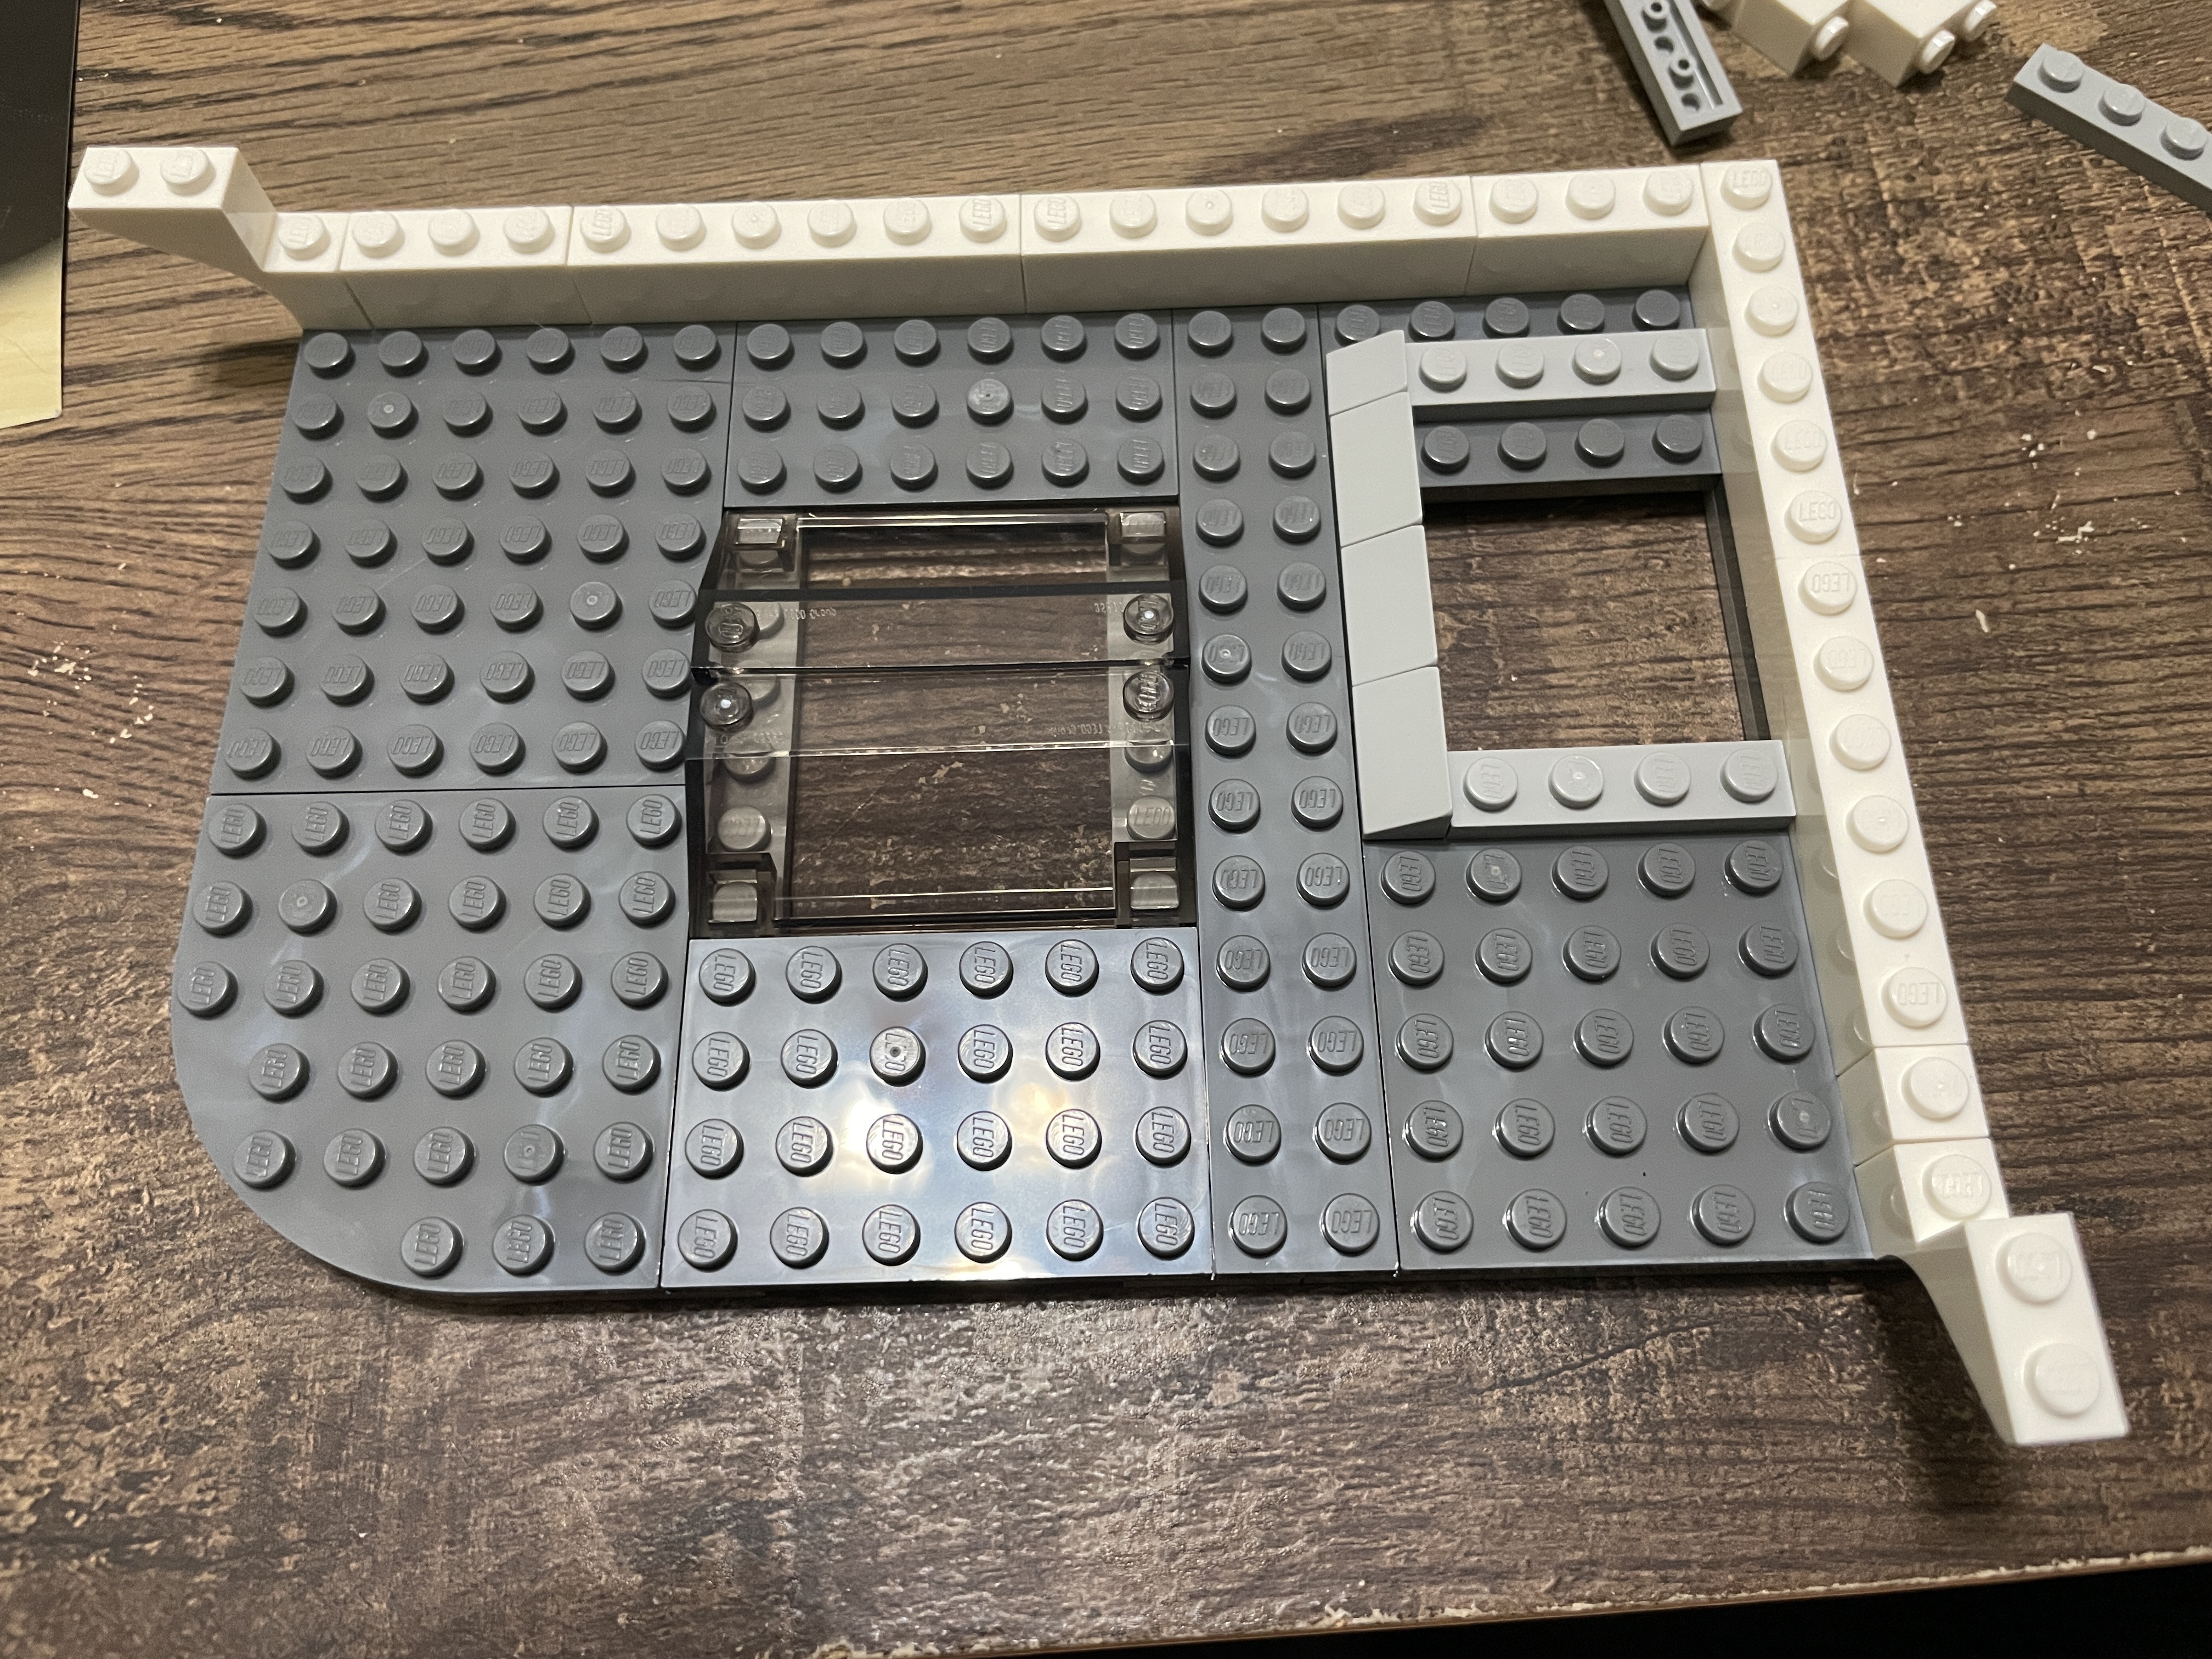
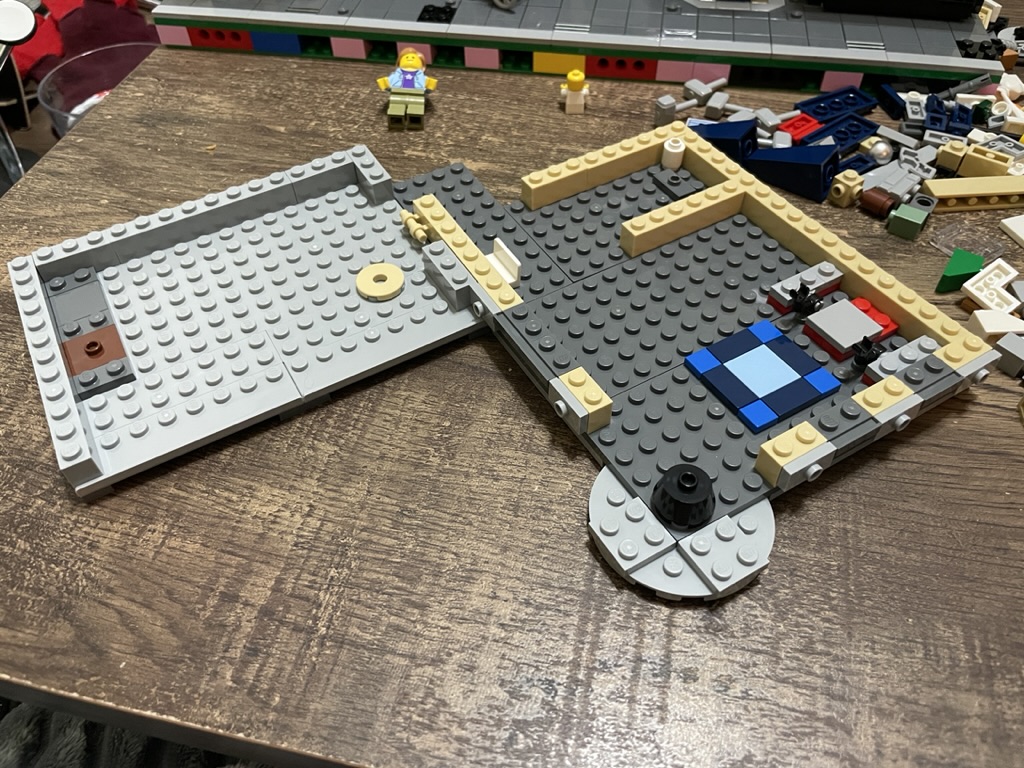
Assembly Square is one-and-a-half baseplates (all other modular buildings are one), and the first thing I did was MILS plate the baseplates. I kept the same green color as the sets’ baseplates, although only a few studs at the very back will be exposed by the end, so most of the color doesn’t matter.

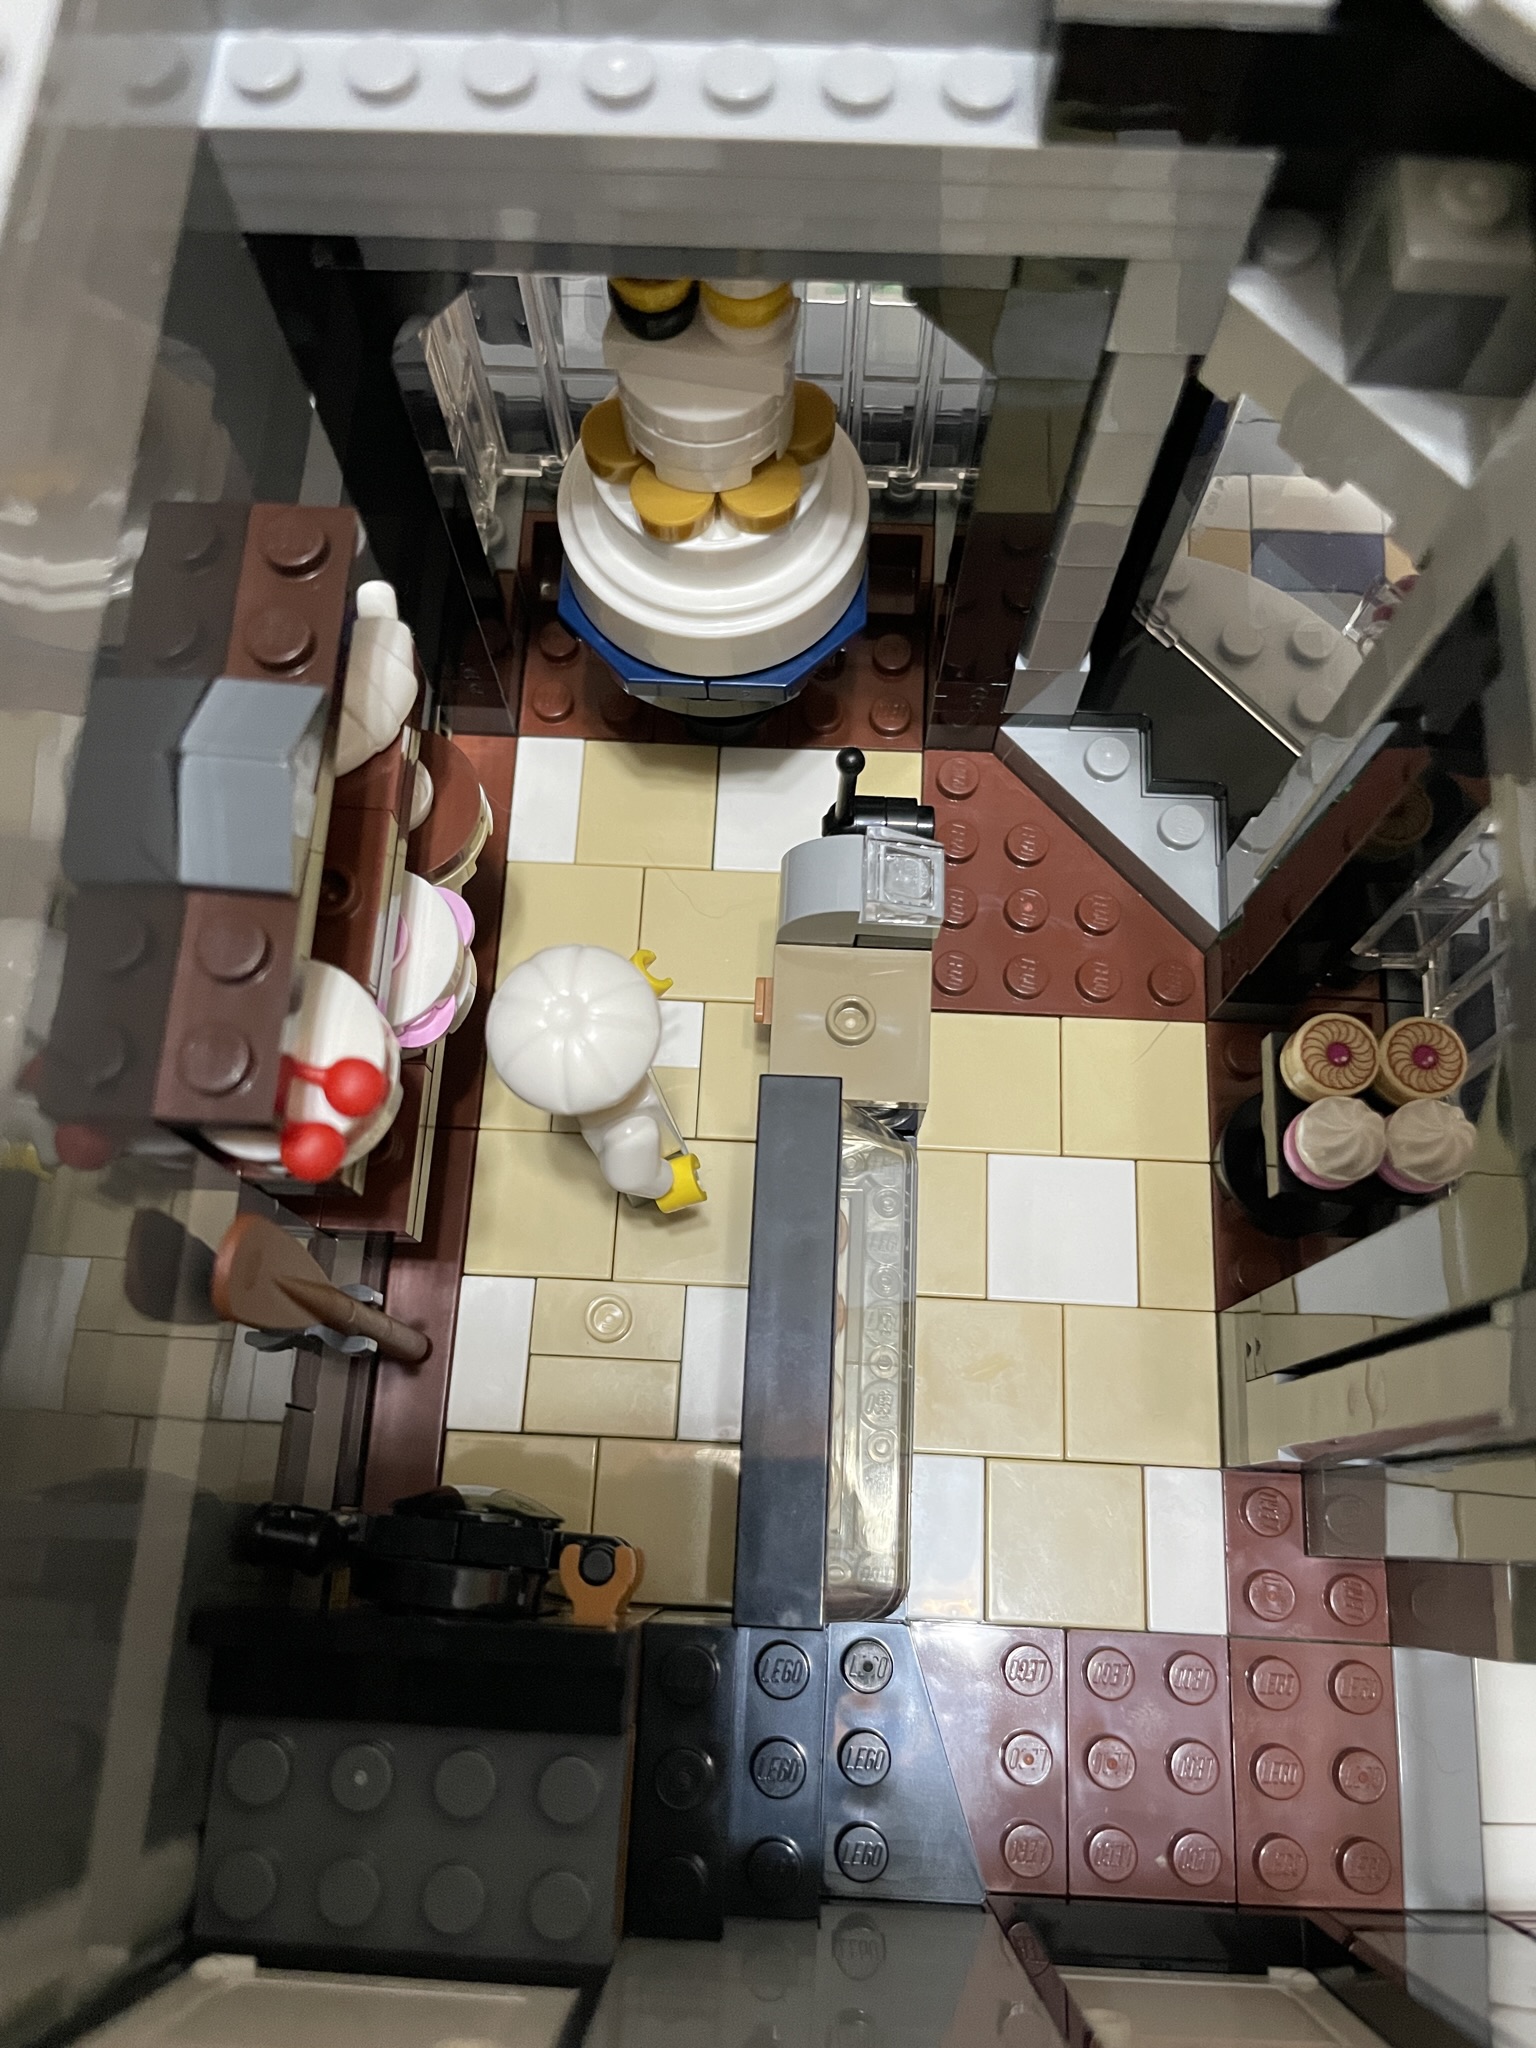
Most of the first stage focuses on laying down tile for the exterior and the ground floor. As with the entire modular line, the front of the pavement is outlined with a single stud of light grey tile (the curb, if you will), whereas the rest of the pavement/sidewalk is mostly 2×2 dark grey tile. There are also drains placed with silver grates and a couple of 2×2 black plates that will tack down the lamposts.
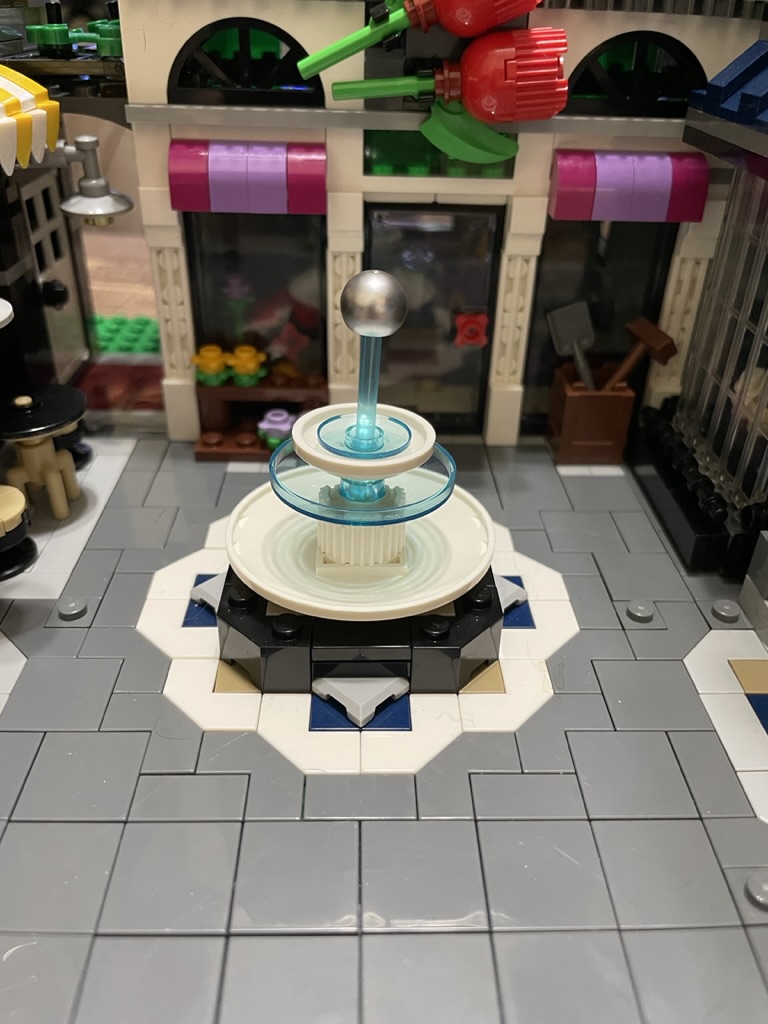
The center of the square has a fountain, and this stage applies the decorative white and dark blue tile around the reddish brown plate. On top of the plates, light grey shields are placed, flanked with modified black brick. On top of these, black and light grey tiles are positioned to finish the fountain design for now.
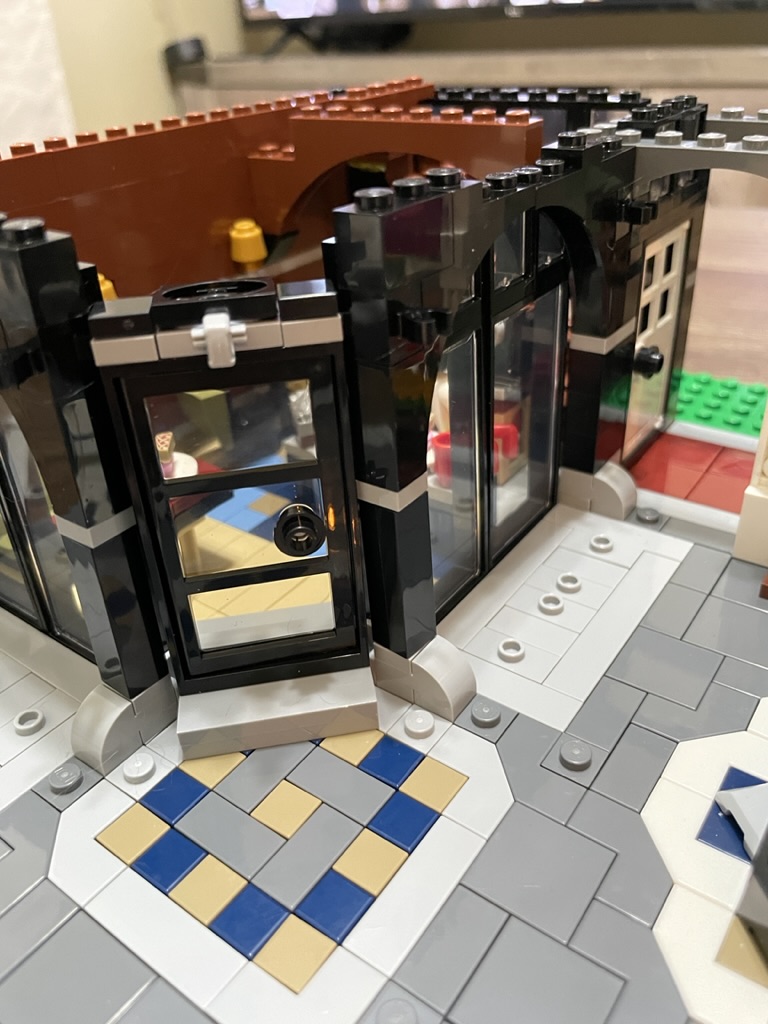
On the right, plates and tiles outline the footprint of the bakery. Black brick forms the basis of the counter, and light grey brick and tile make the curved entrance.
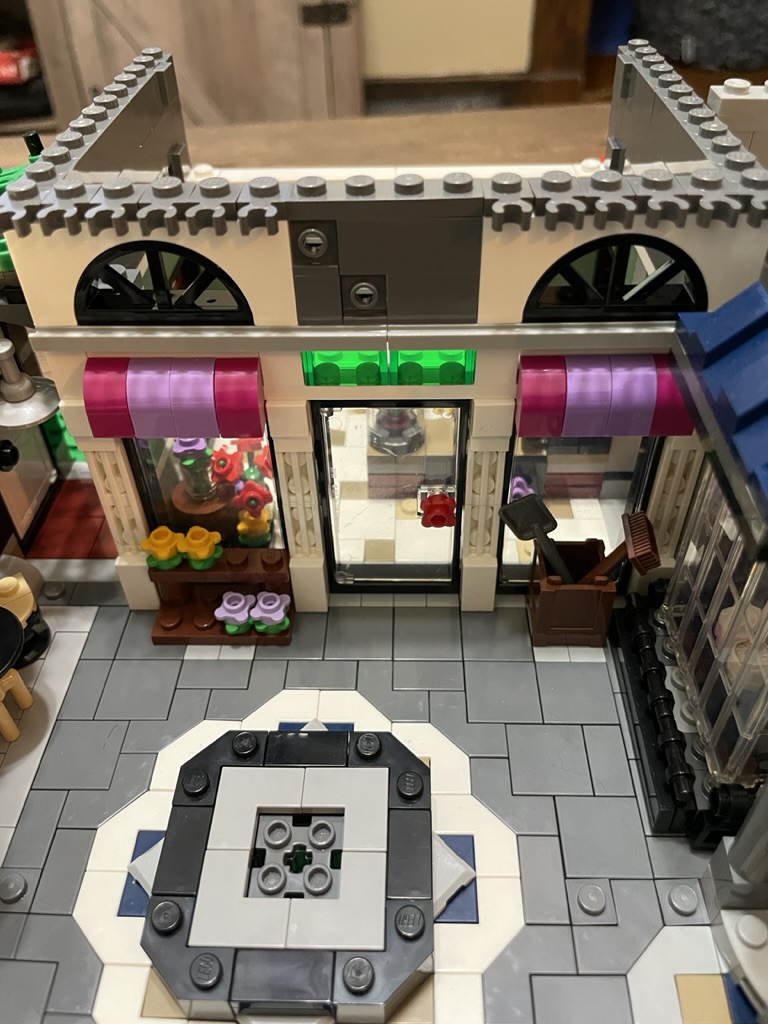
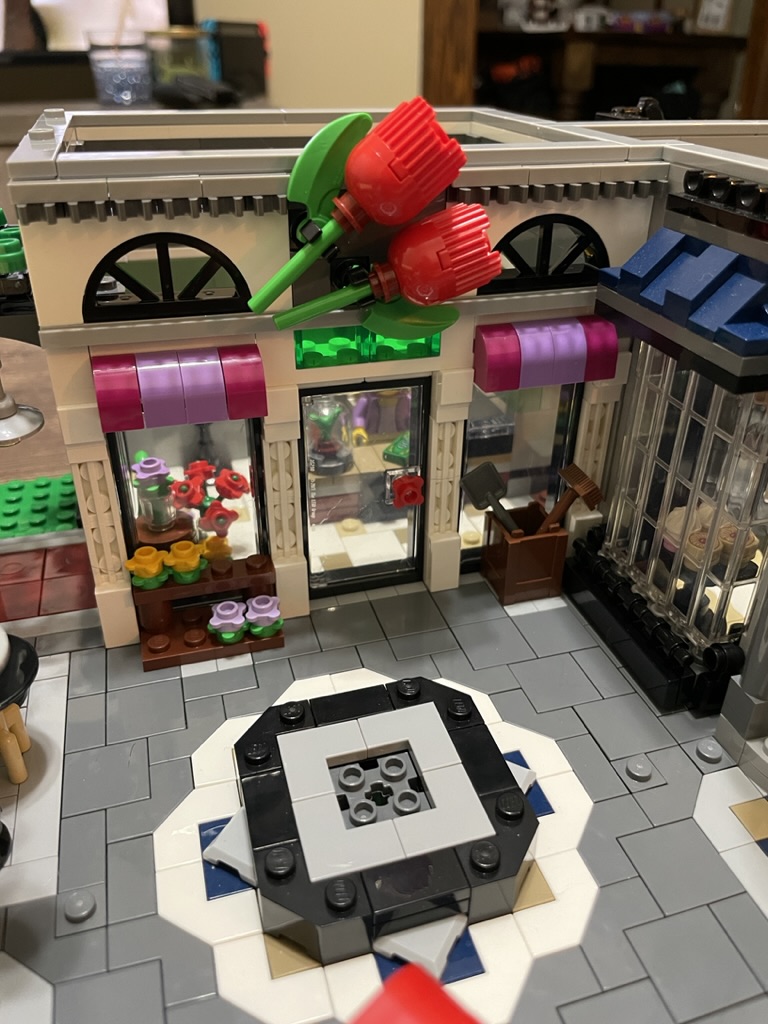
At the back, the outline is laid for the flower shop with an intricate design of white and dark tan tiles interspersed with 1×1 light tan plates. There are a series of light grey jumpers placed that will hold the windows and doors.
On the left, the most significant footprint is made for the cafe with light yellow tiles. Some light grey jumpers are also placed for the windows and to mark out areas for placing internal structures. The doorway for the cafe uses dark blue and tan tiles to create a similar design to the cake shop entranceway.
The exterior of the buildings all have one layer of brick placed, so at the end of stage one, you can see the size and scope of Assembly Square.
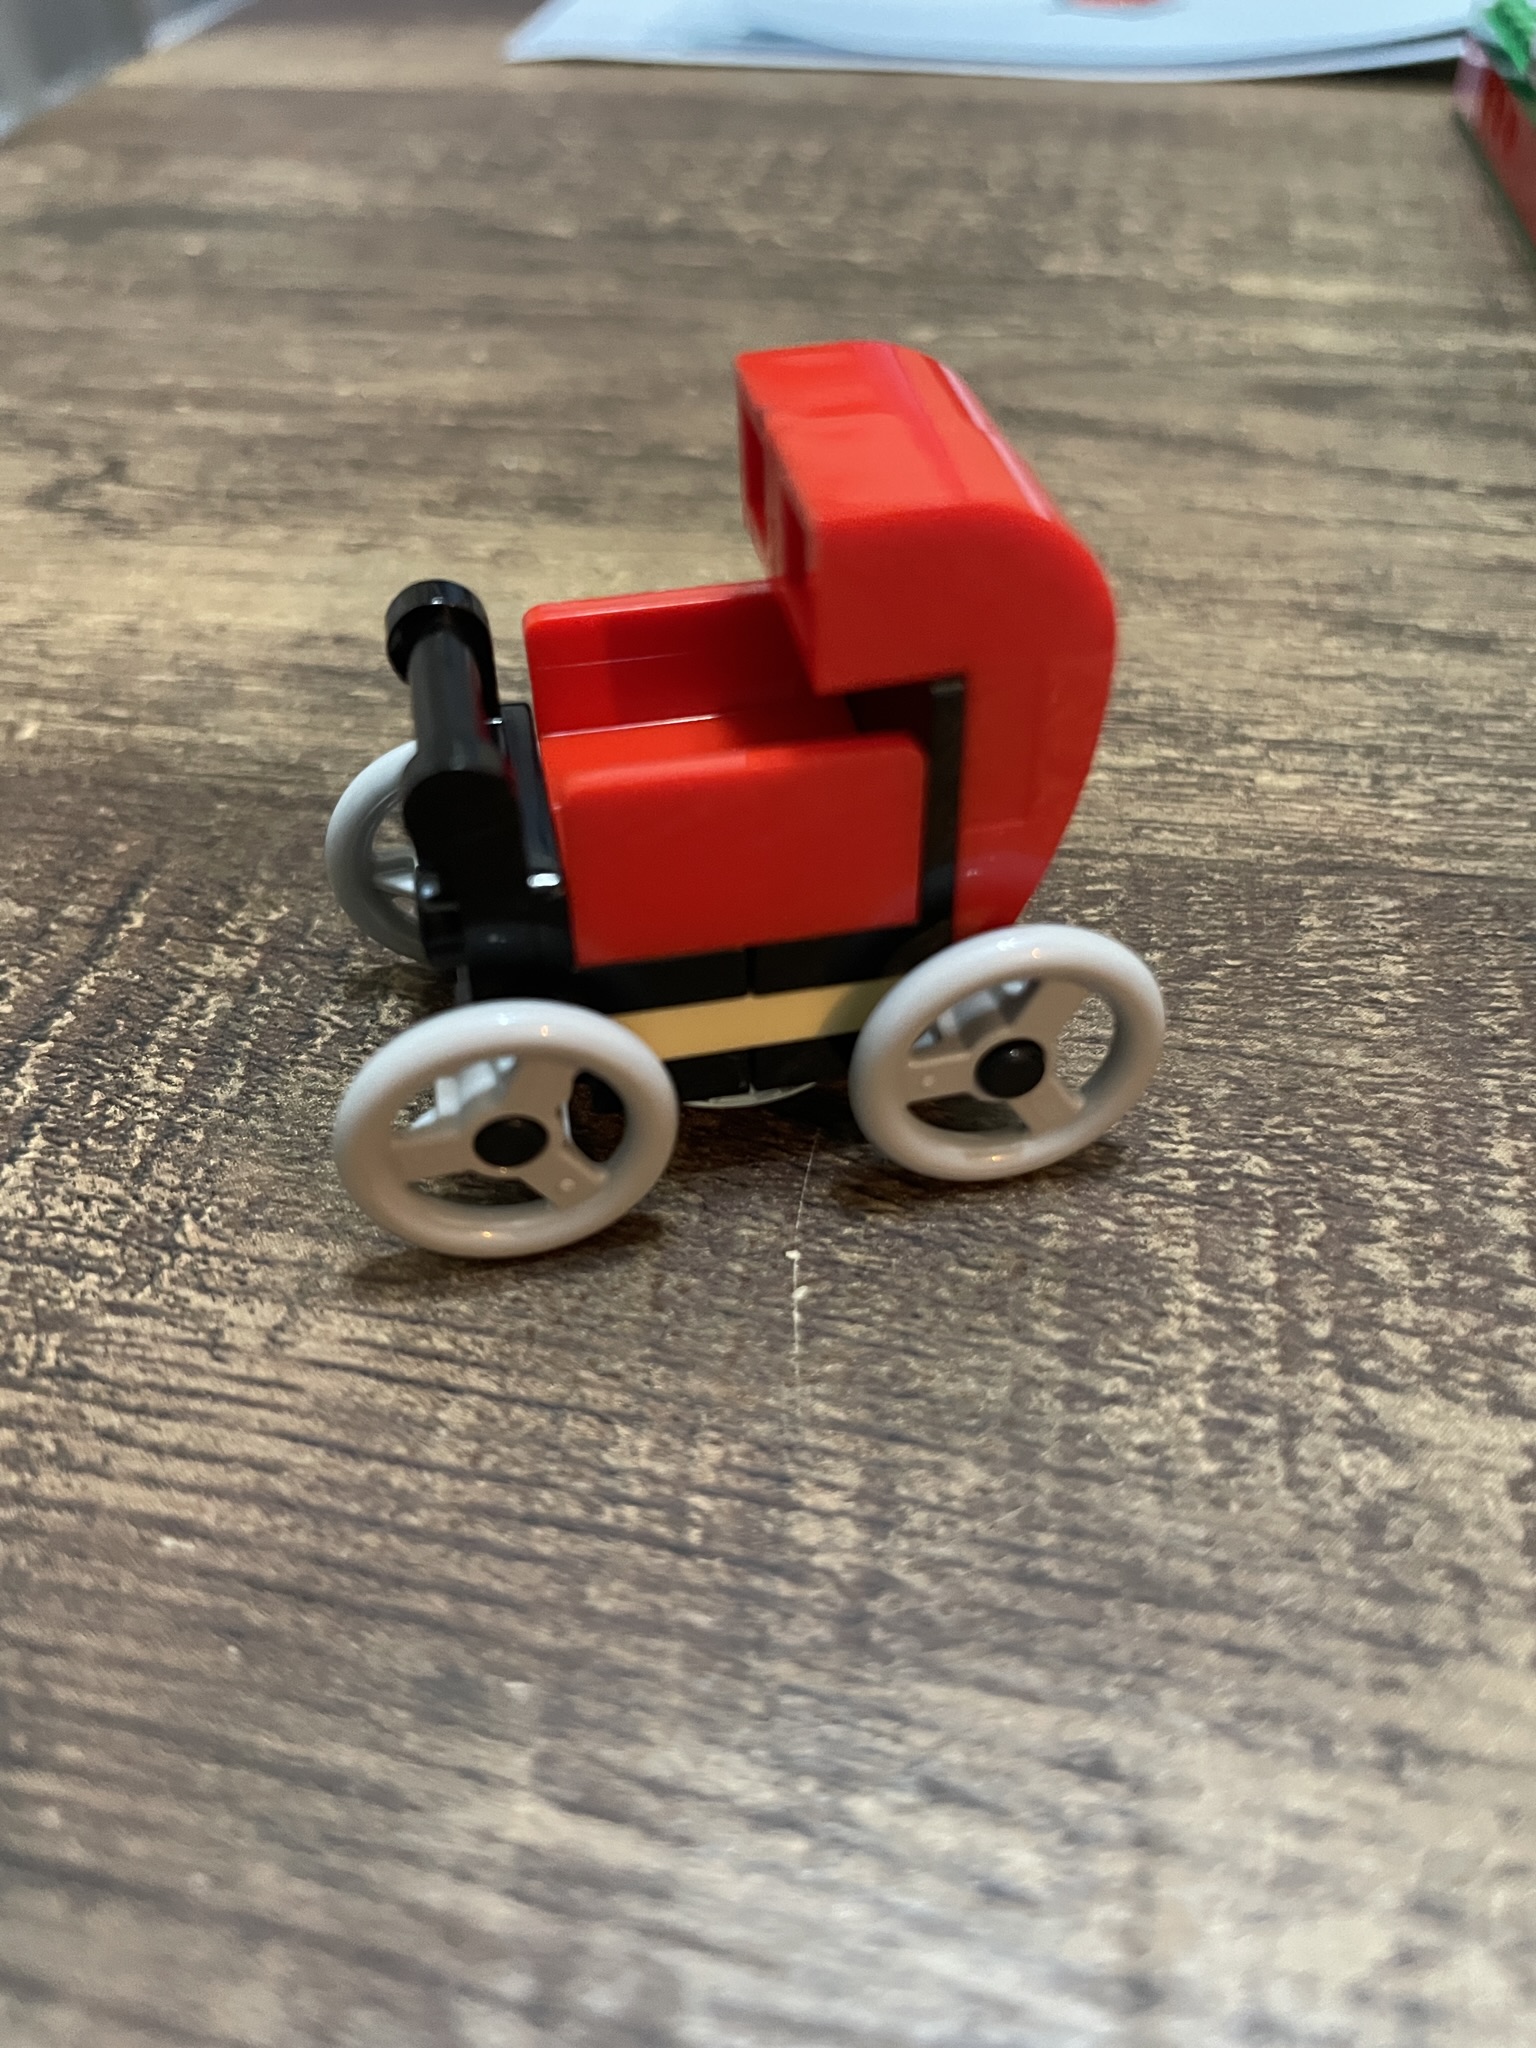
Finally, the stage is complete with a mini-build of a red stroller. I love the part usage here, and it is as cute as anything I have seen in Lego. It’s odd to build these accessories early, but it is something Lego tends to do. I prefer to create them at the end so they aren’t “in the way” during the rest of the build.
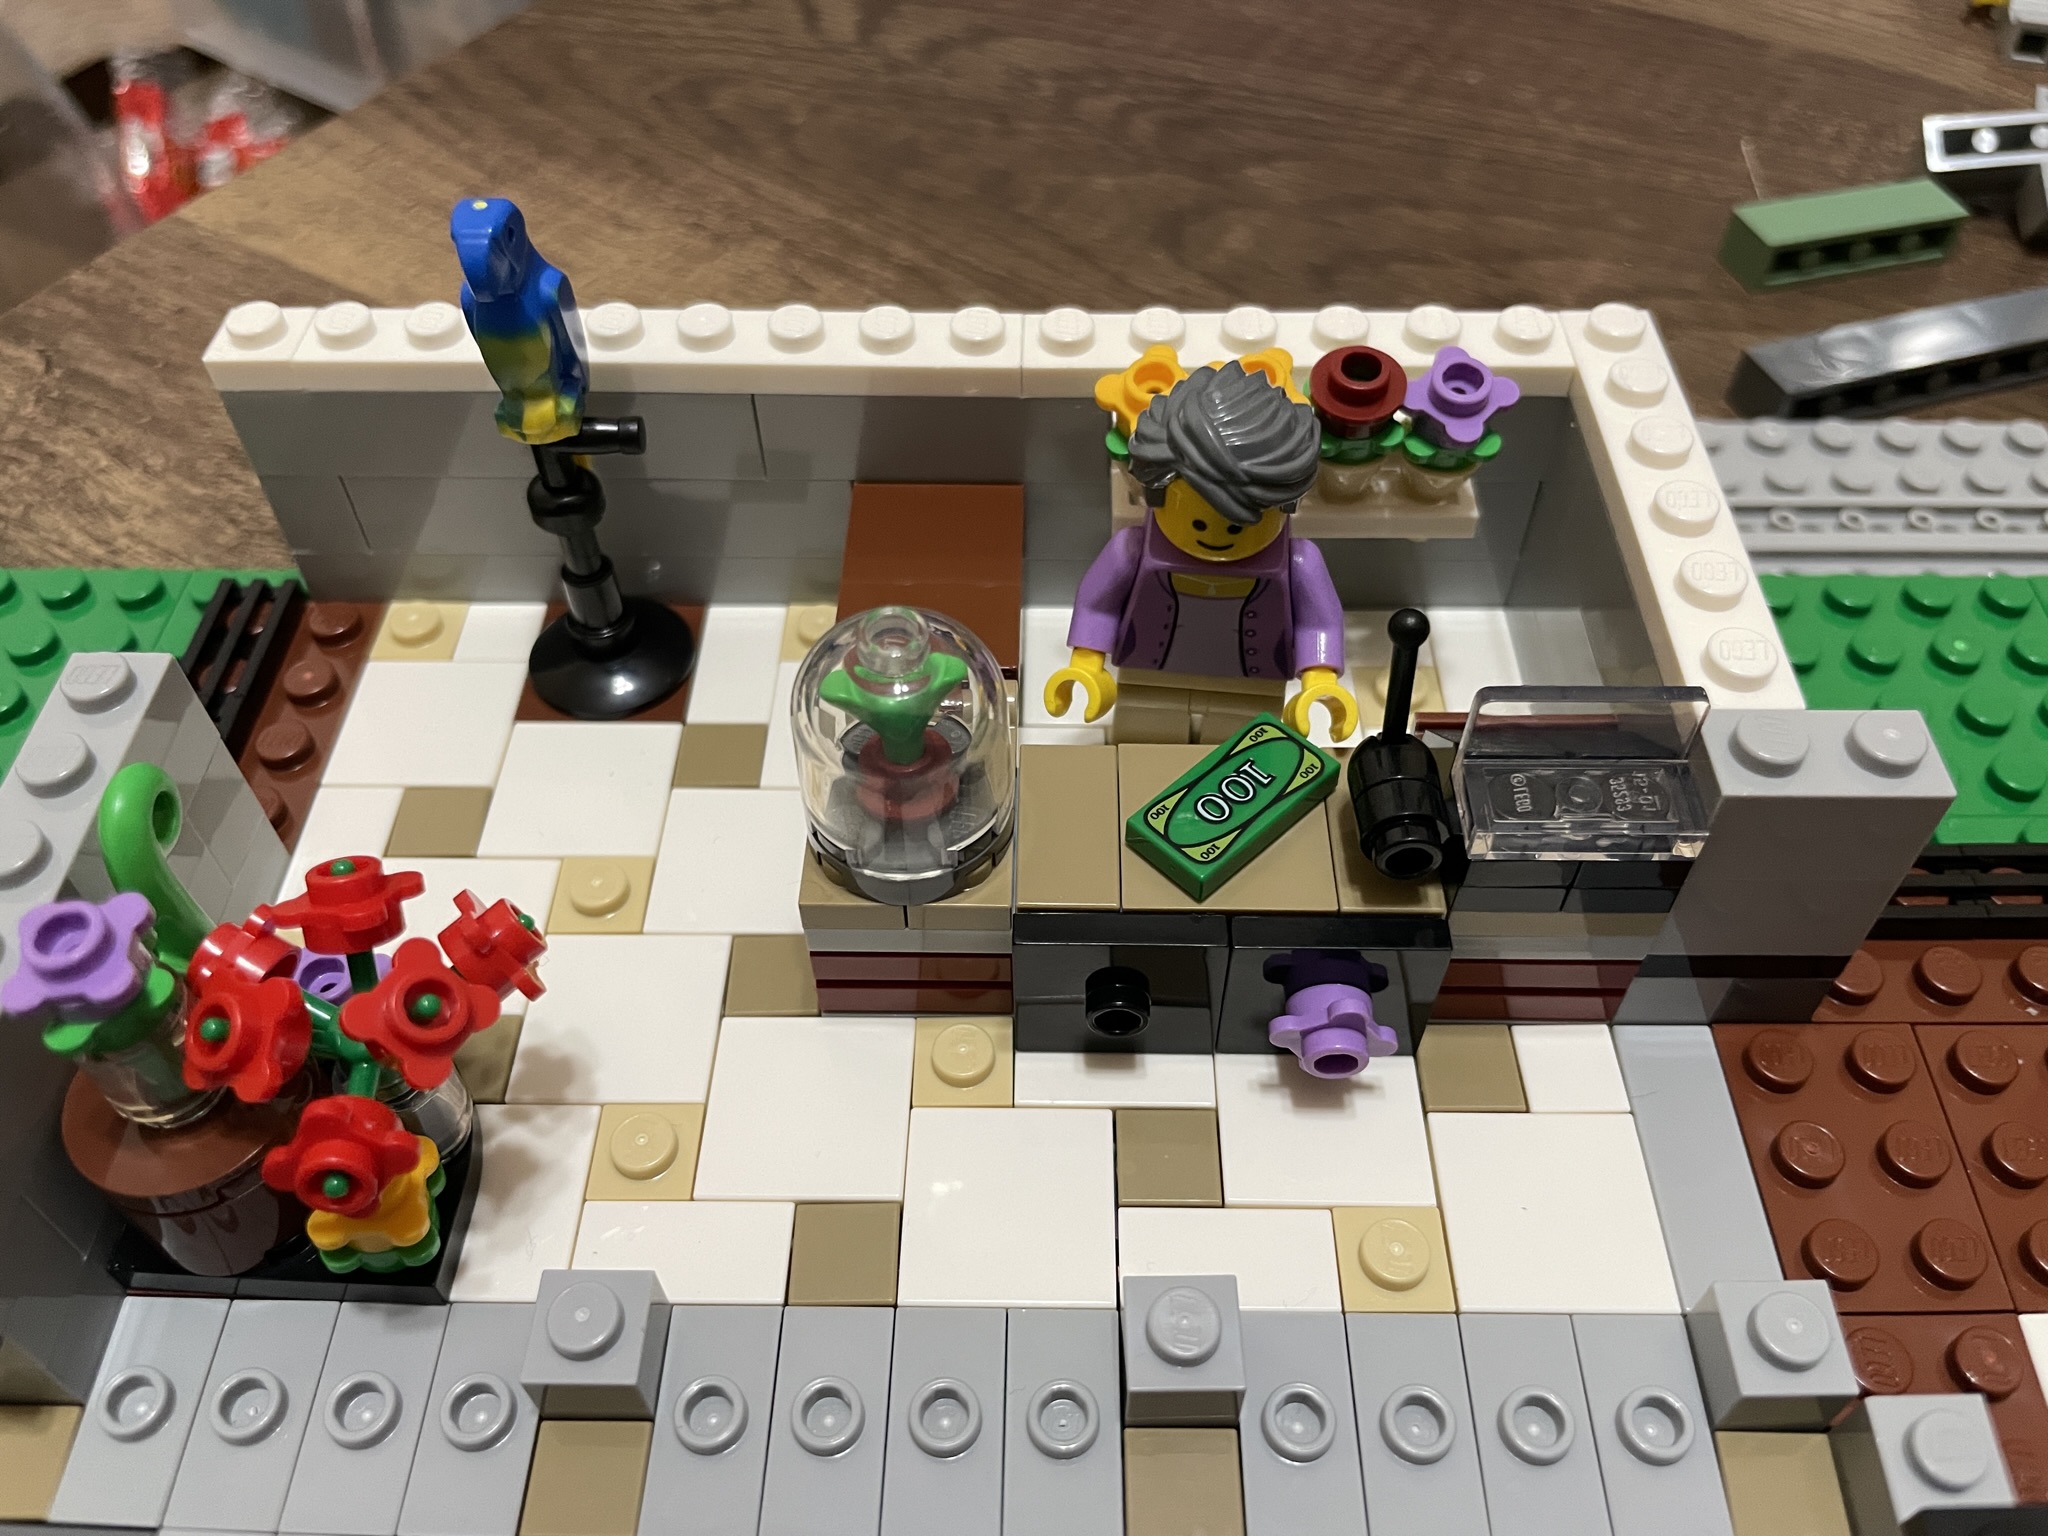
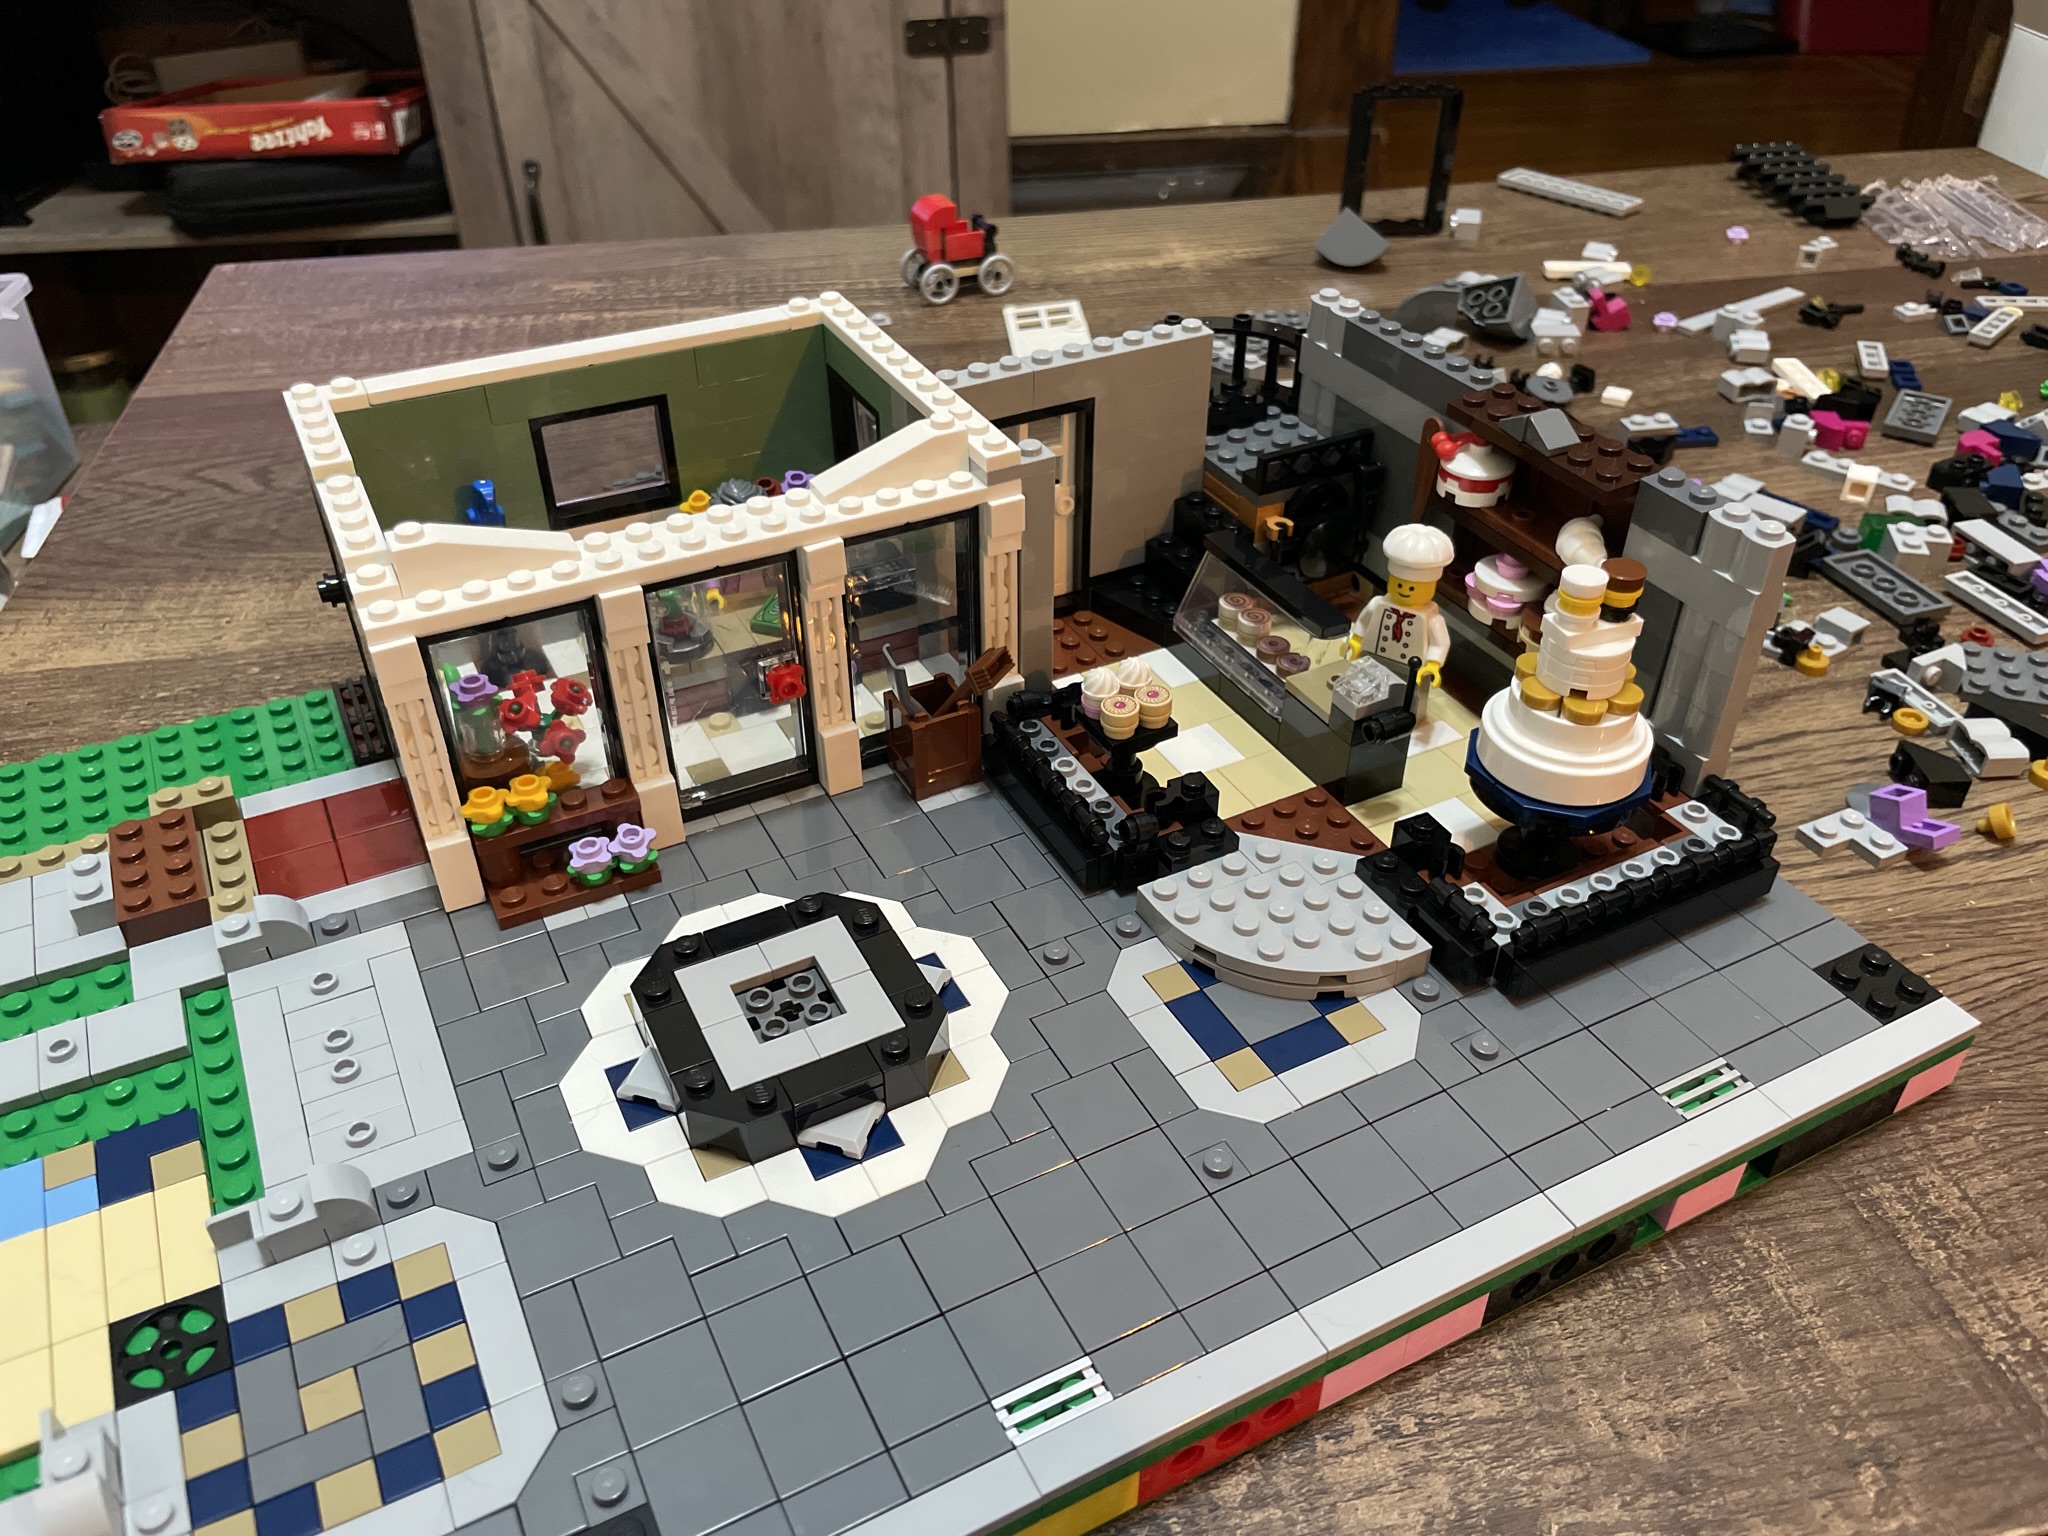
Stage two is just as large, with many pieces! Quickly, the flower shop is the focus, and it only takes a few parts to see the interior come alive. Straightforward plate and tile building construct the counter, complete with a till, money tile, and an encased plant. On the back wall, there is s parrot on a stand as well as a flower display. Simple flower elements on the green plant limbs in the corner create the shop’s inventory. Our first minifigure also appears – the shopkeeper with a simple design.
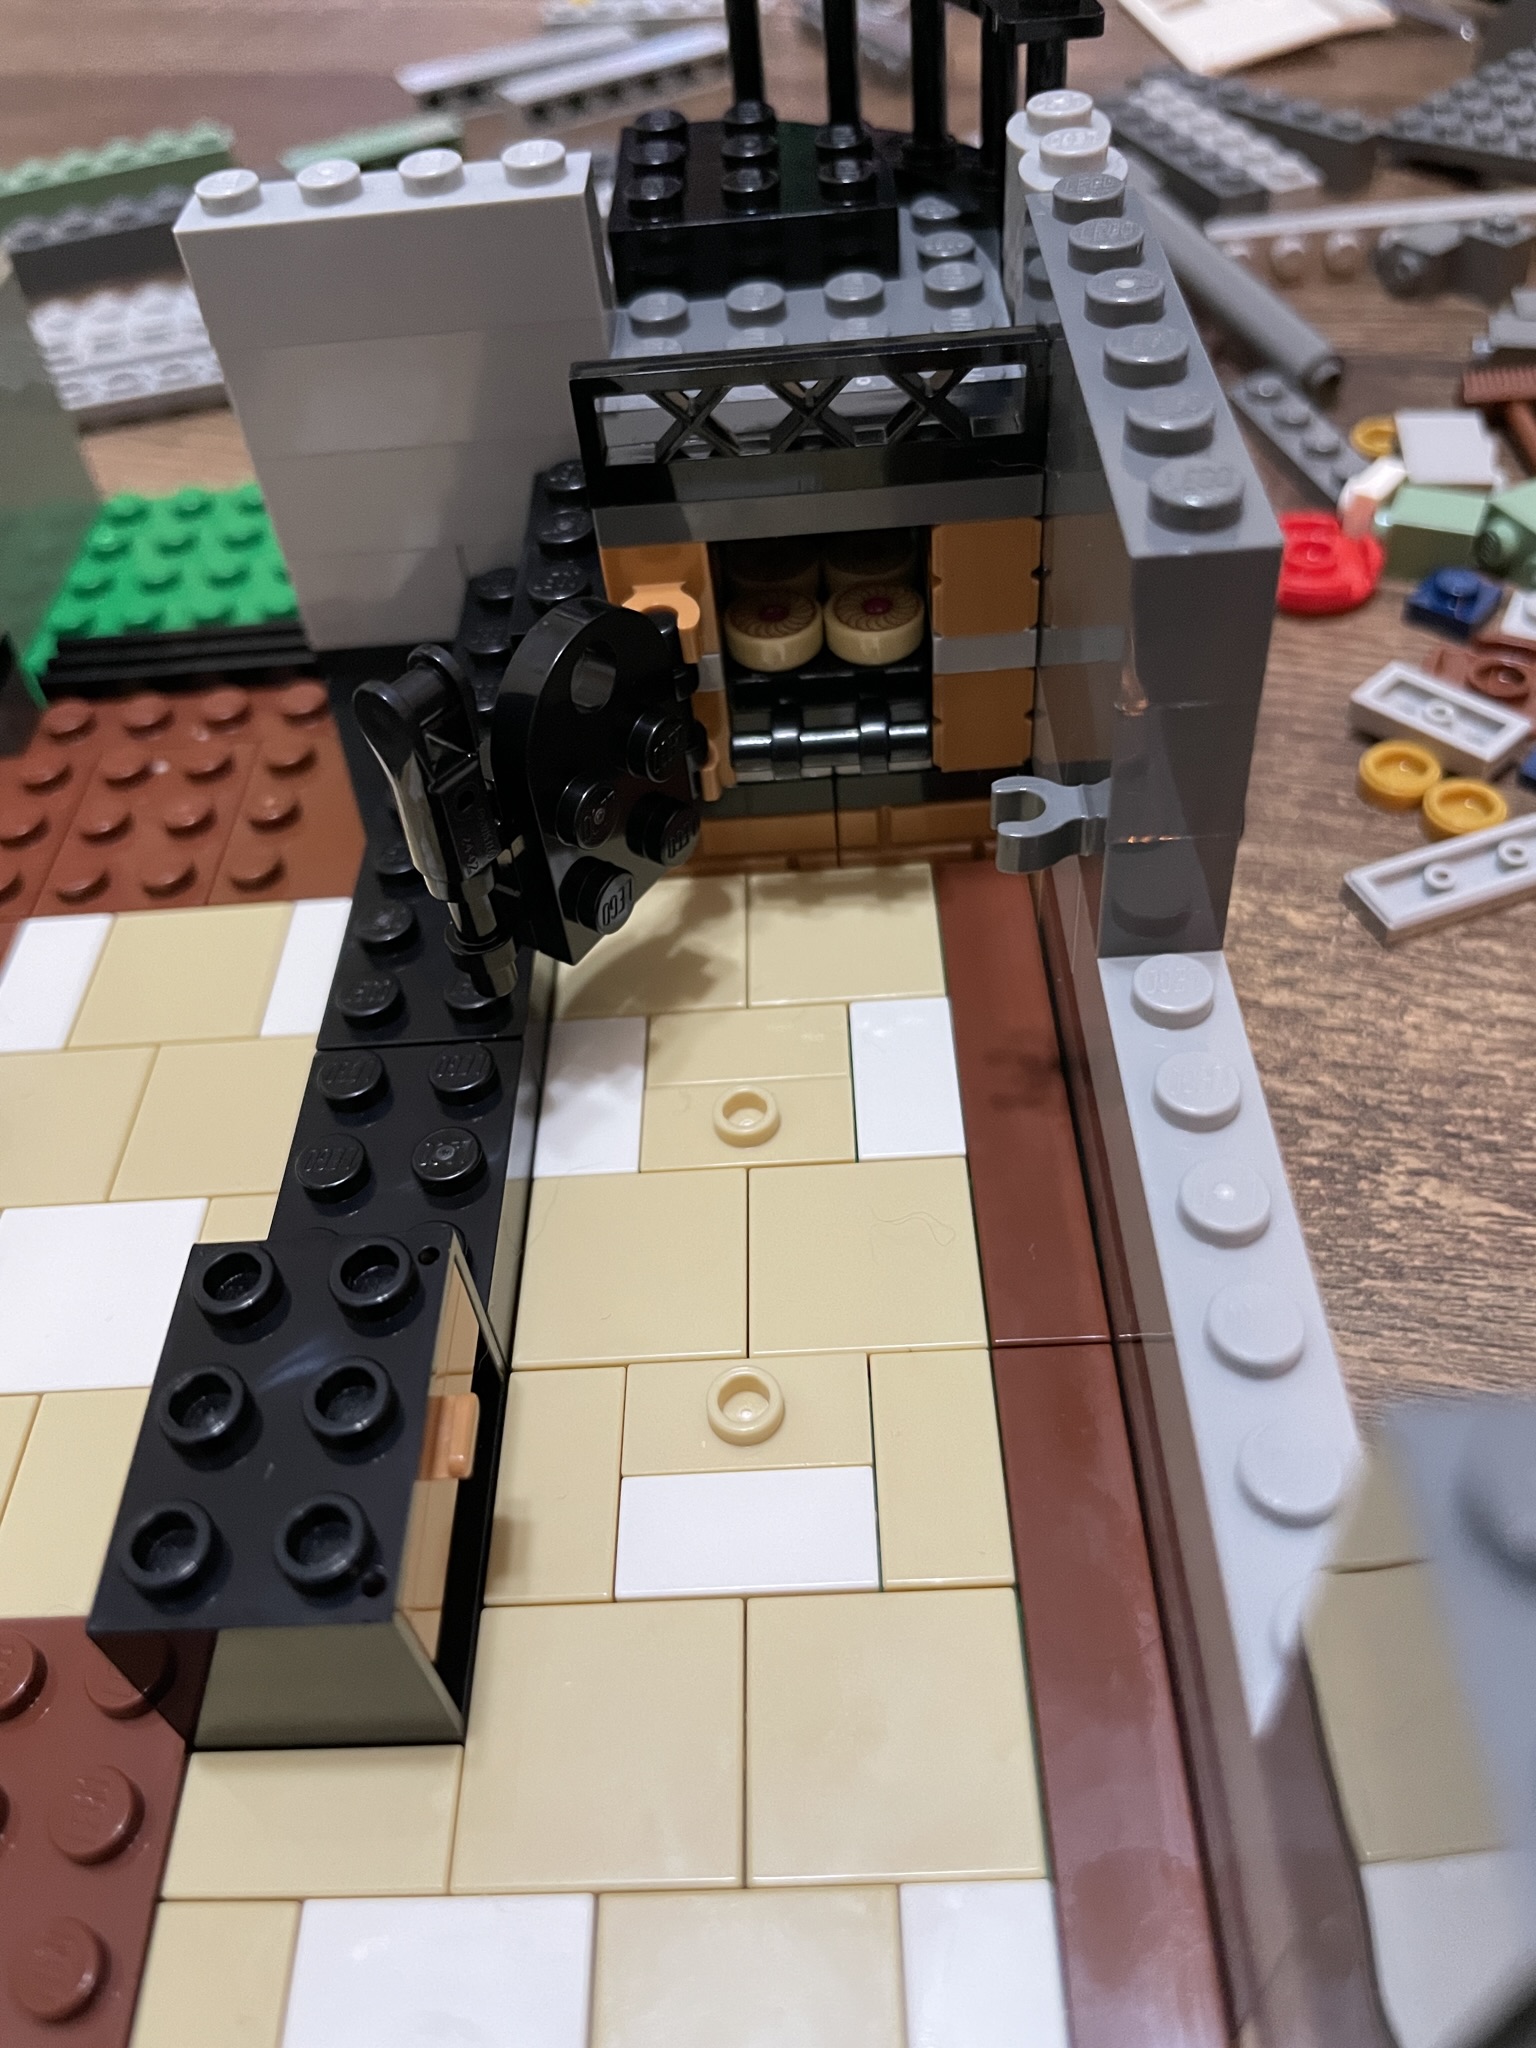
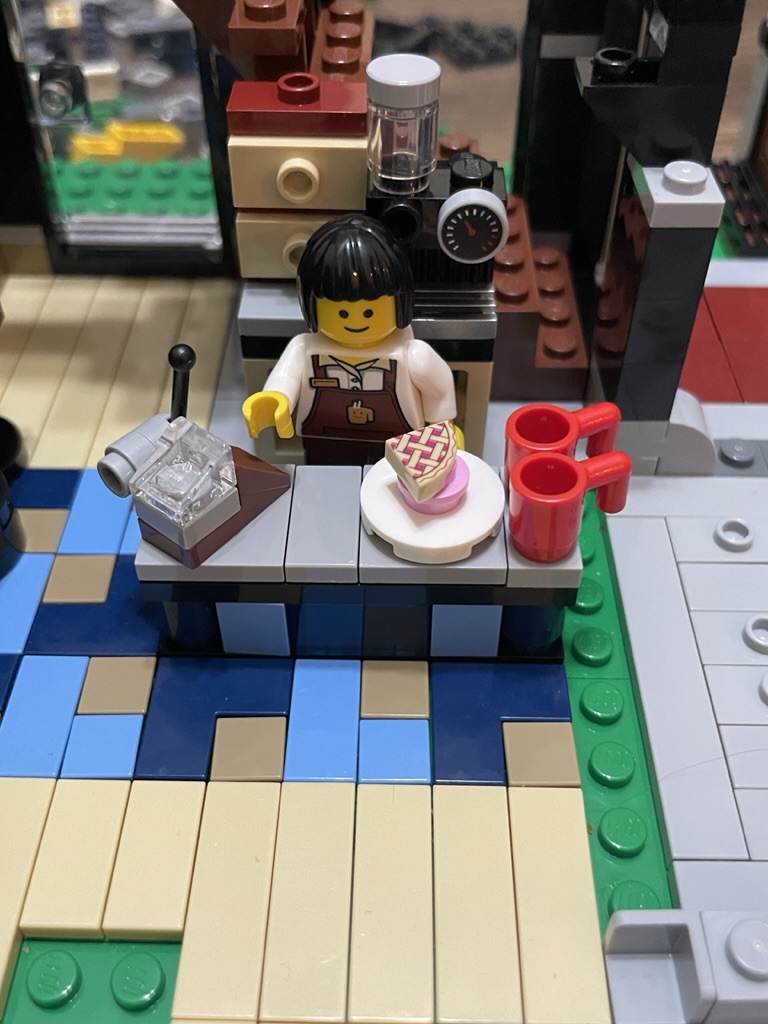
The interior of the cake shop is next to get some detailing. A fantastic little build in the back corner is a pizza oven with biscuits. Just like the flower shop, the interior of the cake shop is created through simple techniques – but they are highly effective. The cake counter is made from black bricks and a transparent windshield. Behind the counter, there is a cake display filled with mini-builds. The baker stands behind it, ready to get a fresh batch of goodies out of the oven and serve his customers.
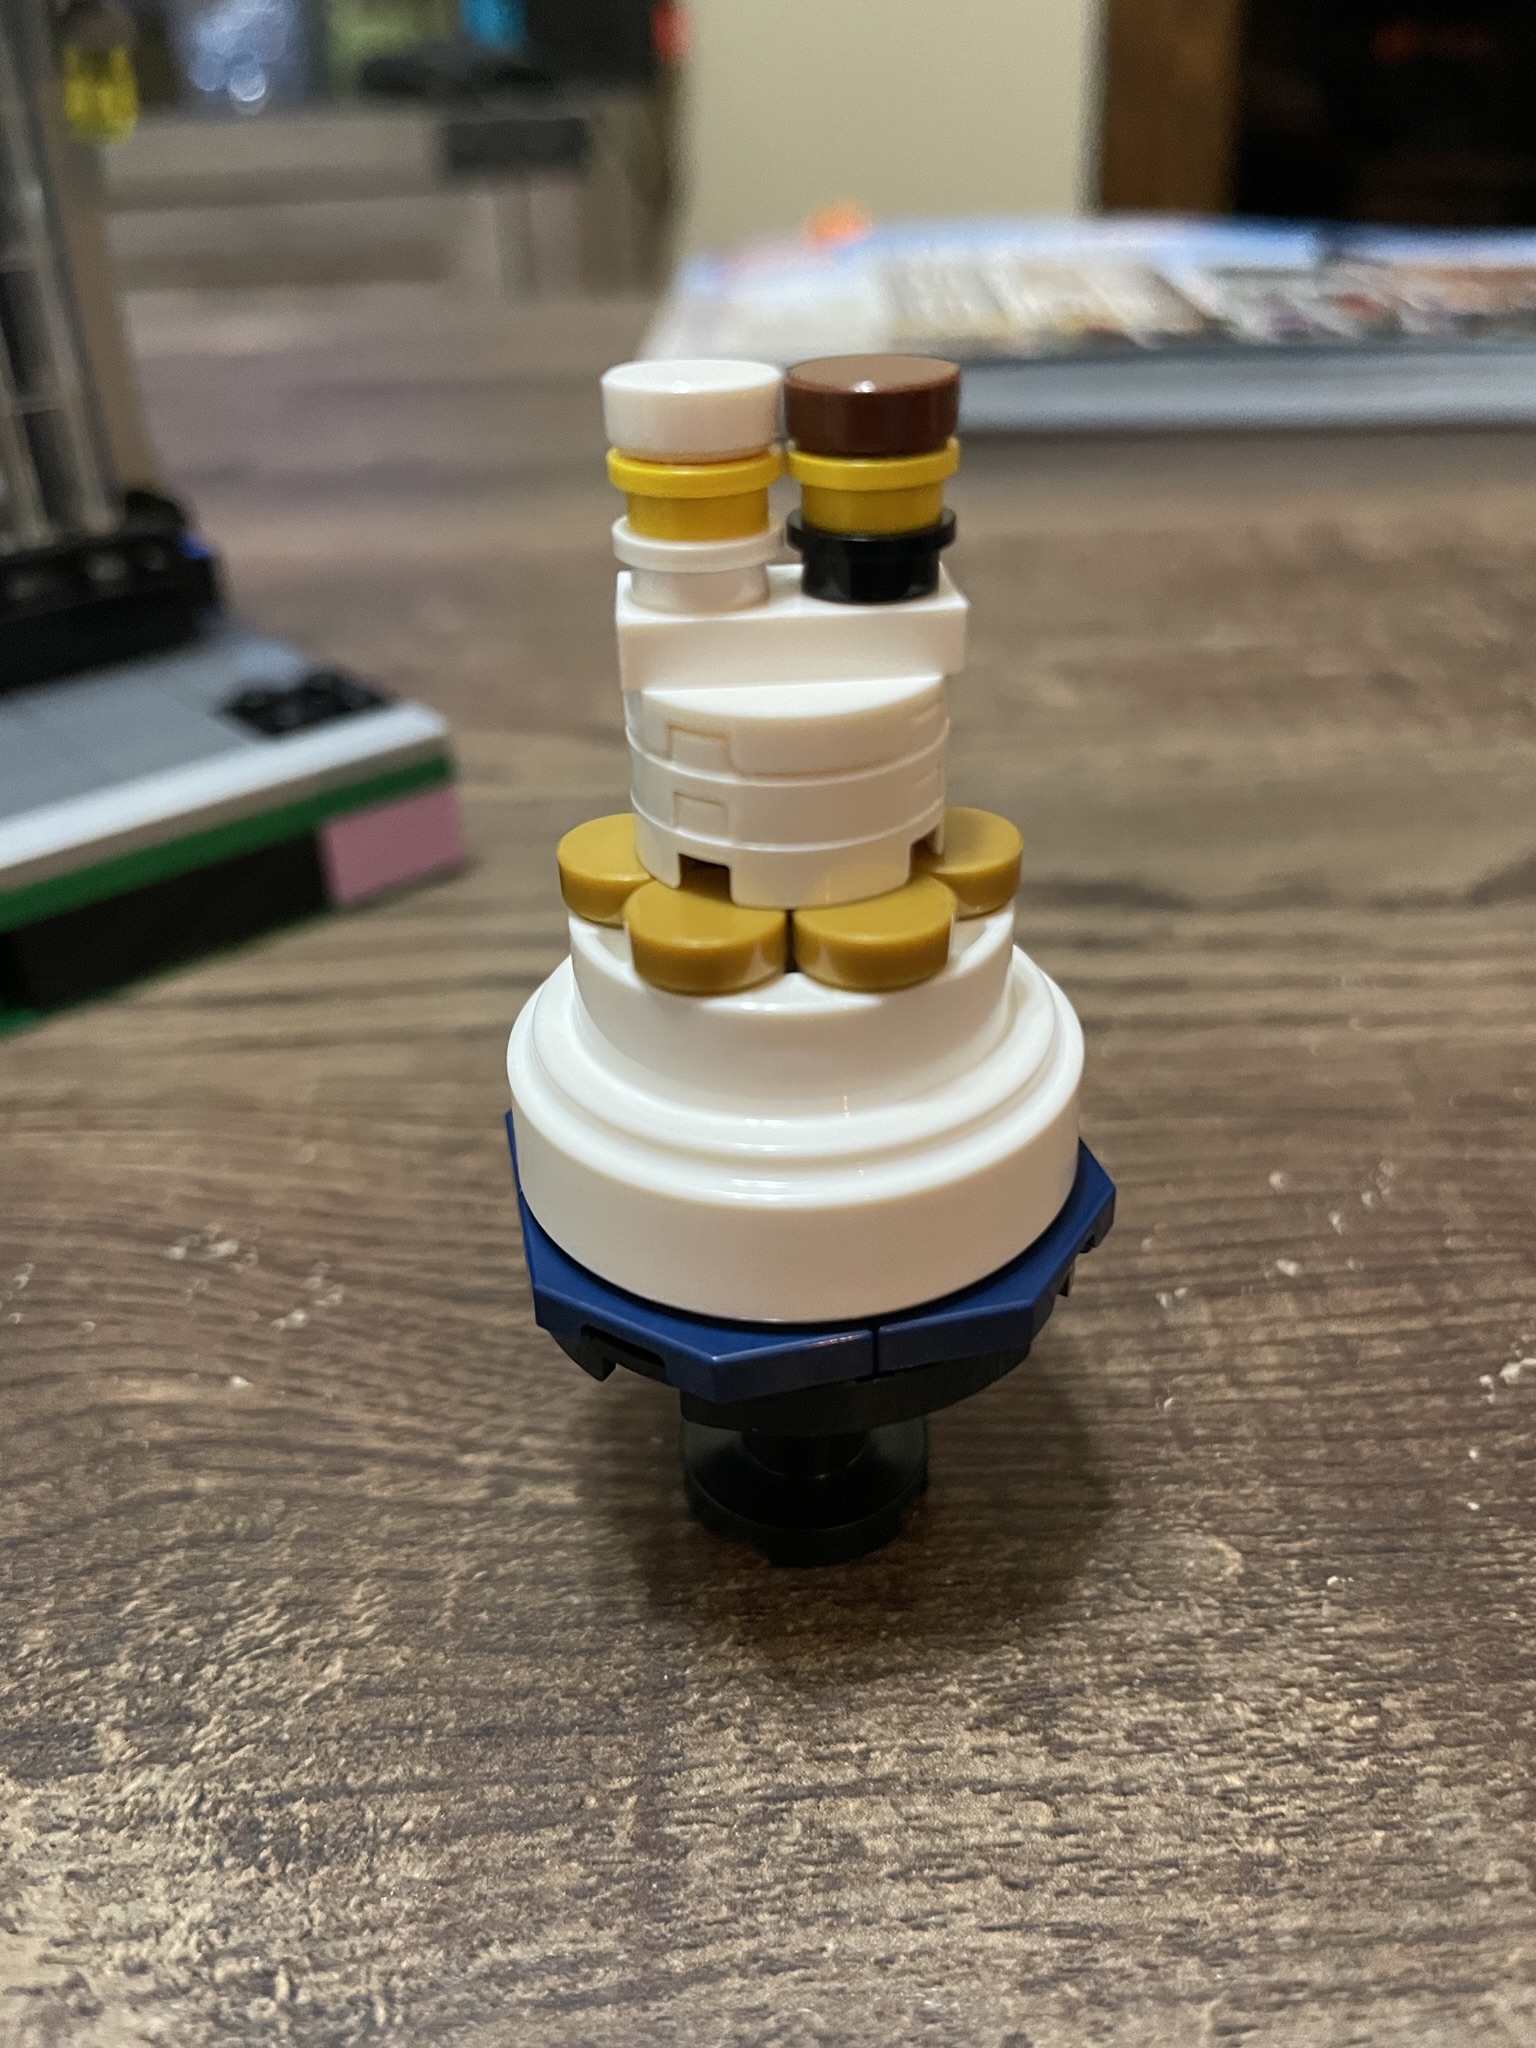
An impressive wedding cake is at the front of the shop, which will take up the entire window display. I was floored by the part usage and the cake’s lifelike appearance — one of my favorite elements in this whole set (see a better picture below). The shop’s exterior is surrounded with black modified bricks to prepare for the walls.
A small staircase will lead upstairs at the side and then on top of the oven. Some methods the minifigures need to take to the other businesses are odd, and a stairway at the back of the cake shop is one of them!
The walls of the flower shop consist of sand green brick, with embedded black-framed windows. The front of the ship uses door frames to create large windows so you can see inside. Plates covered in white grates generate some texture to the front’s facade. Finally, a little flower display sits at the front of the shop.
The walls of the cake shop are a mix of light and dark grey bricks, topped with light grey tiles and jumpers. At the back are two doors connecting the staircase and providing a way to get to the second floor. Shame if you want to get upstairs, but the cake shop is closed.


The entrance to the cake shop has an elaborate design with large curved pieces connected to plates. The windows are garage door elements turned on their sides. I love the ingenuity of this, even if it is hard to look through. The top of the shop windows is designed from dark blue curved slopes and cheese wedges to create a textured asymmetrical design. The very top uses modified 1×1 plates with clips to generate decoration.
The top of the flower shop uses bright pink and purple curved slopes to generate canopies. Transparent green bricks sit above the door for a splash of color.
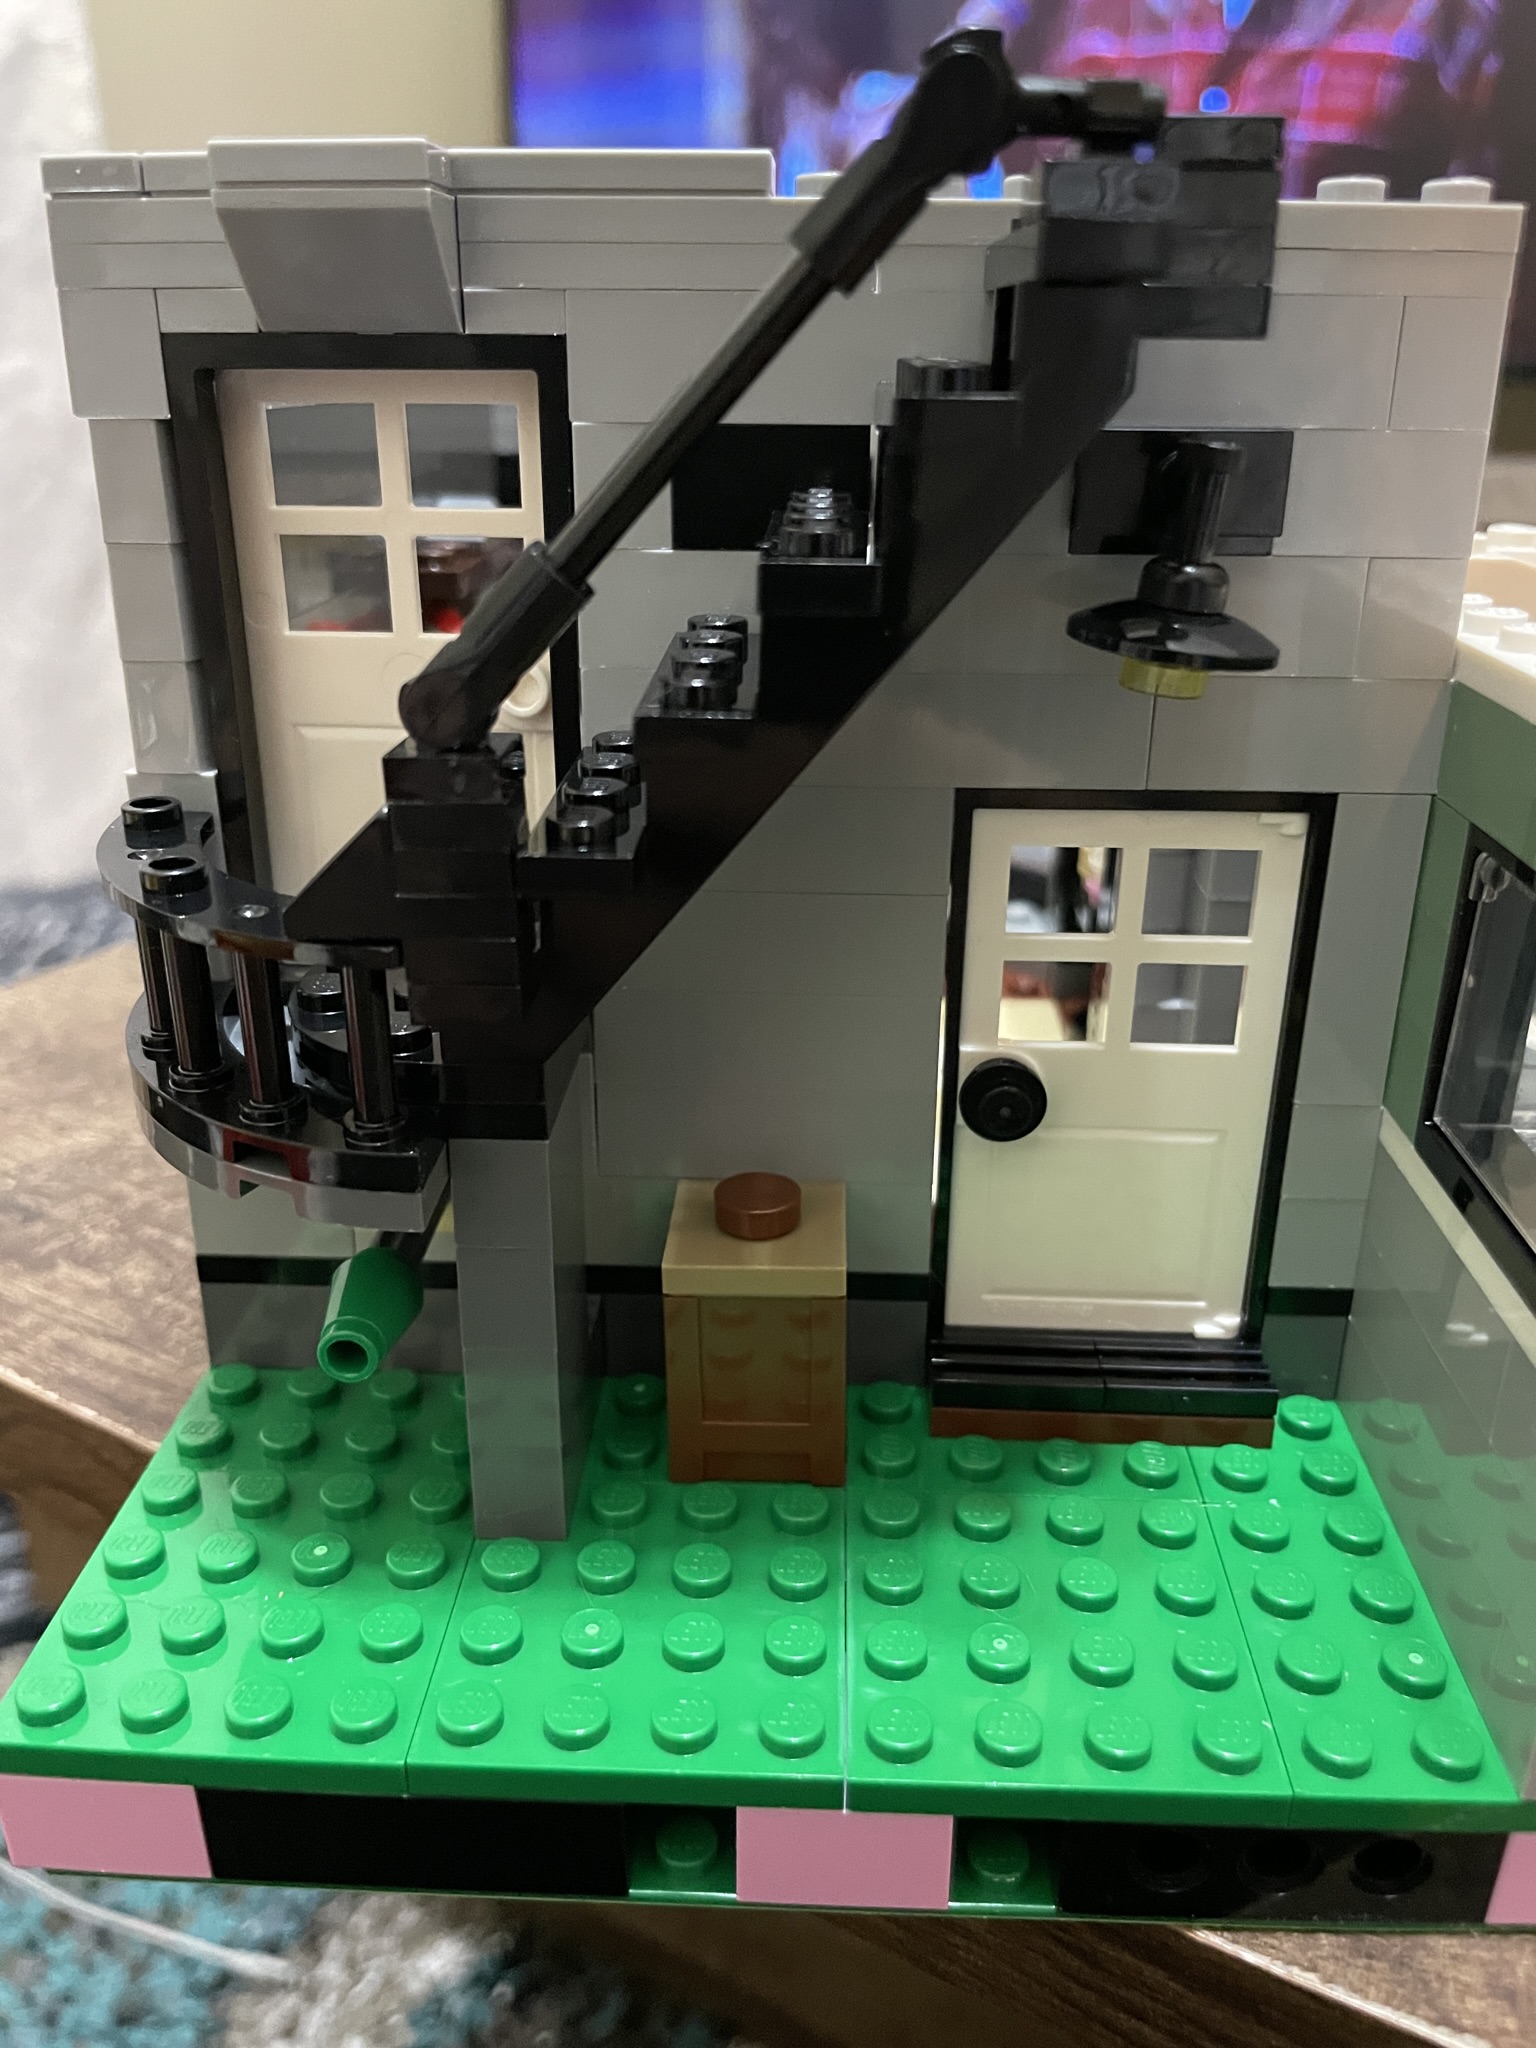
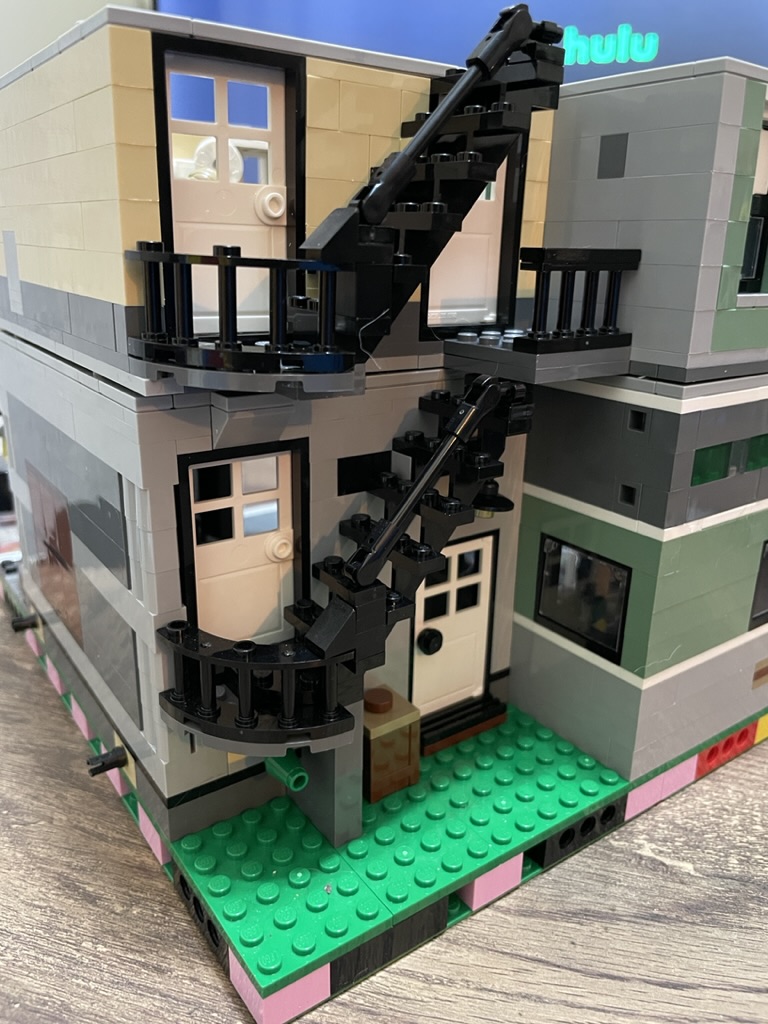
Behind the cake shop, the staircase upstairs is accessible. Alas, it looks more like a fire escape, and I wish the staircase was designed better so you didn’t go through one business to get to another. The back is a bit bare and depressing looking, and I’ll have to figure out how to make this area accessible within the greater scheme of my city.

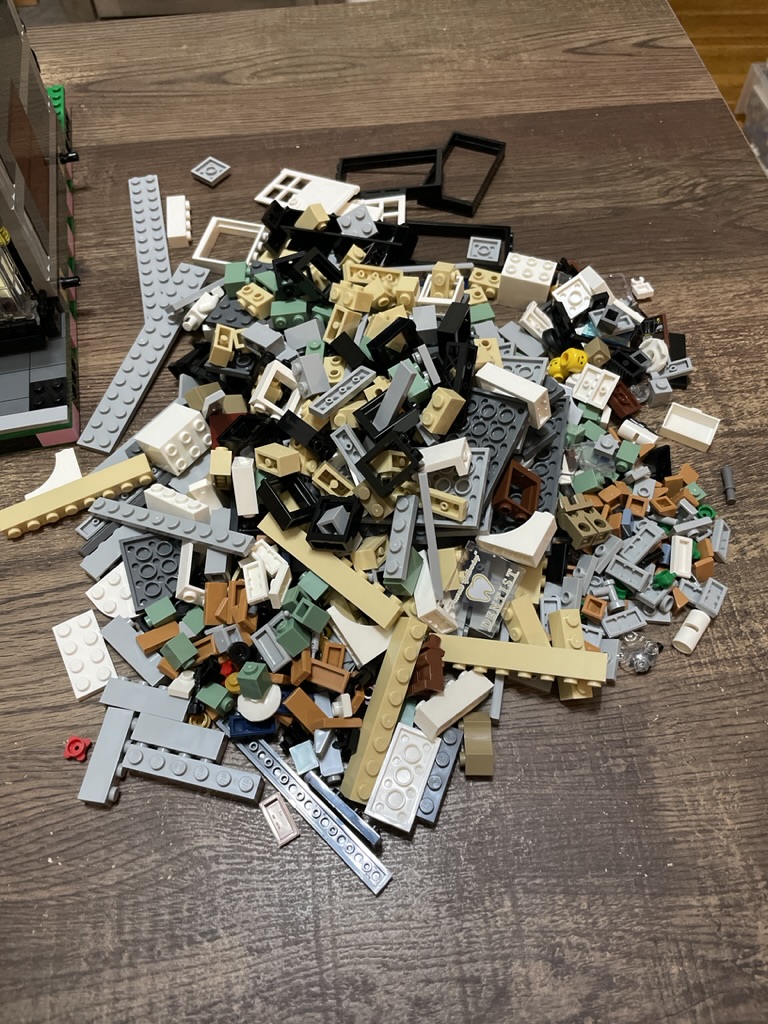
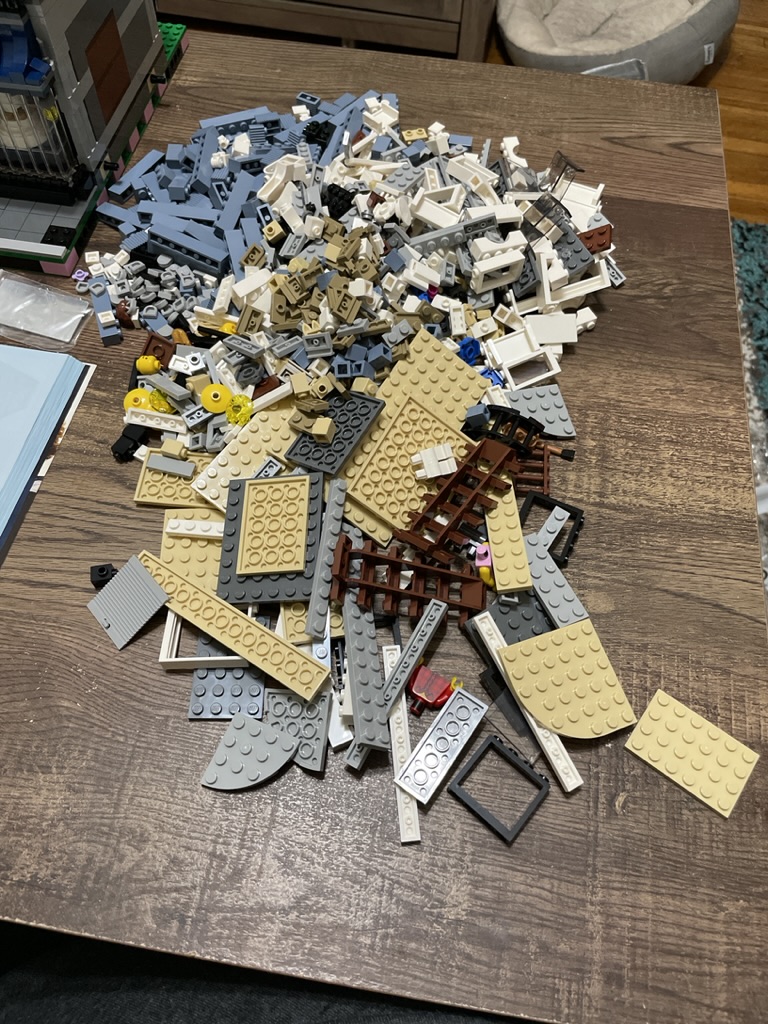
After putting all the parts for stage three in a pile, I knew I was in for another monster section. I prefer fewer pieces per stage as my workspace is small (coffee table), especially when assembling a more extensive set.
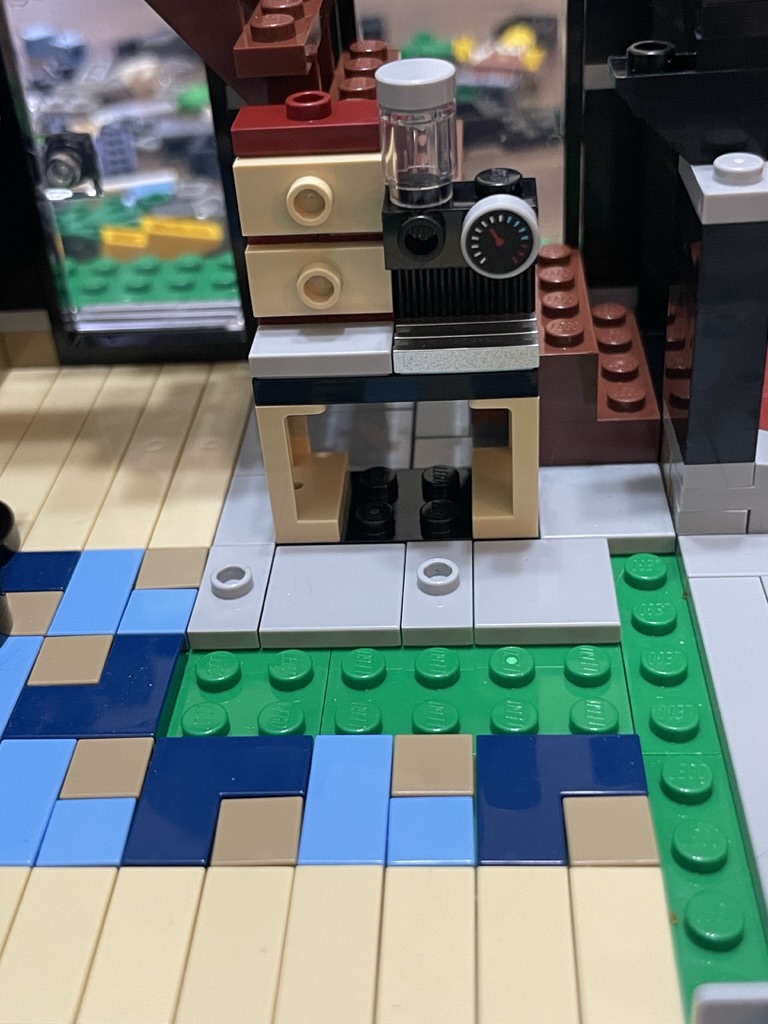
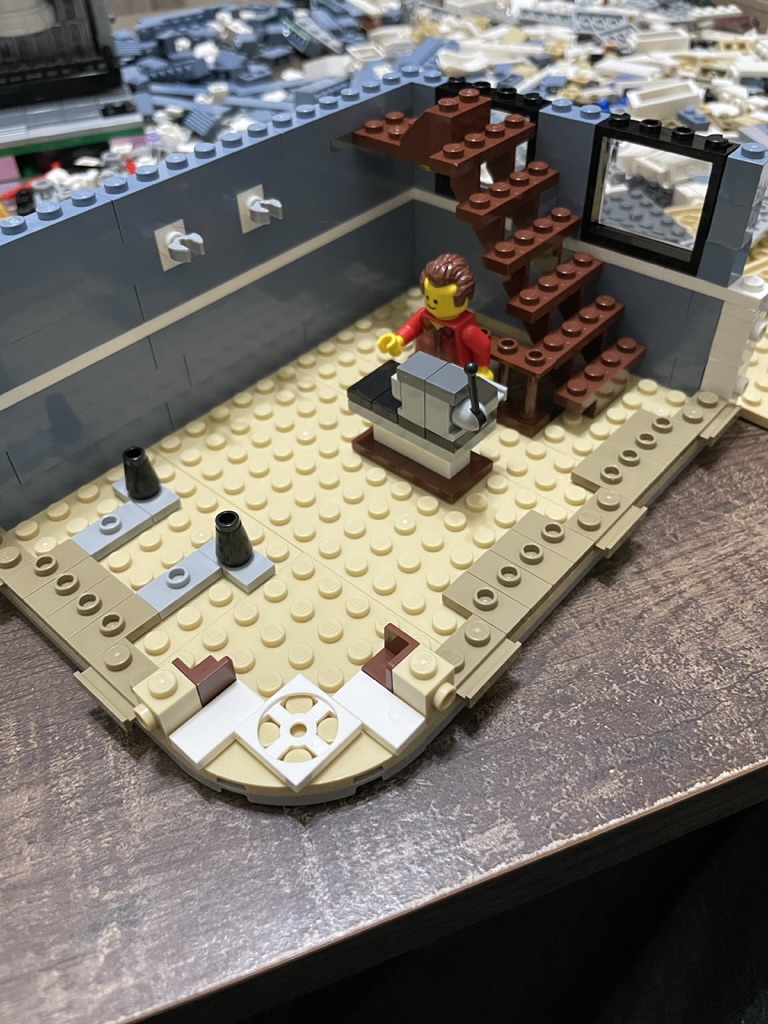
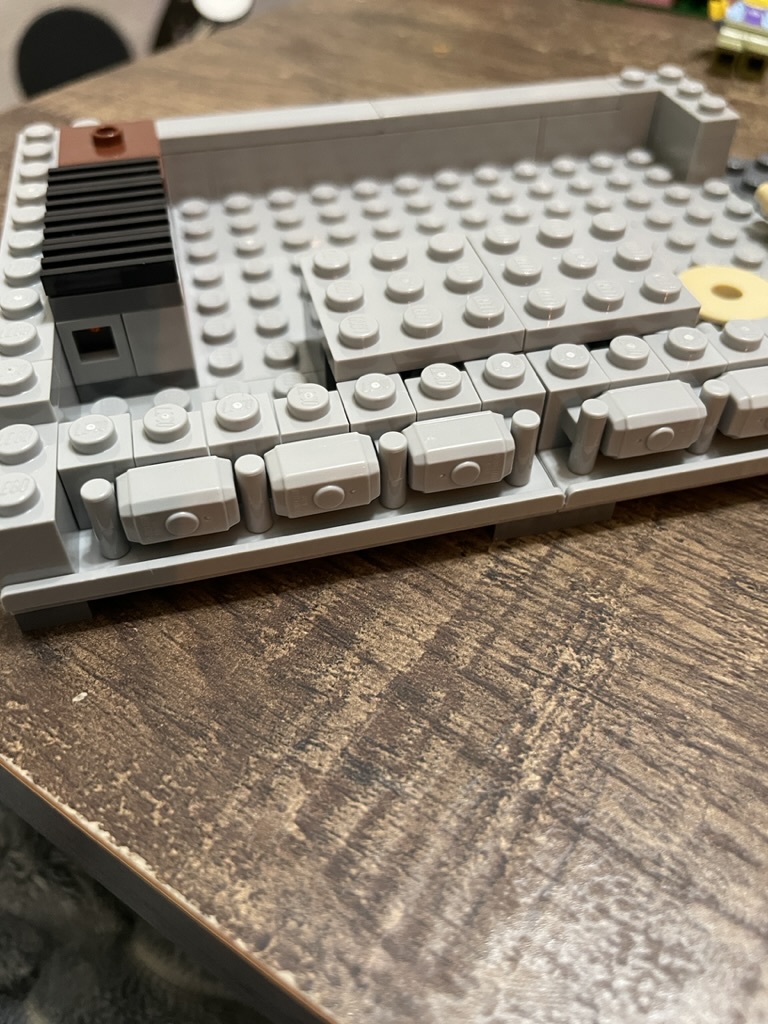
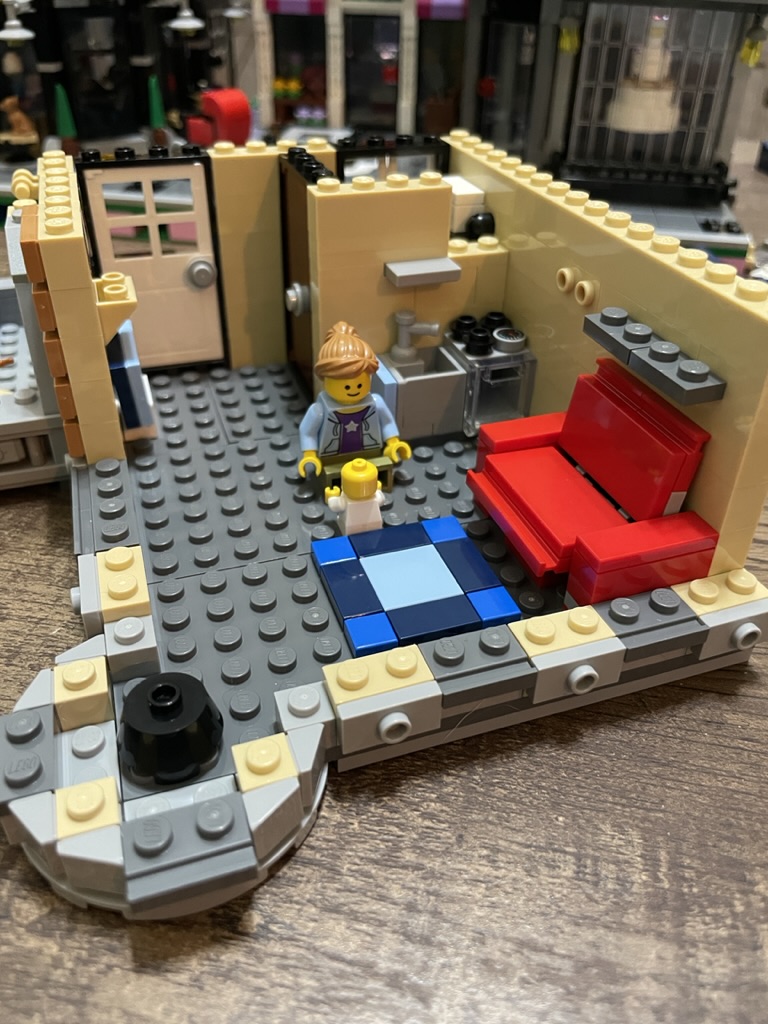
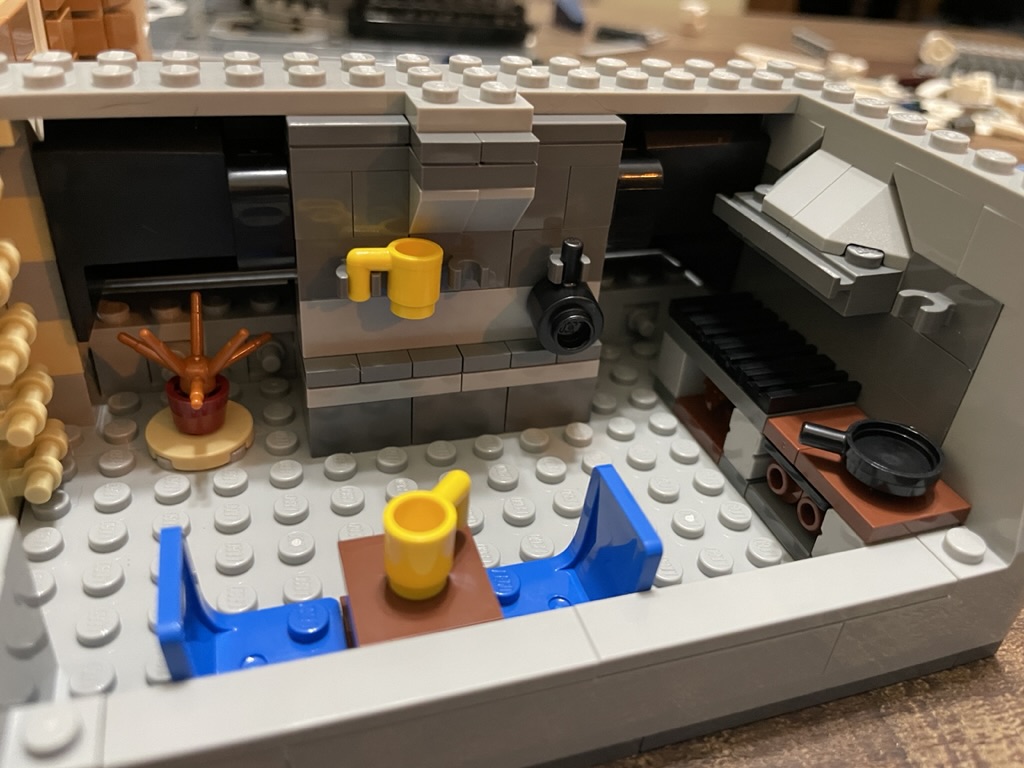
The ground floor cafe is next up for construction. Reddish brown bricks with a light grey plate layer for detail create the outer wall. The rear wall is made from black bricks and light grey plates. Sand green slopes and modified 2×2 plates are used to make a couch.
Underneath two wall lights, a personal table and chair are built. The espresso machine sits on a counter and is an ingenious design. What I love about Lego is that a few seemingly random pieces can come together to create something magical. The espresso machine is an ideal example of this.
In front of the espresso machine, a simple counter is constructed with 1×1 brick, topped with a series of 1×2 light grey tiles. On top are coffee cups, a piece of pie, and a till. We also meet the next minifigure, a cafe worker.

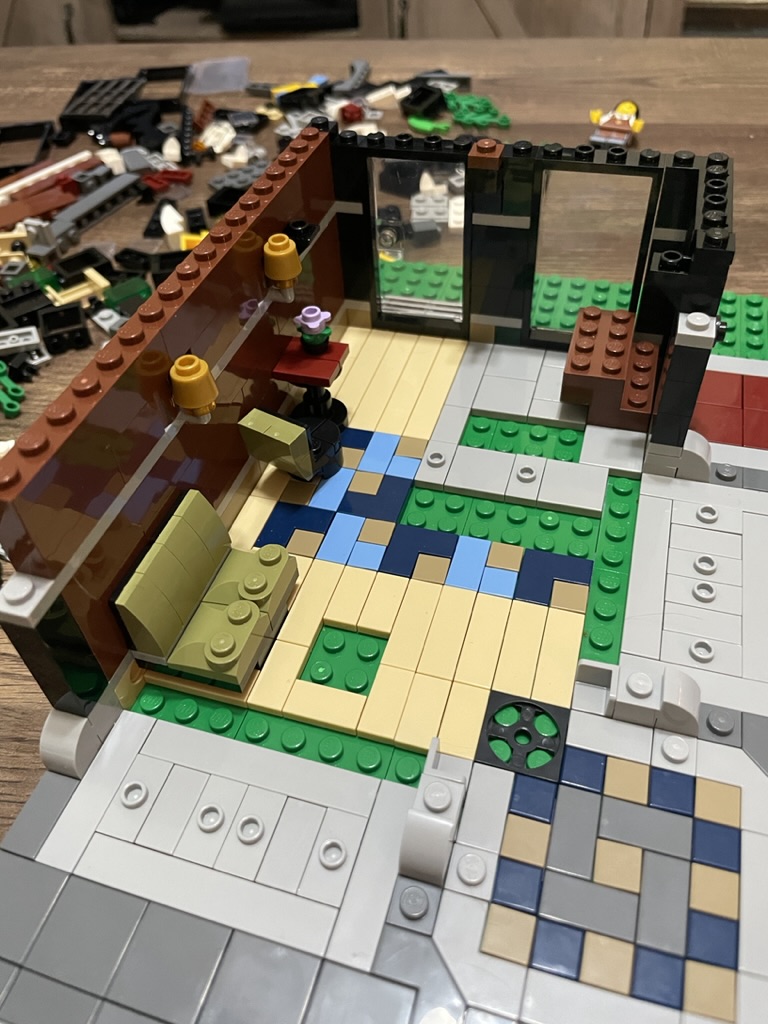
The cafe’s exterior is large black window panels with smaller panes on top. Black arches cover the smaller windows to create a dynamic design. In front of the facade windows, a table with two stools is placed, which will be a fantastic spot to put some minifigures to bring the exterior to life. A couple of plants flanking the front door add a beautiful decoration.
The next area to get some attention is the flower shop’s top. Curved window panels sit above the canopies, which looks fantastic. A row of 1×1 modified plates with clips is located above the panels. Two modified 1×1 bricks with holes are incorporated into the front that will later be used to hold the flower shop sign.

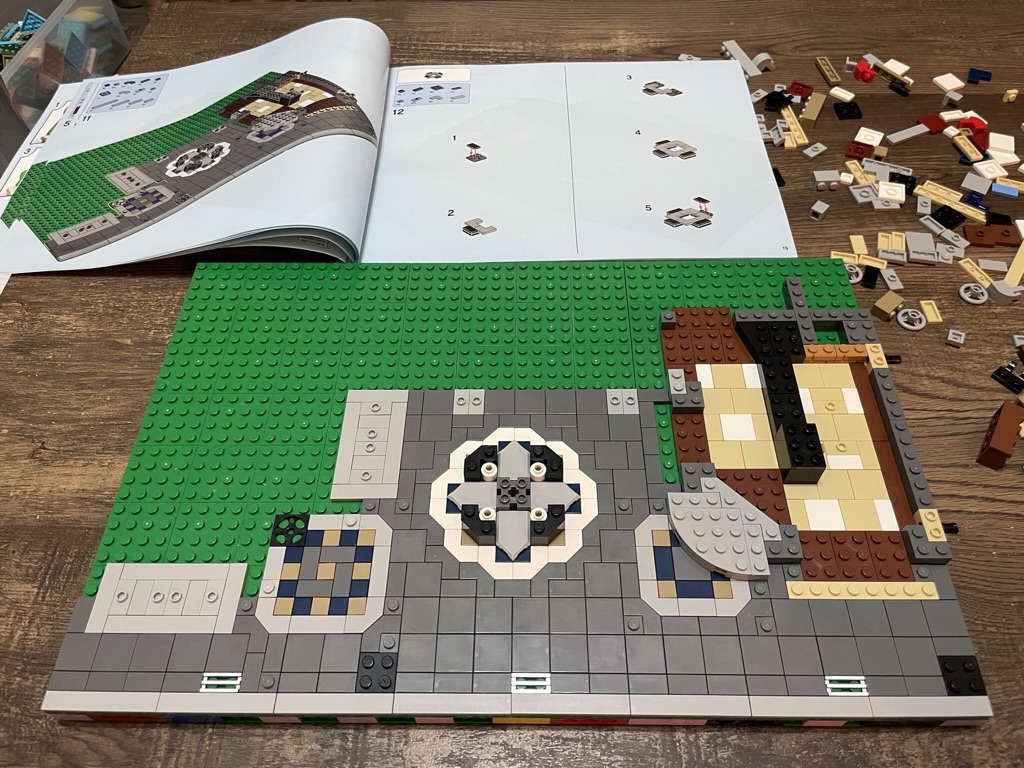
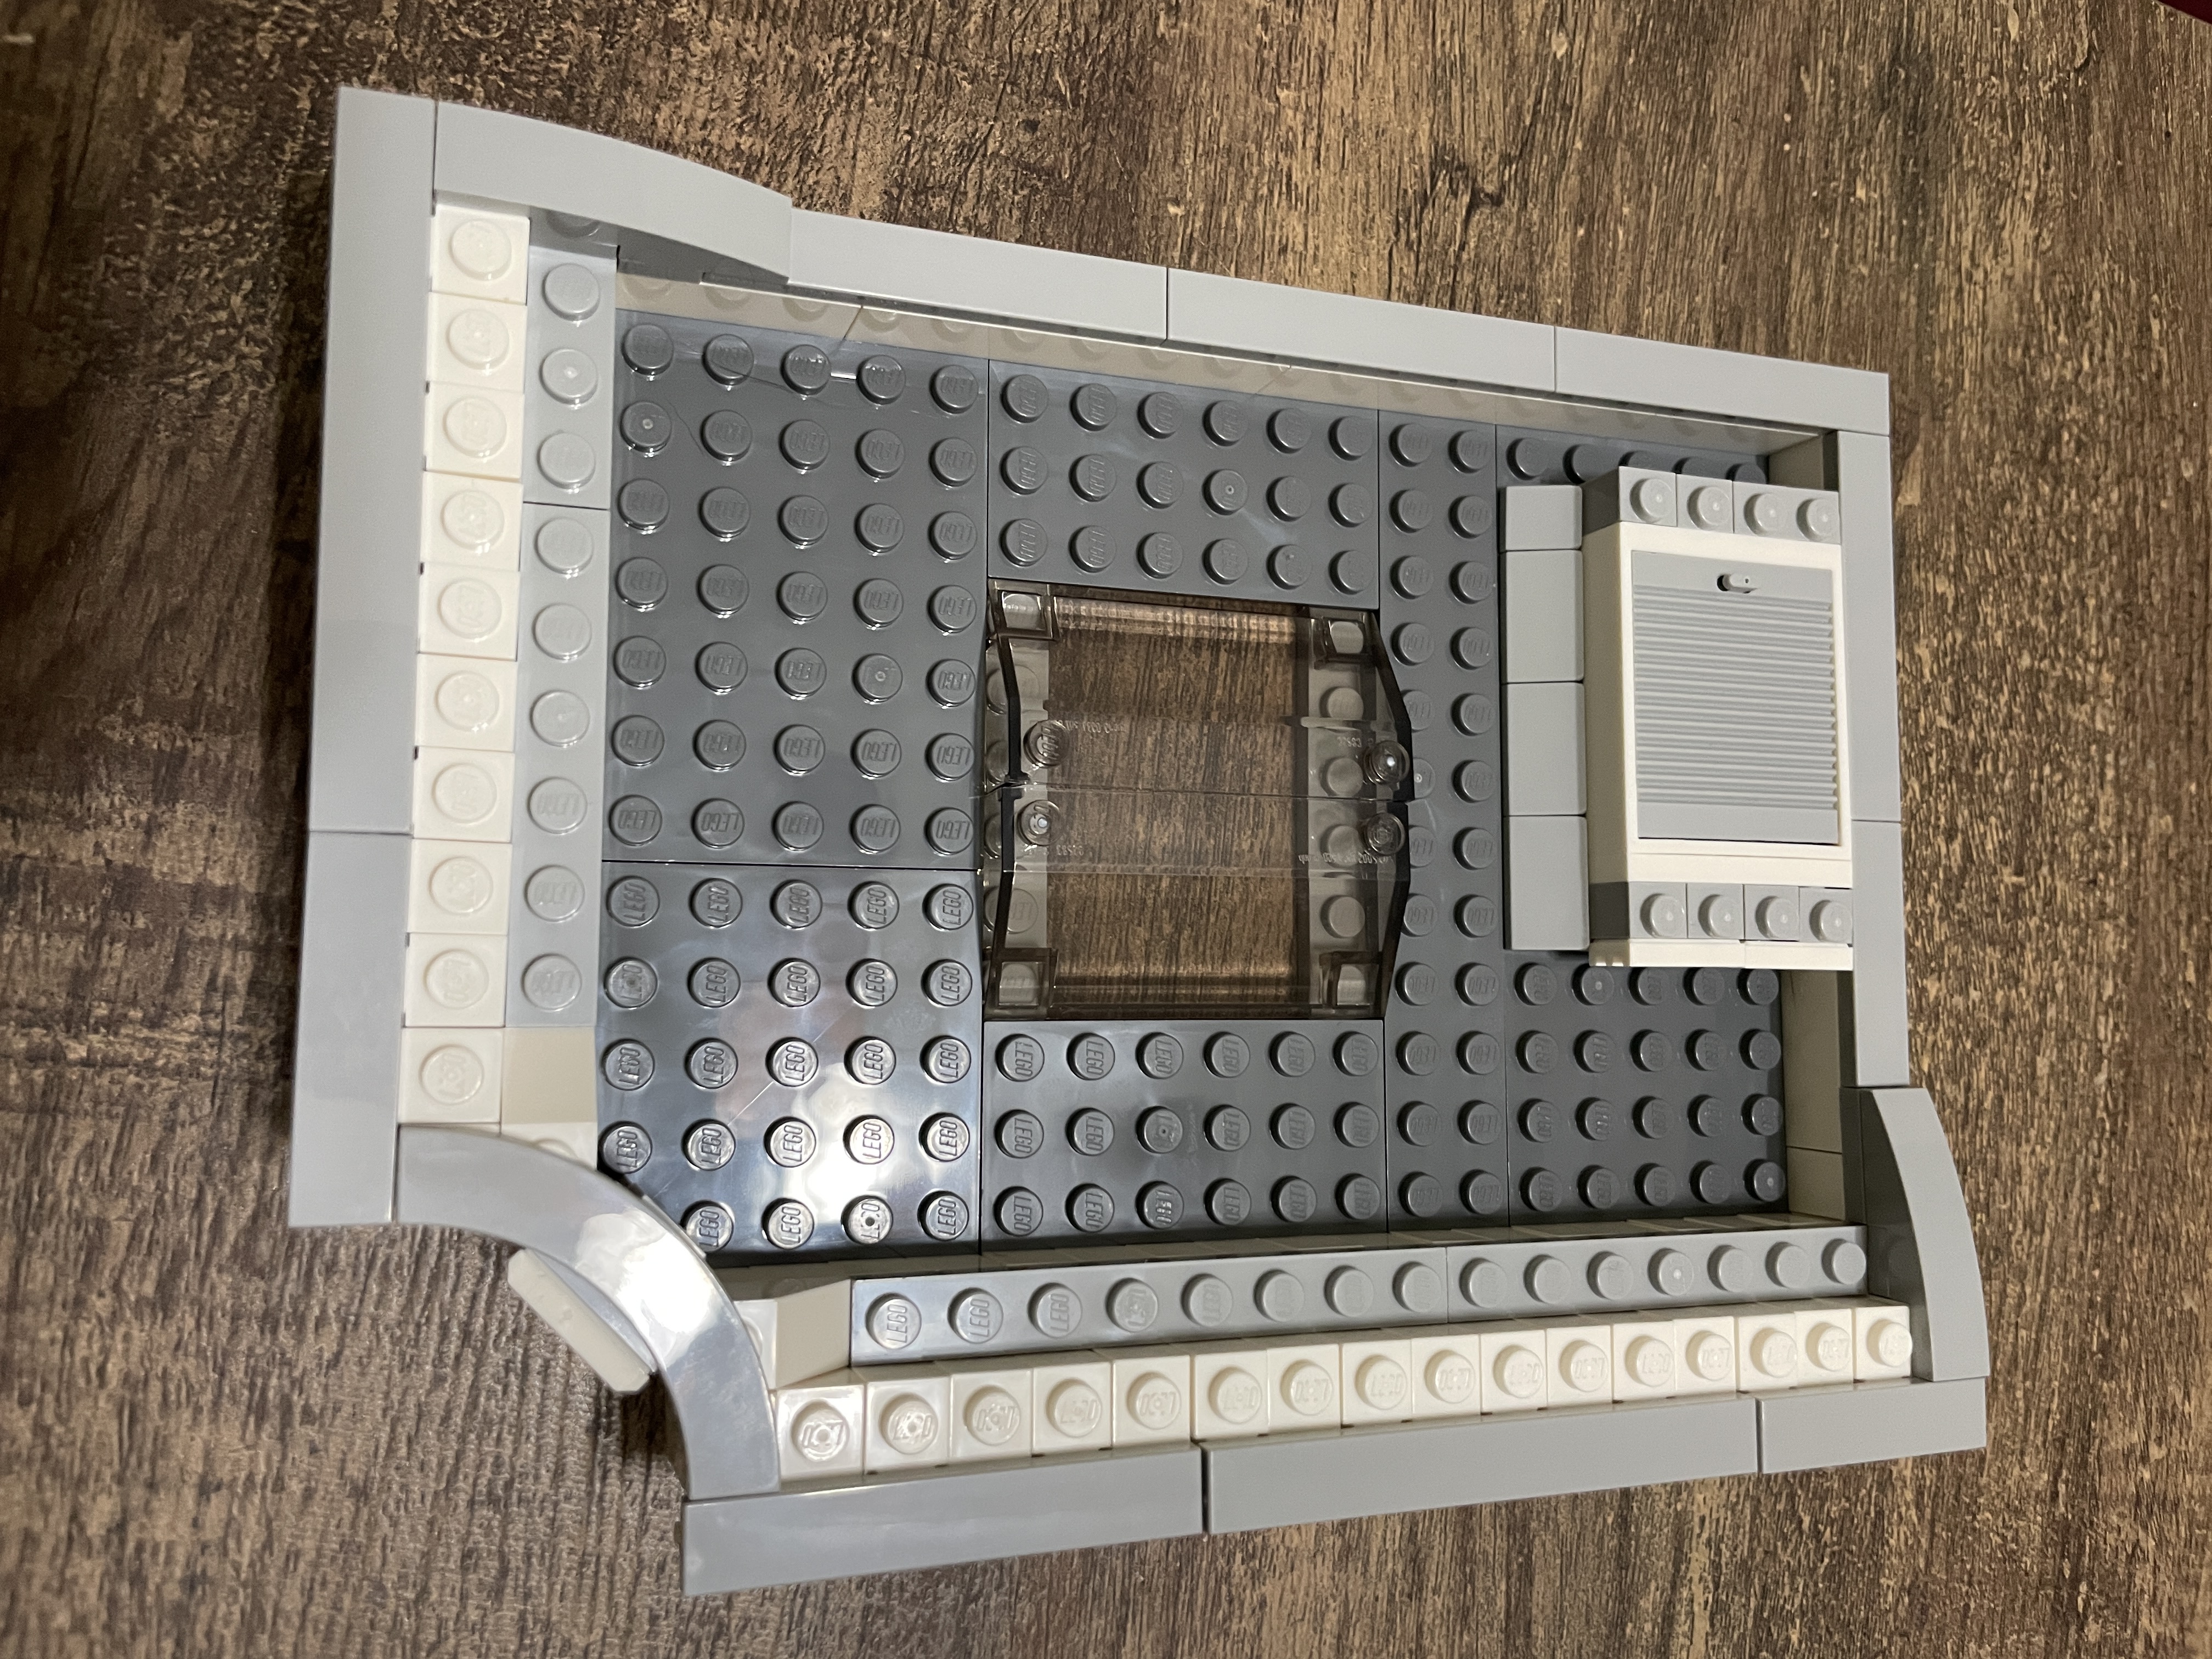
The entire ground floor is completed by the end of stage three, which is halfway through the build. At the rear of the coffee shop is a staircase that can be accessed from the back of the complex. All the walls are tiled off with light grey tile, with a few jumpers in place for a loose connection. Such a design allows for structural integrity while also making it easy to remove each of the floors.
The cafe’s canopies over the exterior seating areas are made from a series of slopes and single teeth elements. The composition looks stunning and is a technique I will use in the future. The cafe design is a clever use of yellow clip connectors orientated around a hexagonal technic element. The red mug and the white quiff complete the logo.
The flower shop also gets a gorgeous mini-build for its sign. With only four pieces, a large rose is created. Using clips placed into 1×1 bricks with holes, the two flowers are adjustable to achieve the desired angle. A couple of leaf elements also attach to the clips to complete the design.
At the rear of the cafe, there is an entranceway to the flower shop, cafe, and a walkway to the main square, which also has a doorway to the stairs. The walkway is covered with a jail cell door element and a couple of tree limbs. Three tree limbs climb the rear wall; otherwise, this area is left bland.


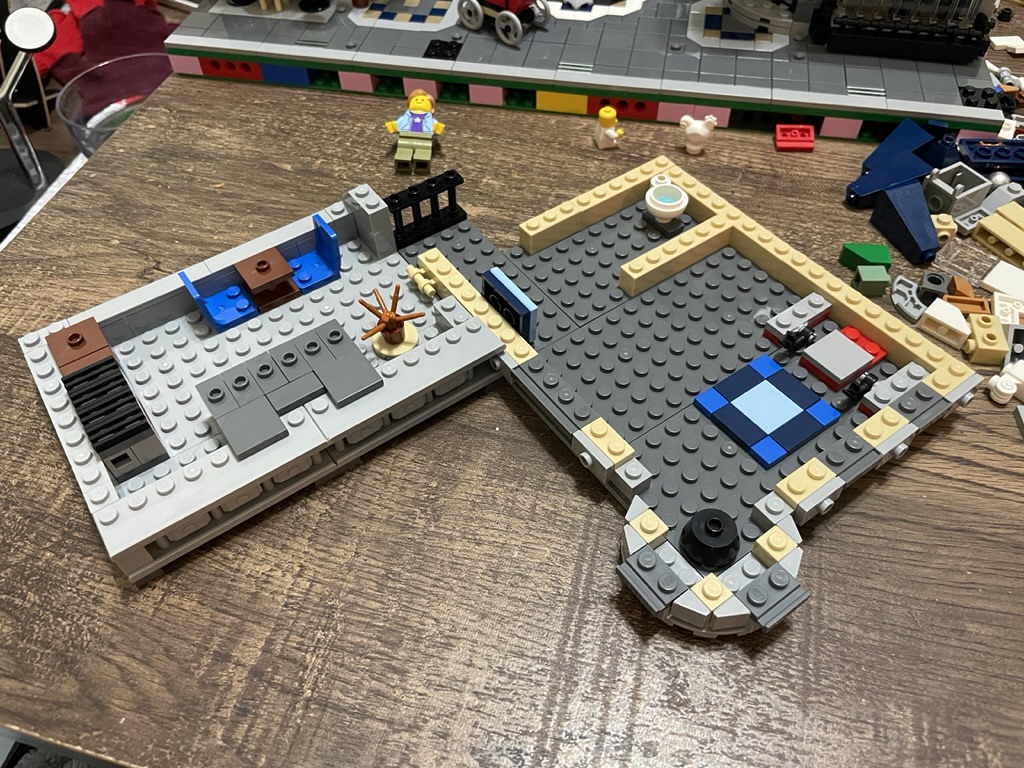
Stage four marks the beginning of the construction of the second story of the square. A mixture of light and dark grey plates is combined to make the floor for the areas above the cake and flower shops.
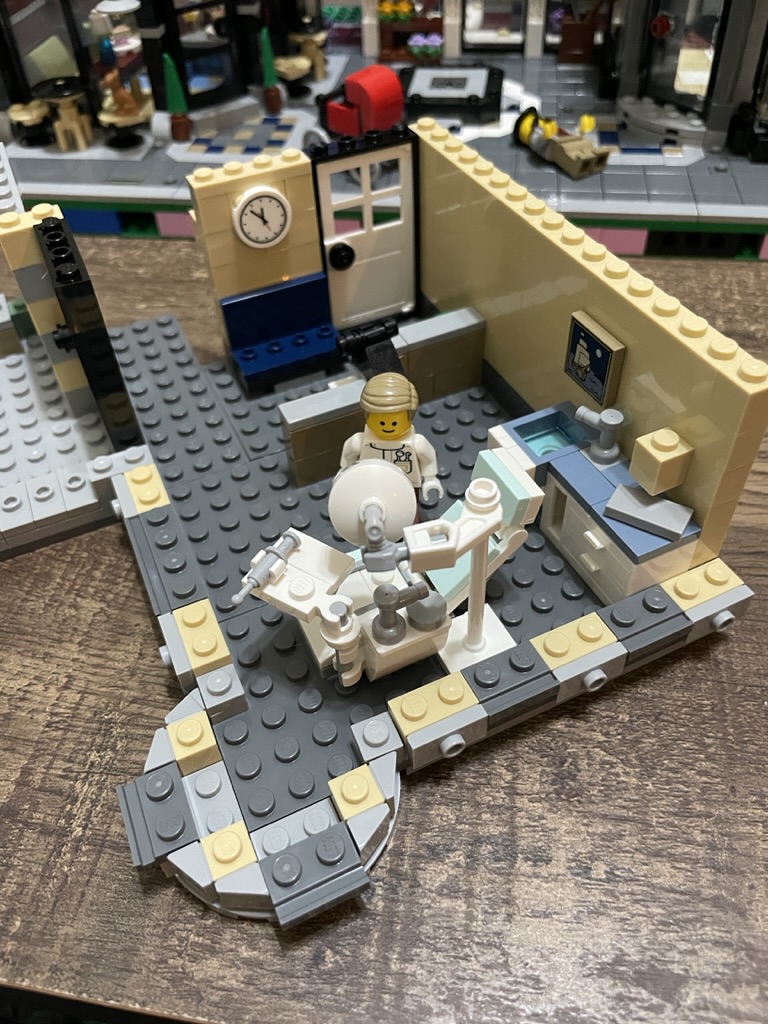
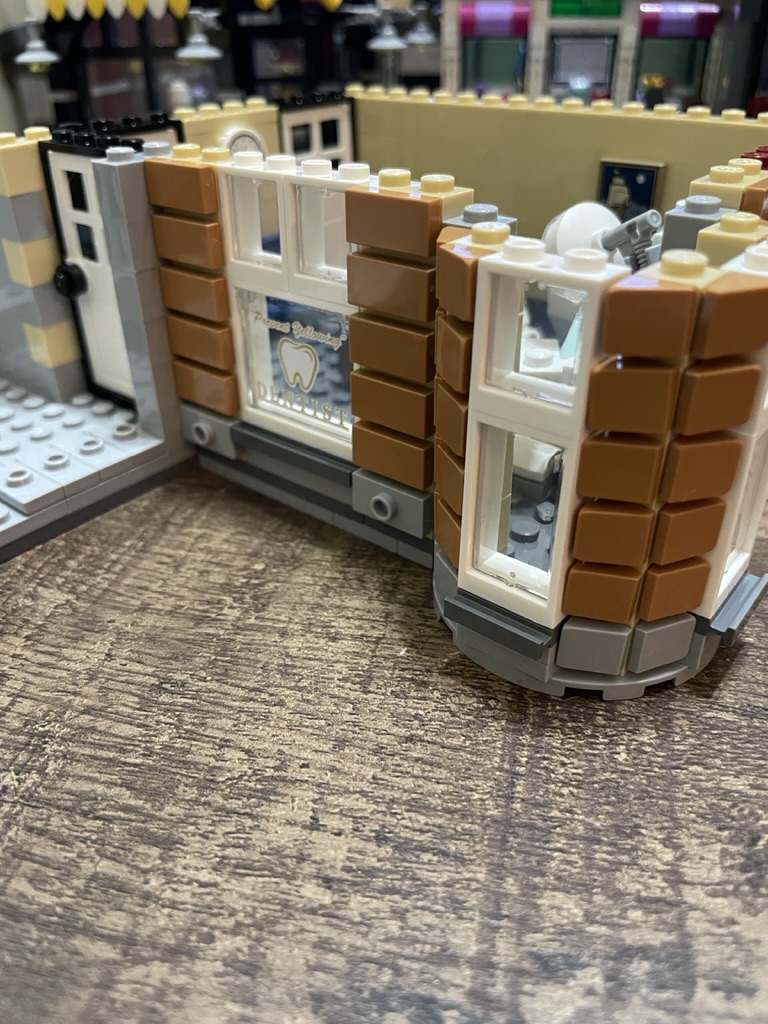
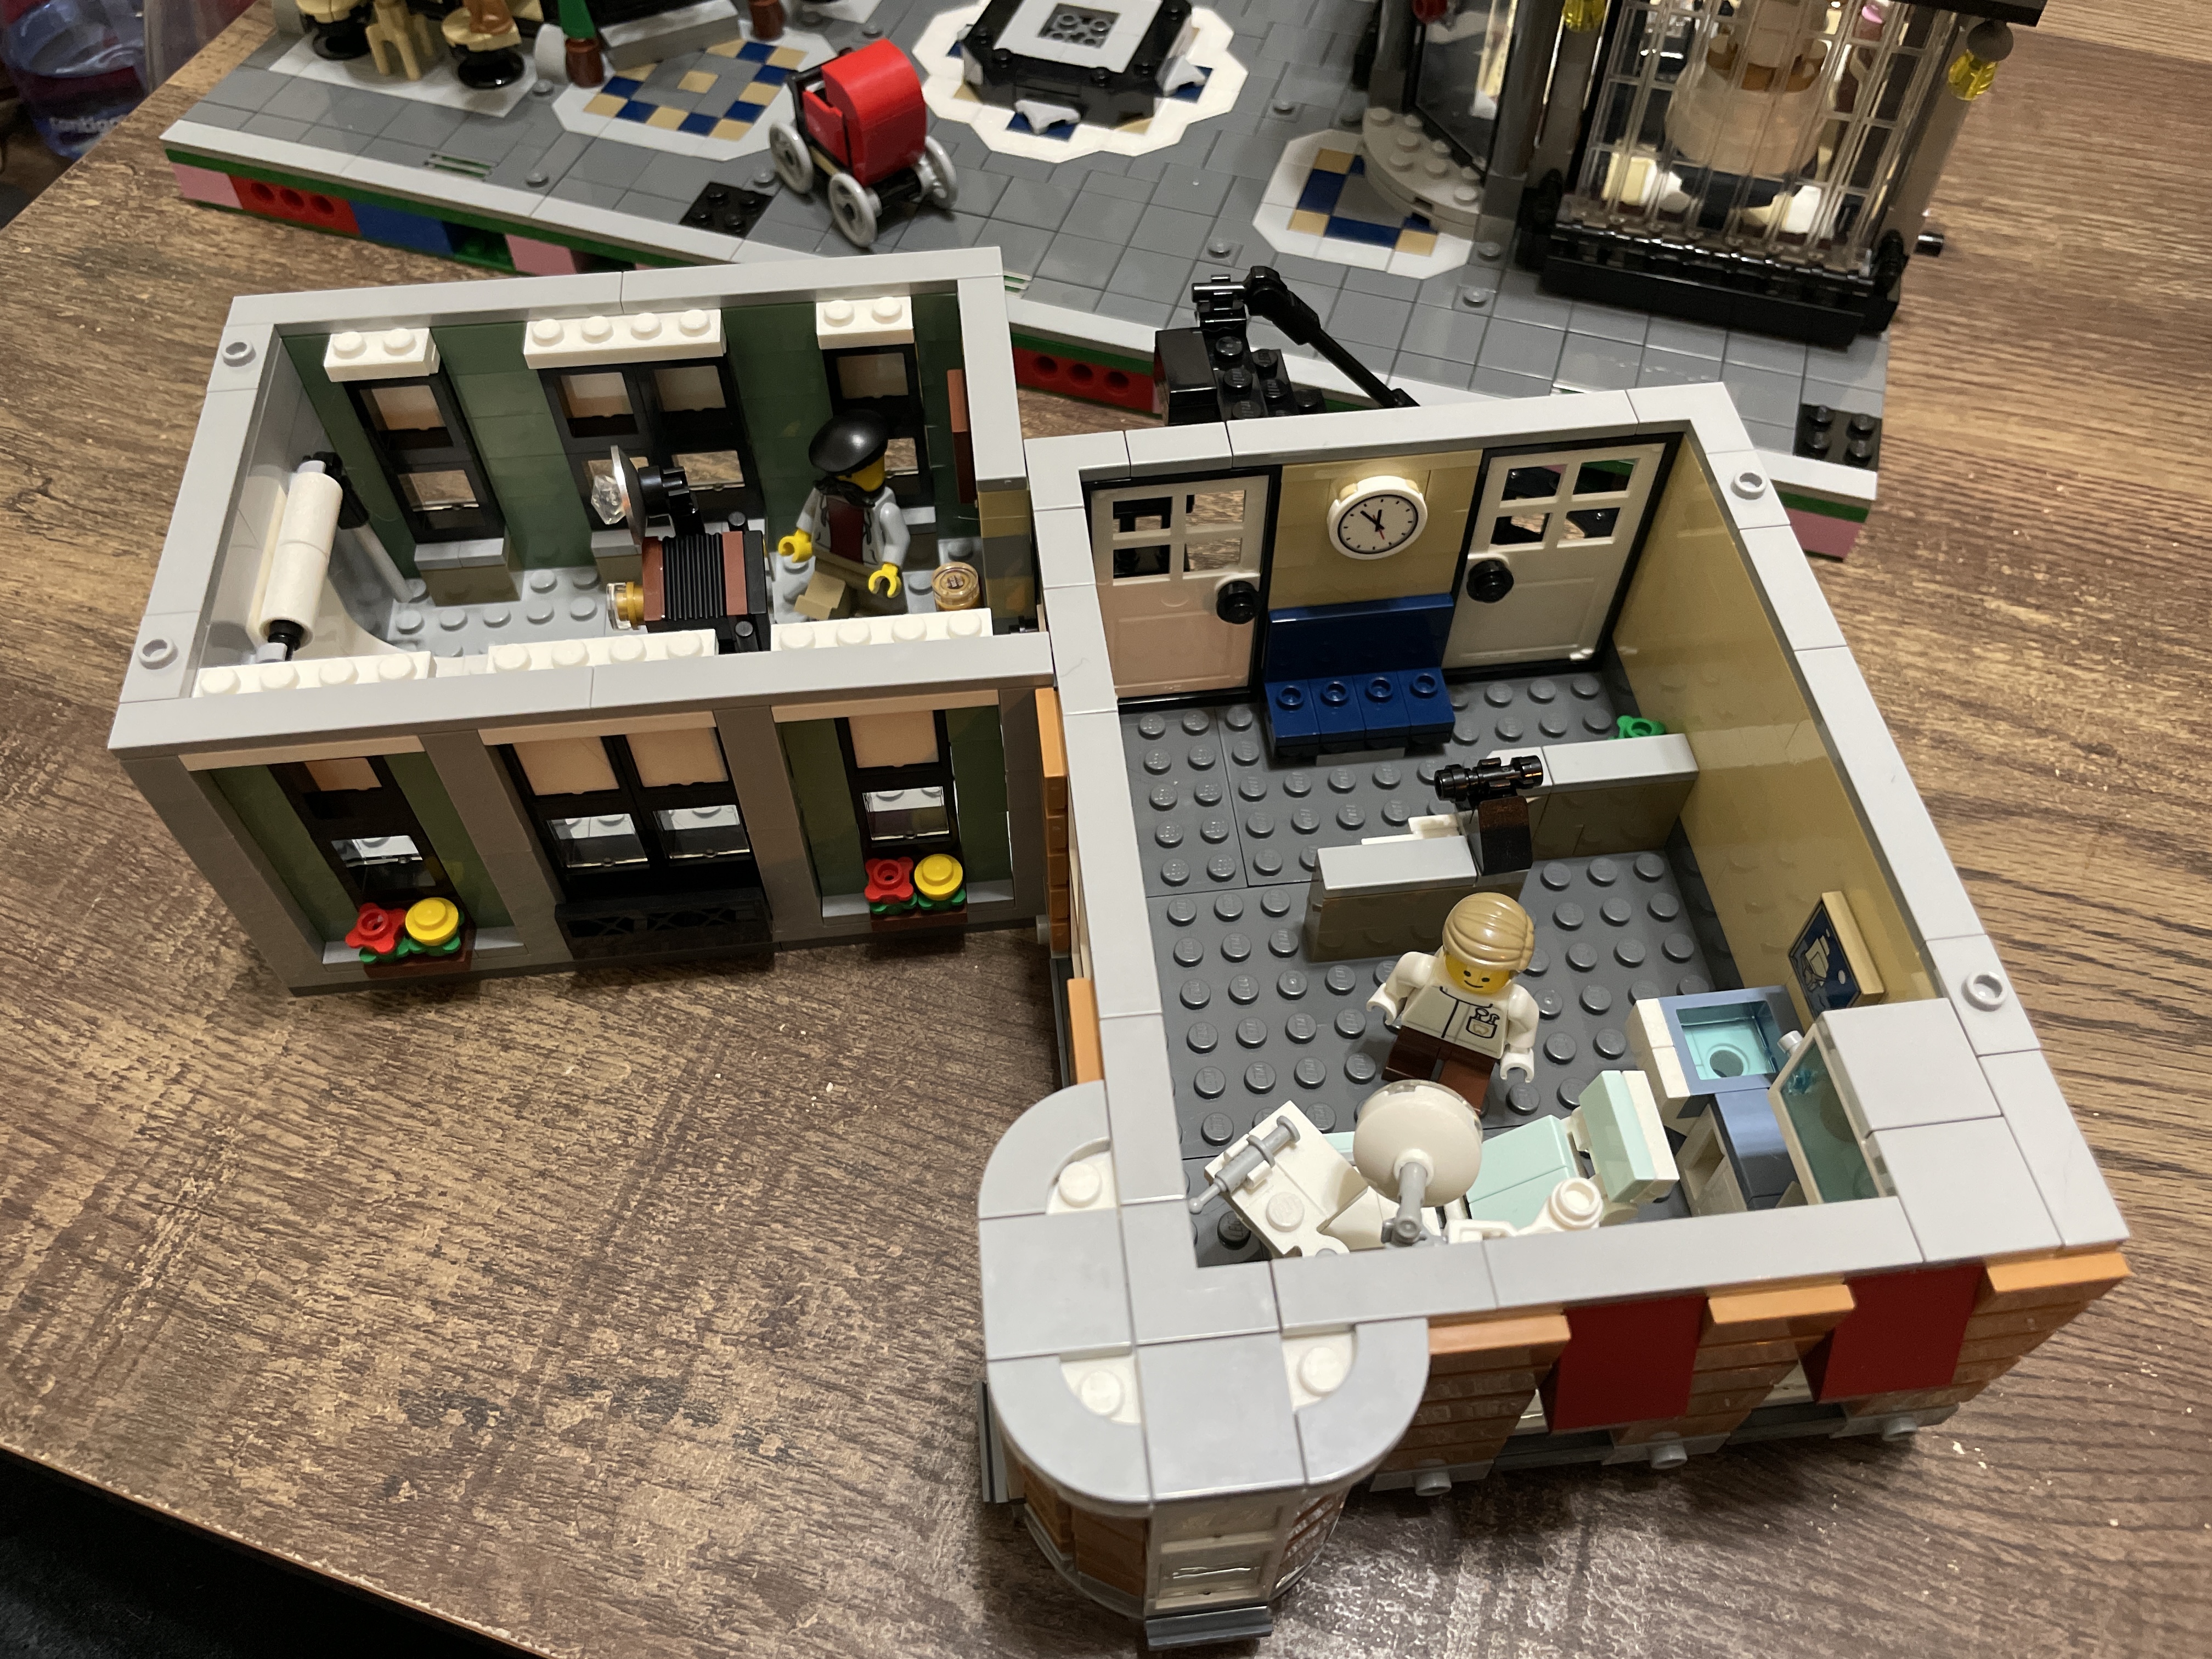
The area above the cake shop – which will become a dentist’s office, is outlined with light tan and dark grey bricks.
In the corner, a lab bench with a sink is placed. The sink is a sand blue window panel with a transparent blue window. Amazing part usage. The dentist’s chair is a fun mini-build with a lamp, sink, and a tray of dentist tools. Alas, the dentist minifigure is generic.
A reception area starts to form, with a couple of print pieces such as a leaflet and a newspaper. There is also a clock and a small couch for the waiting area.
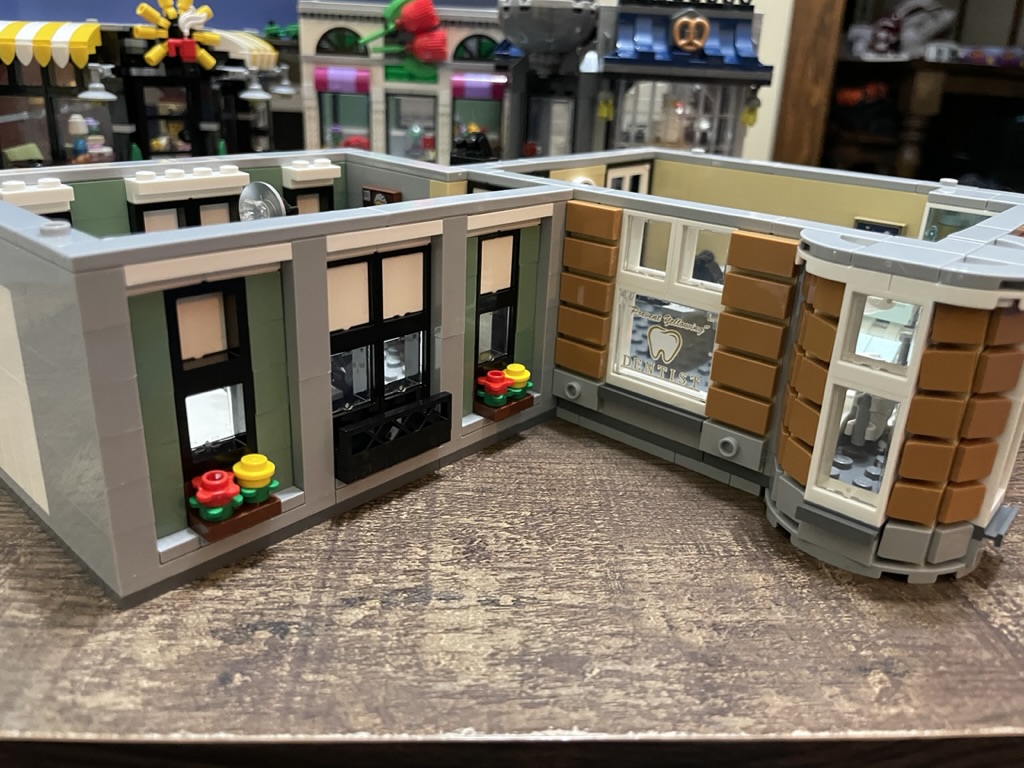
Once the interior is complete, the walls go up quickly. I appreciate the printed window as the dentist’s sign. Studs not on top (SNOT) bricks are used to construct the wall, with nougat 1×2 tiles placed on top to create the brickwork effect. Cheese wedge elements are used in the cove to create a smooth curve.


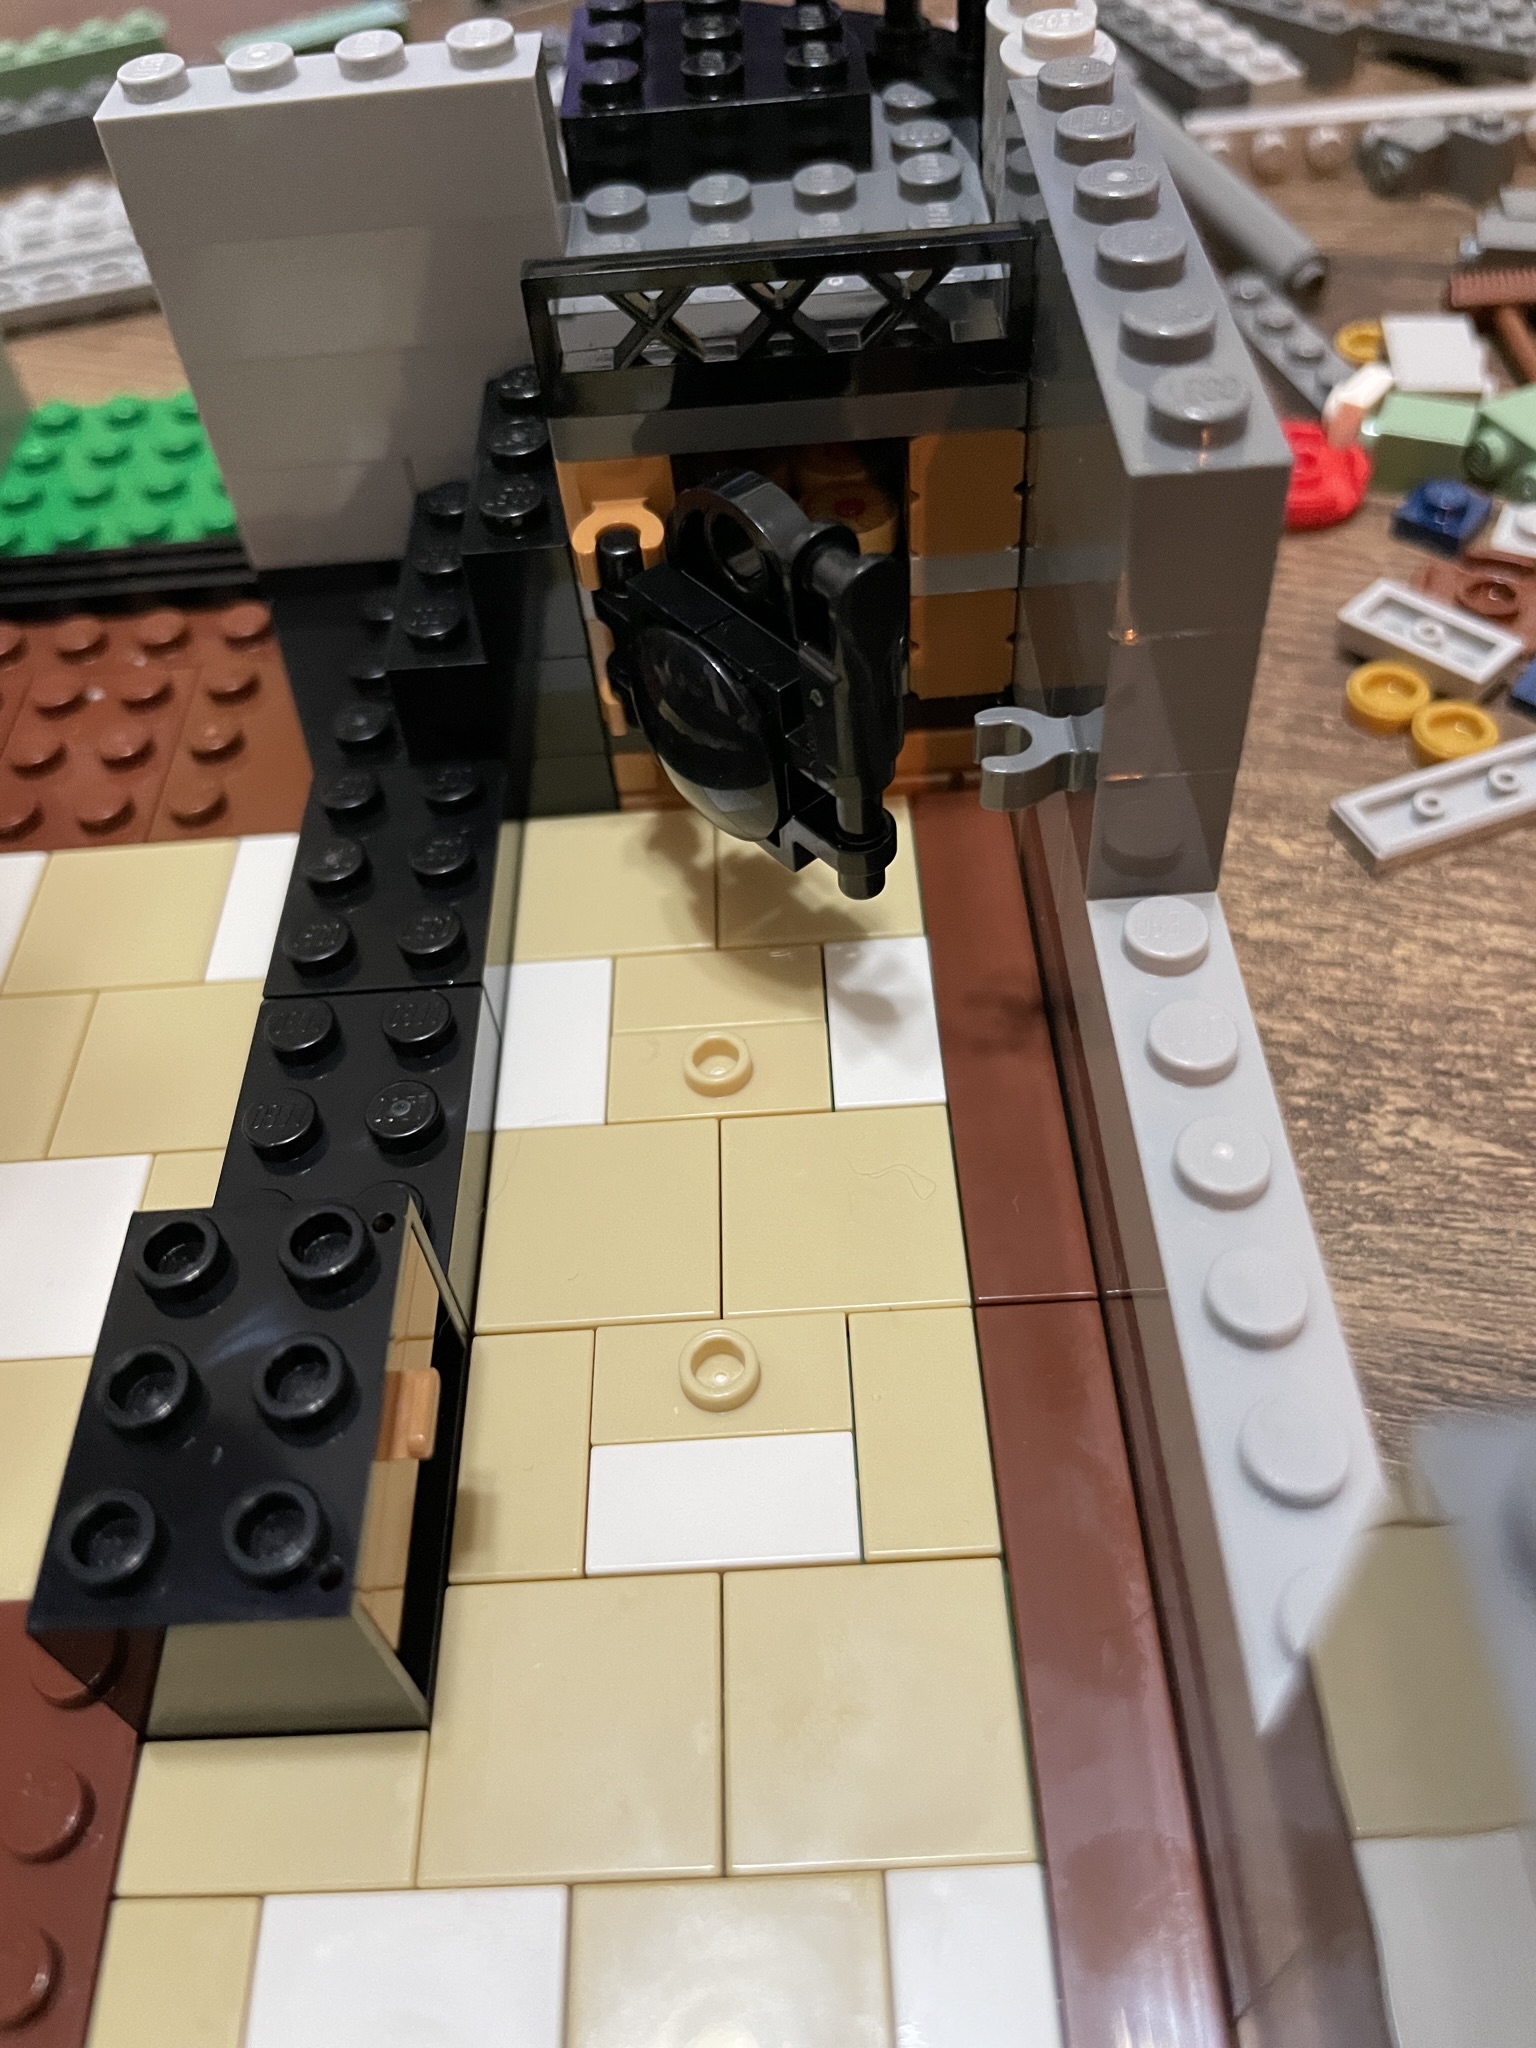
Above the flower shop lies a photography studio. The interior is narrow; the white background screen and the marvelous camera mini-build fill the room. While most of the minifigures are lackluster in this set (Lego had yet to find its minifigure groove), I love the photographer minifigure. His hat and mustache combo is perfectly stereotypical in the most delightful way.
The photography studio’s walls are light grey with a sand green inset to outline black window frames with white accents. Flower boxes sit on the window sills as decoration. The windows are half transparent and half white at the top to look like blinds. It’s a highly effective design.
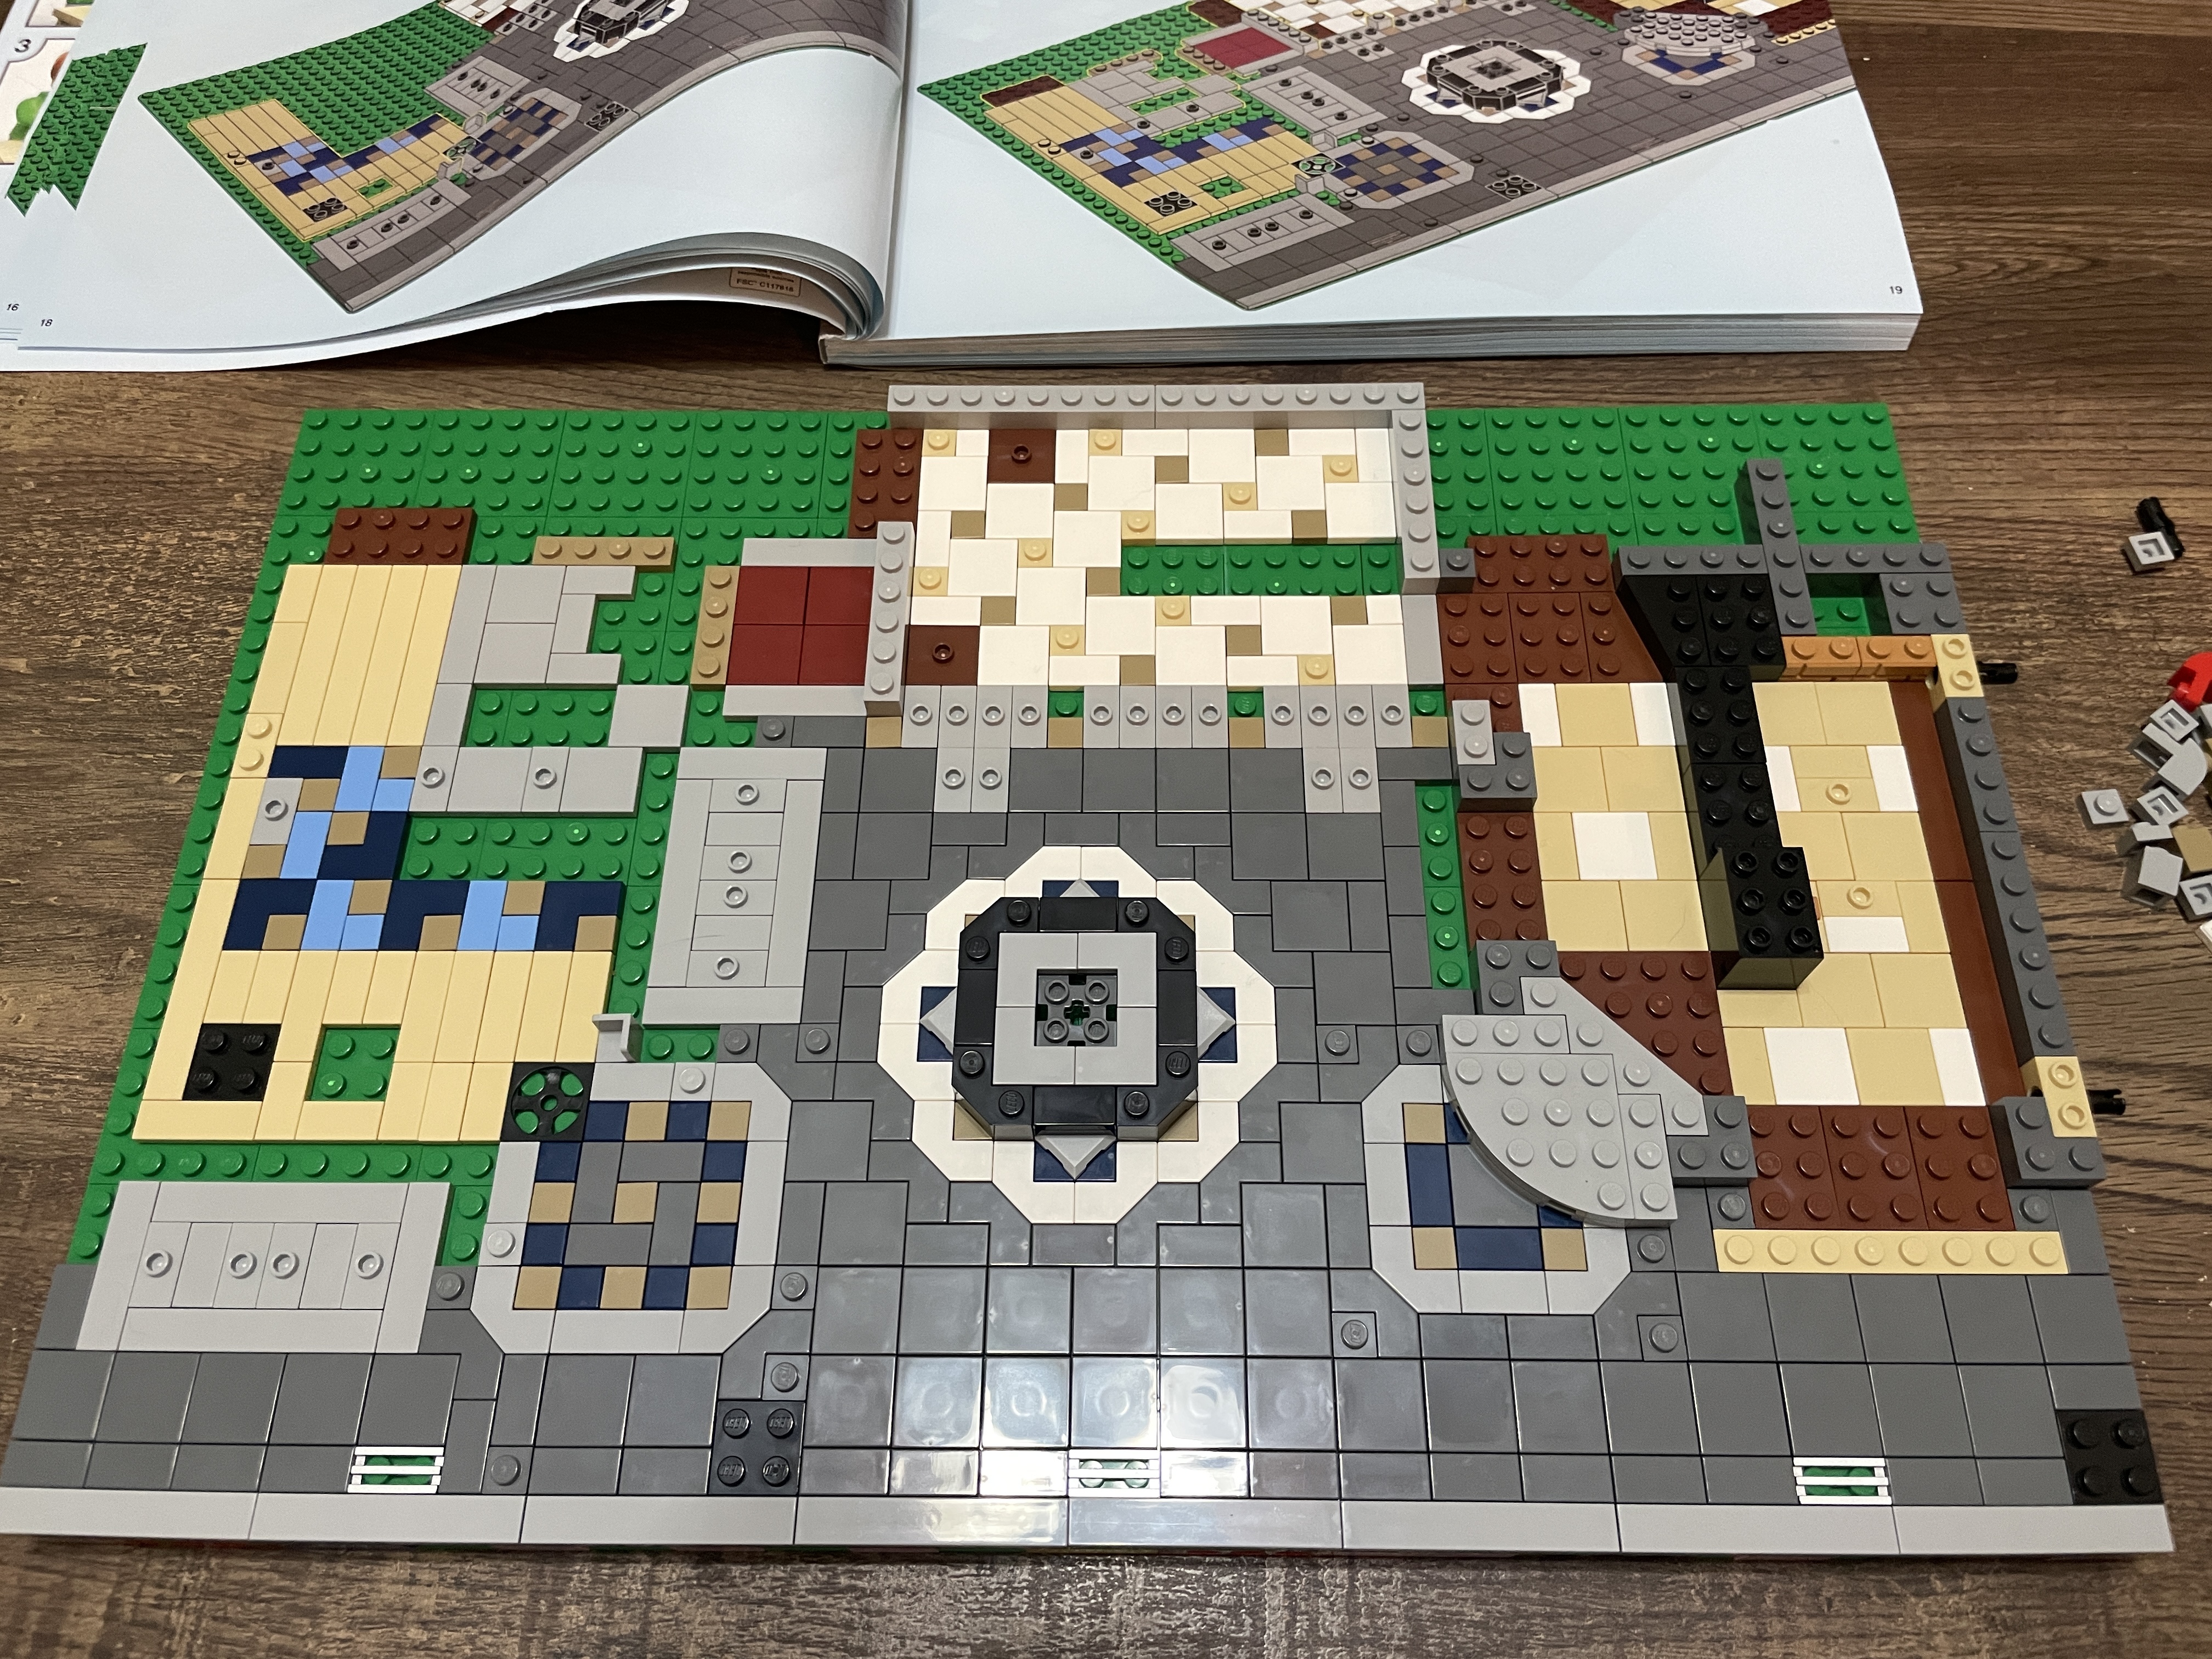
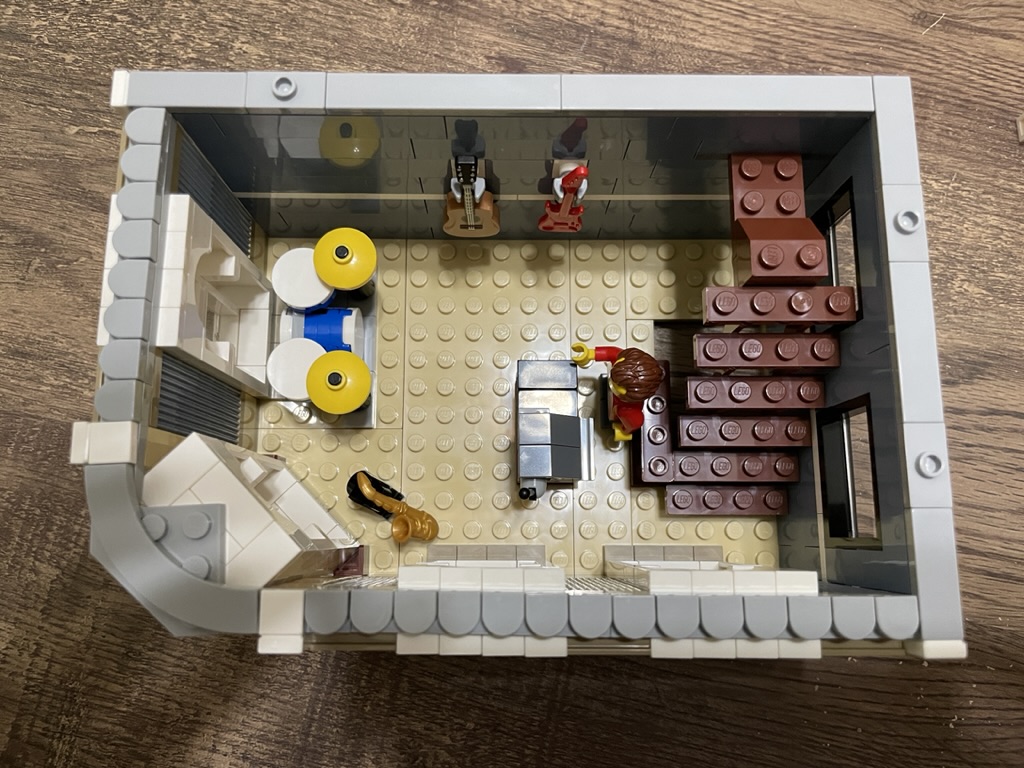
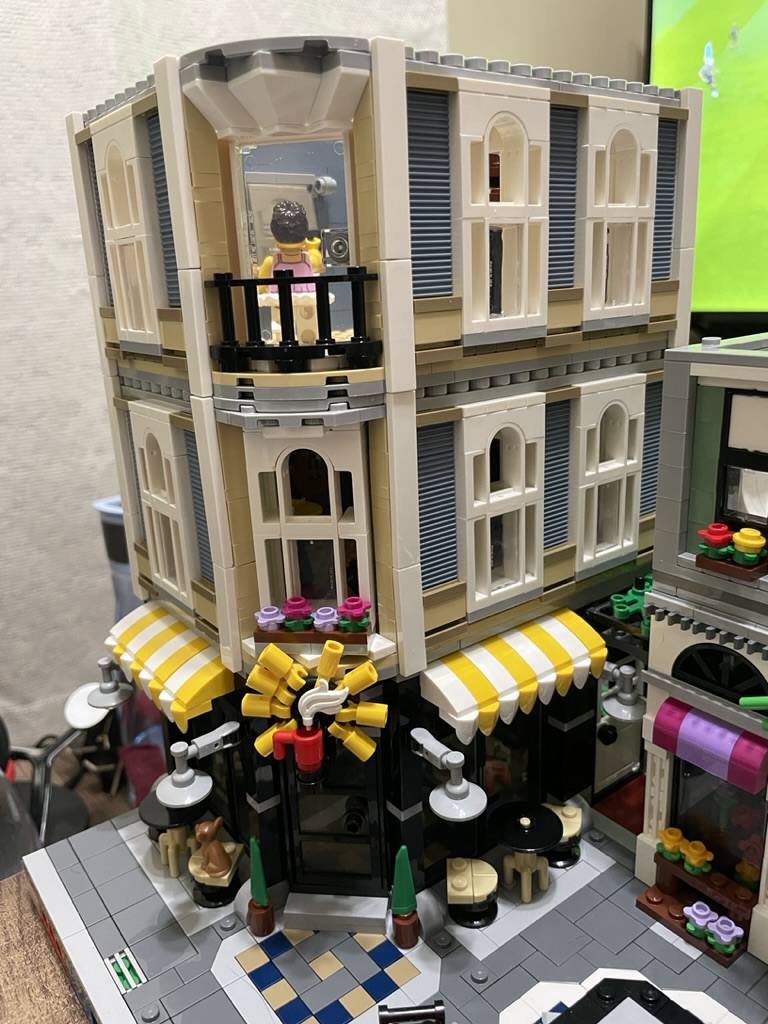
Once the second story is positioned, the square starts to look fantastic – with each establishment having its identity. Thus far, every business is distinct, each with different colors and textures. I’ve learned that only the bottom floor of the modular buildings is tiled (I imagine to save cost), but that might explain why the second floor looks a little unfinished. Perhaps it’s because the interiors are not as full, though honestly, I’m still determining what else I would be looking to add.
The rear has an additional staircase added, just like the floor below. I remain disappointed with this design, even as it comes together. Having the minifigures go outside to get to the upper floors is clunky. While the build techniques for the staircase are excellent, it could look more attractive.

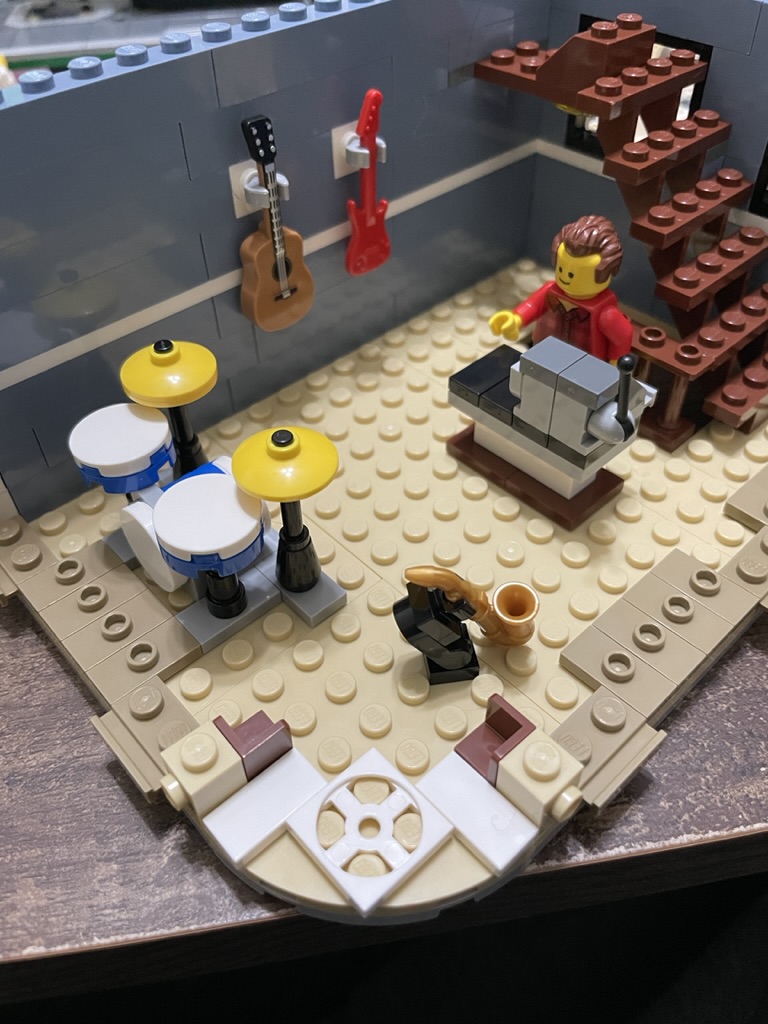
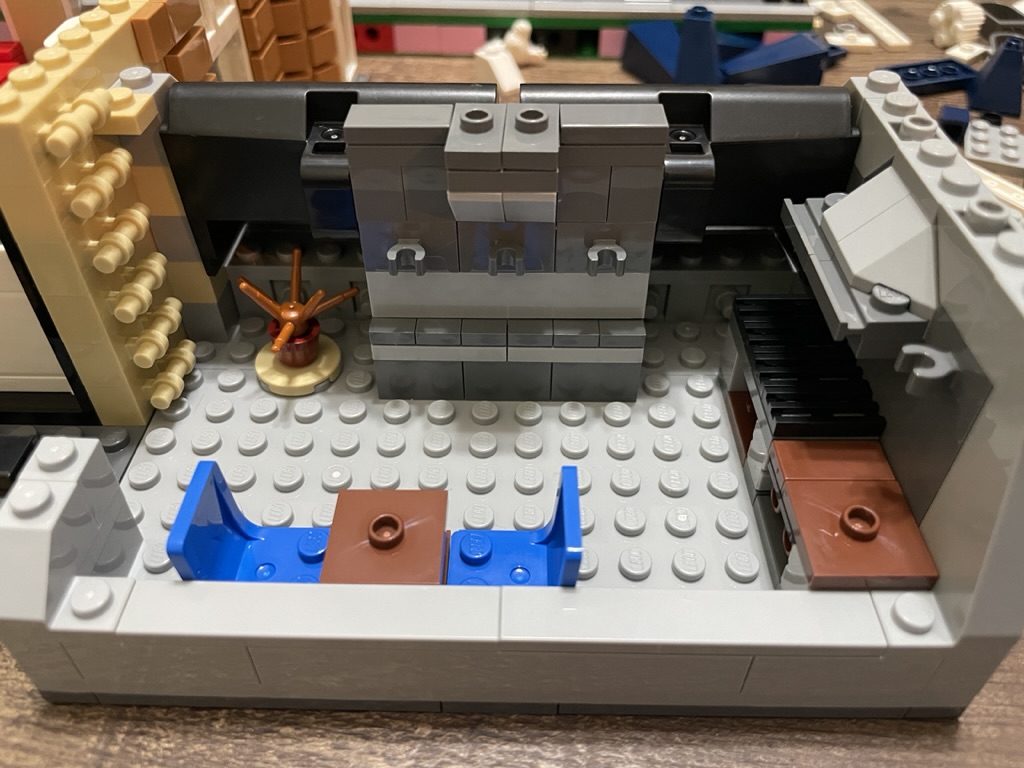
Stage five is another mammoth section with the pieces to construct the two floors above the cafe. The second story’s base, which will become a music store, is made from light tan plates held together with light grey plates. Tan jumpers frame the edges – indicating the placement of the windows. A reddish-brown staircase is placed at the rear.
The store’s interior is full of goodies, including a mini-build drum kit, acoustic guitar, electric guitar, and a saxophone. These are not inexpensive pieces, so it’s great to have them all included. The clerk has a receding hairline and stands behind an unimpressive counter. Again, the shop’s interior feels unfinished, though it will be straightforward to add some minifigures trying instruments that will be a sufficient infusion of life.
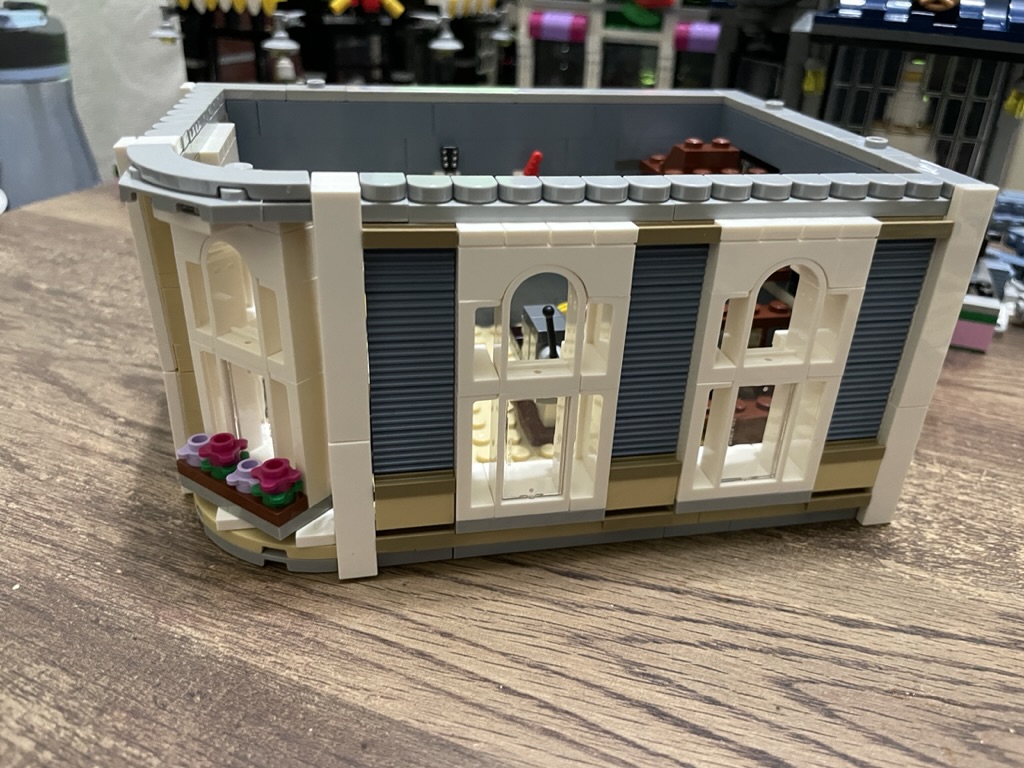
The exterior walls are where this stage shines. The windows are made from eight parts, including two frames flanked with two small wall pieces to generate a three-pane effect. We will ignore that most of the window is not paned; therefore, this would indeed be an icy shop. The top frame is covered with an arch that is clad with jumpers to connect to a structural layer of light grey plate. On top of that are half 1×1 curved tiles, providing a lovely texture between the floors. Each window section is spaced with a column of sand blue profile bricks, adding gorgeous texture and color to the build. White brick columns help to blend the windows into the design.
Once again, despite a myriad of textures and colors, these disparate floors work well together when combined. I may still need to build a MOC, but I wonder if I would think to do something so varied and daring in a single building.


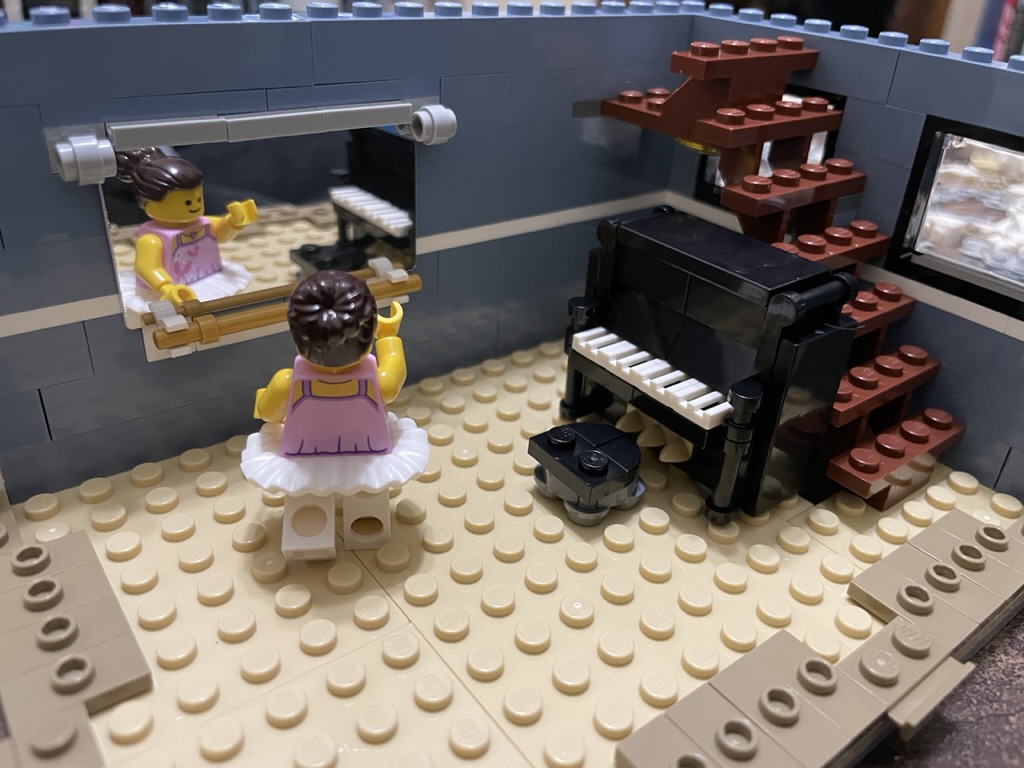
The top floor is structurally the same as the one below, with the base made from tan plates and dark tan jumpers to dictate where the windows will go. There is even a staircase included to allow for roof access. This top floor becomes a dance studio with a piano mini-build and a reflective cardboard element as a mirror on the wall. The minifigure is darn cute with her tutu. Alas, I have the same critique – a bland interior, and this room is the worst I have seen yet in the build. I’ll add a piano player and the series 23 CMF fairy to help the space awaken.
The same exterior is used on this floor, keeping a cohesive nature to the building. As I love the design, I have no issues with this. Further, as it is somewhat complicated and part intensive, it is not a repetitive build and you will enjoy putting these floors together one after the other. The only difference is that this top floor has a little balcony with a transparent door. Combined with the brickwork above the doorframe, it is an attractive addition. I don’t believe Lego produced that curved fence in any other color, but switching it out for light grey or white might look less jarring and fit better.
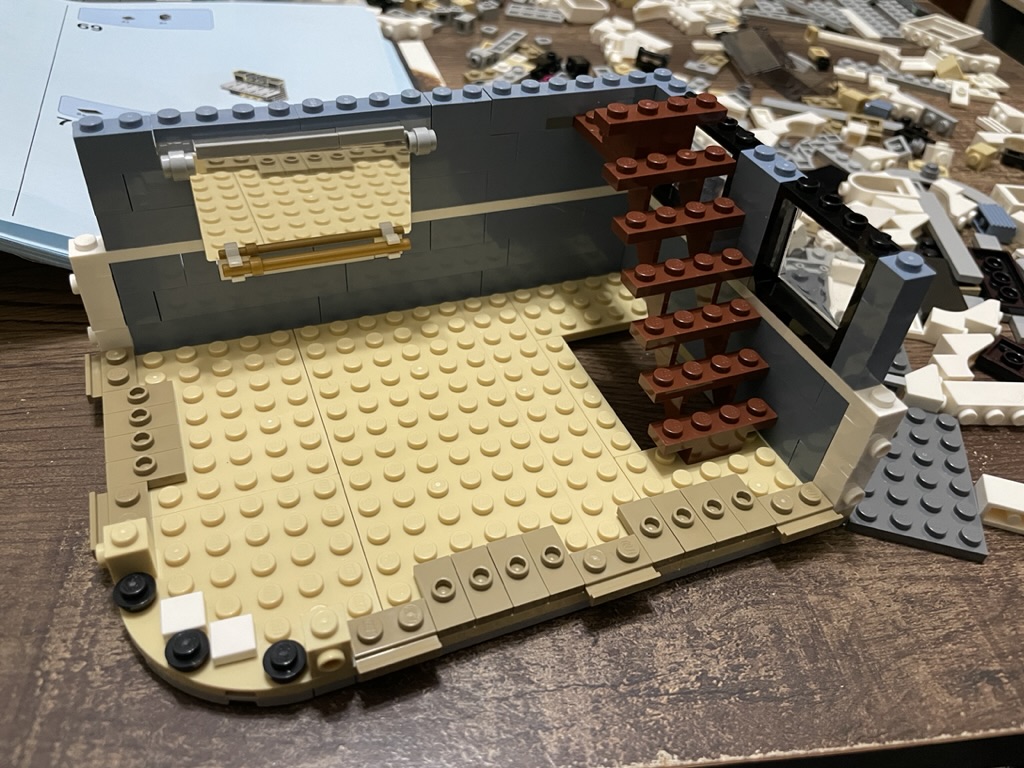
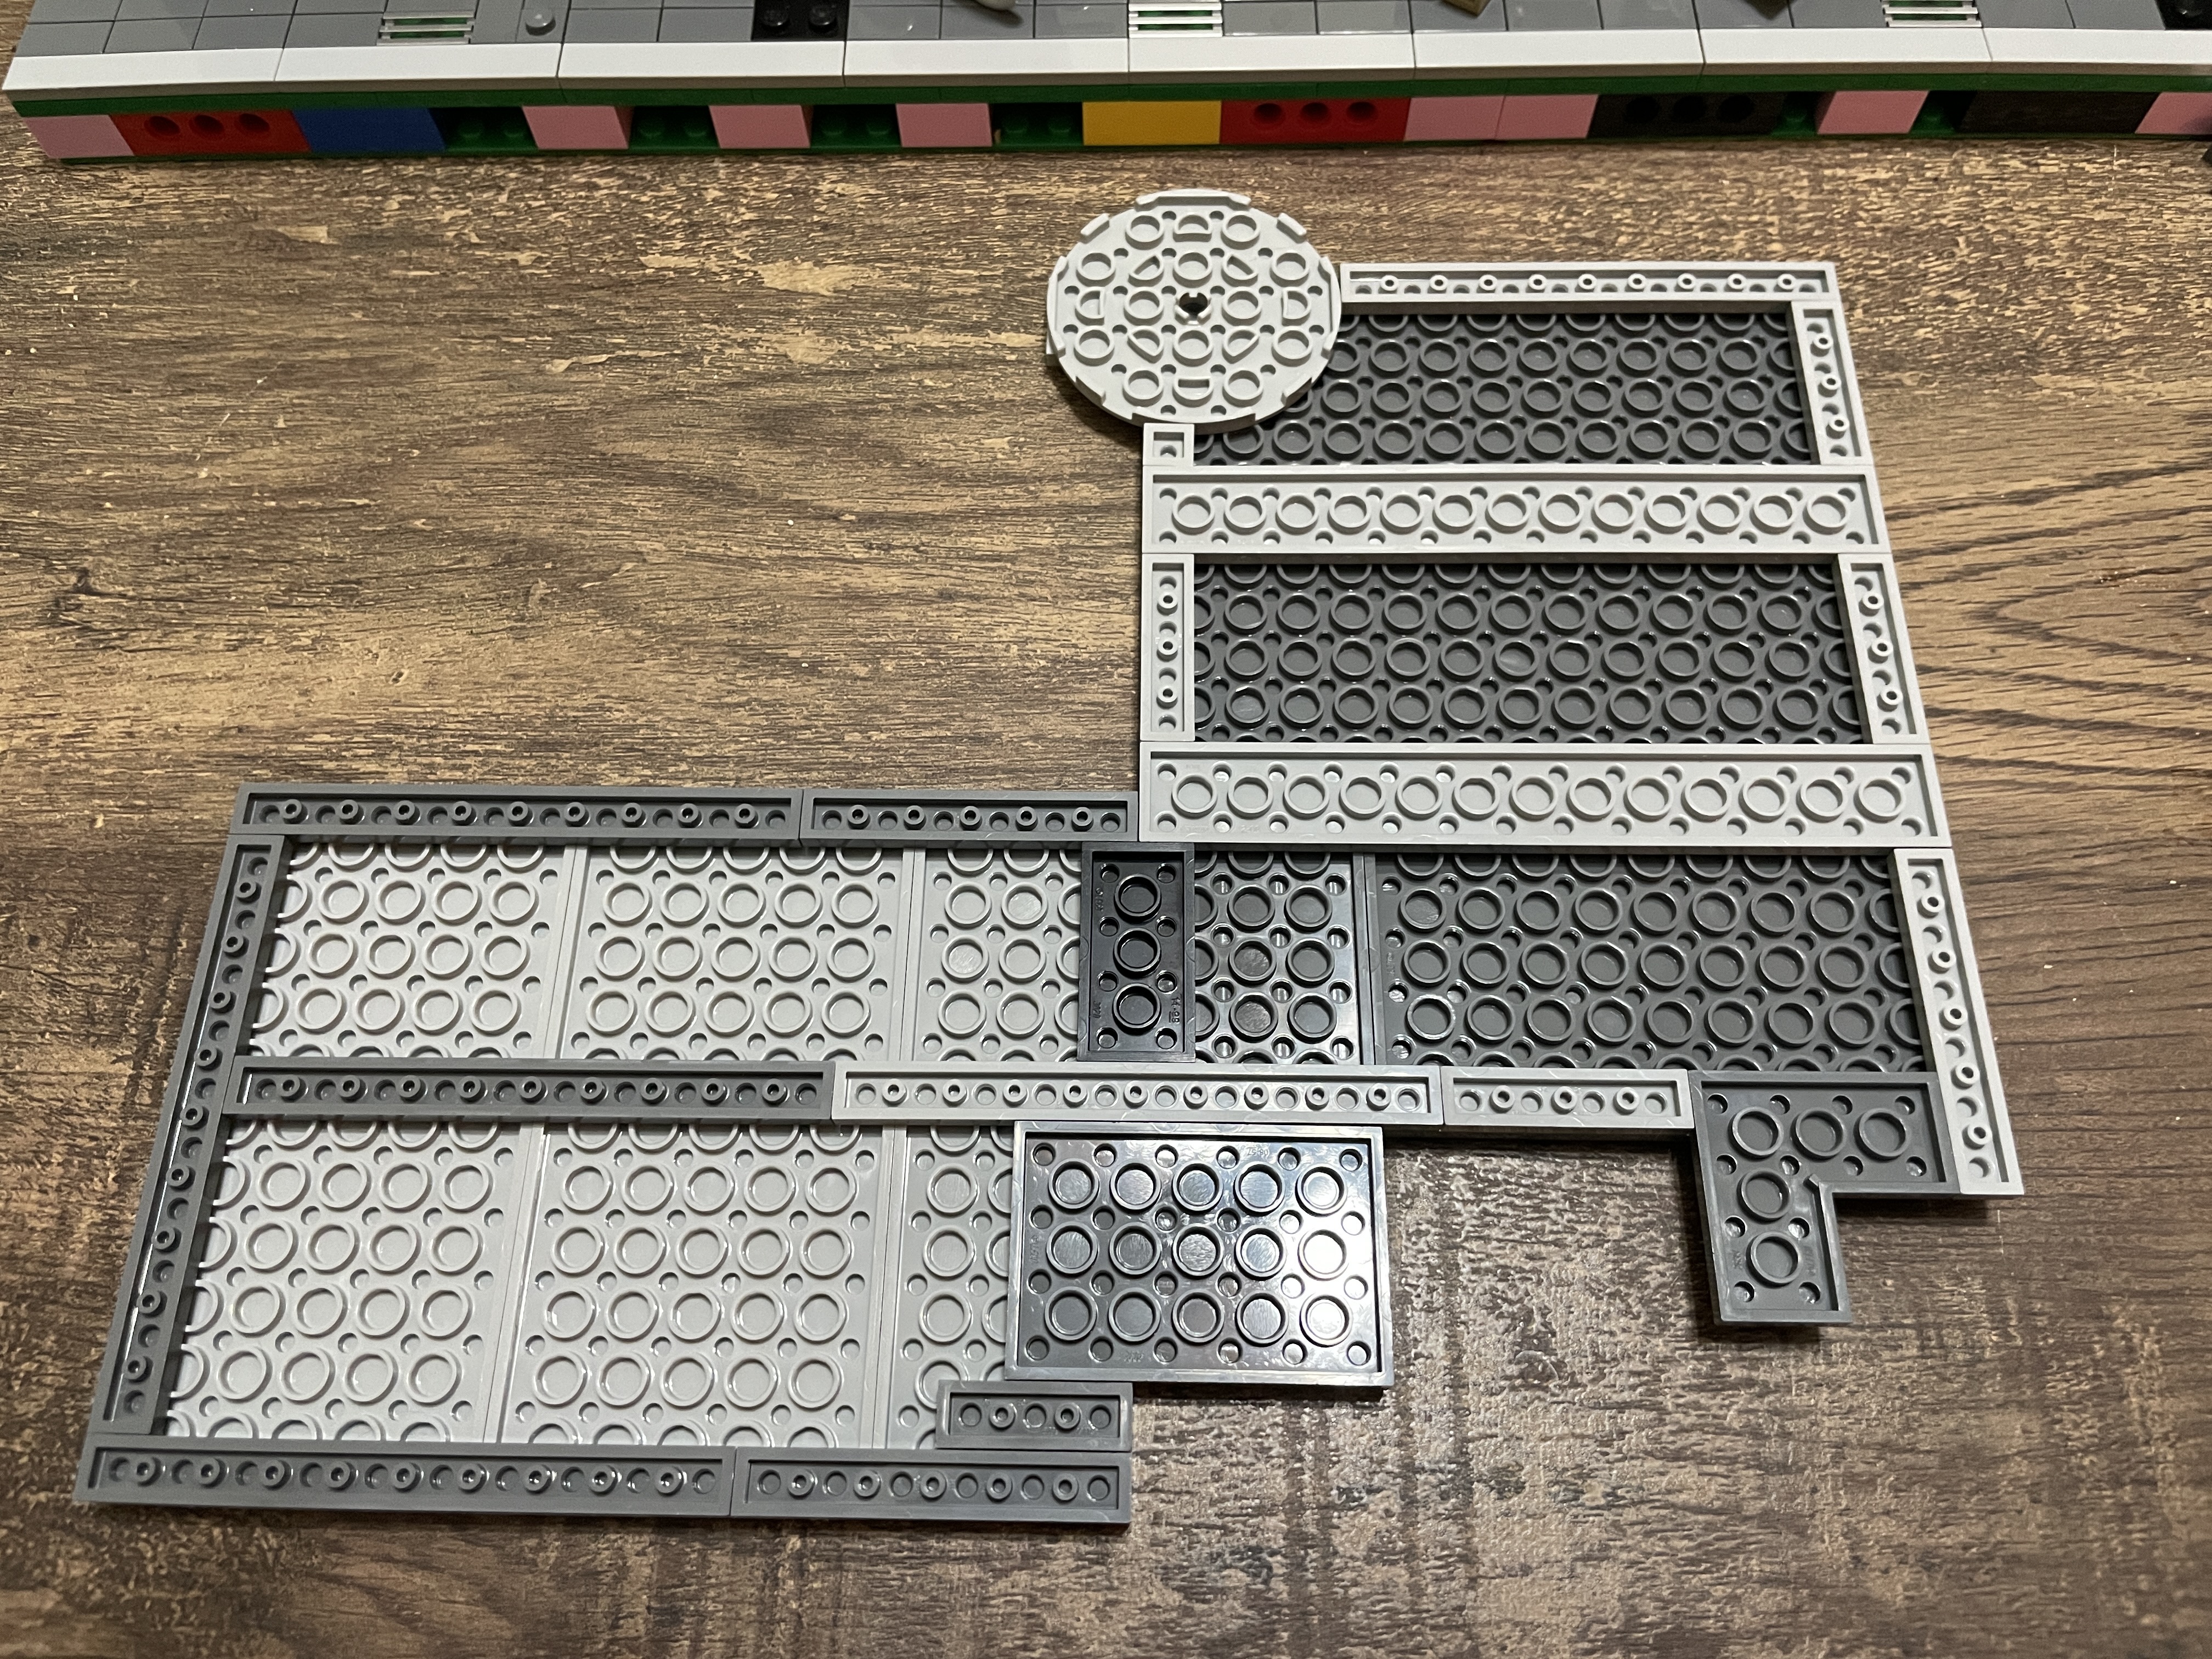
We need a roof to complete this stage and section of Assembly Square! The zone starts with dark and light grey plates generating a stable base structure. In the center, two transparent grey windshields join to create a skylight. At the back, a ridged panel is used as a hatch and the entry point to the roof.
The roof’s exterior is framed with white bricks, then covered in light grey tile and slopes to give a smooth finish. Fancy 1×1 bricks are placed on top of inverted slopes and spaced out with a half arch to create the gorgeous white brick effect. Finally, a white shield tile sits between the two edges and lines up the balcony brickwork below.
It might be controversial, but I’m not convinced this roof design works. It seems bulky and a brick taller than it needs to be for the building.
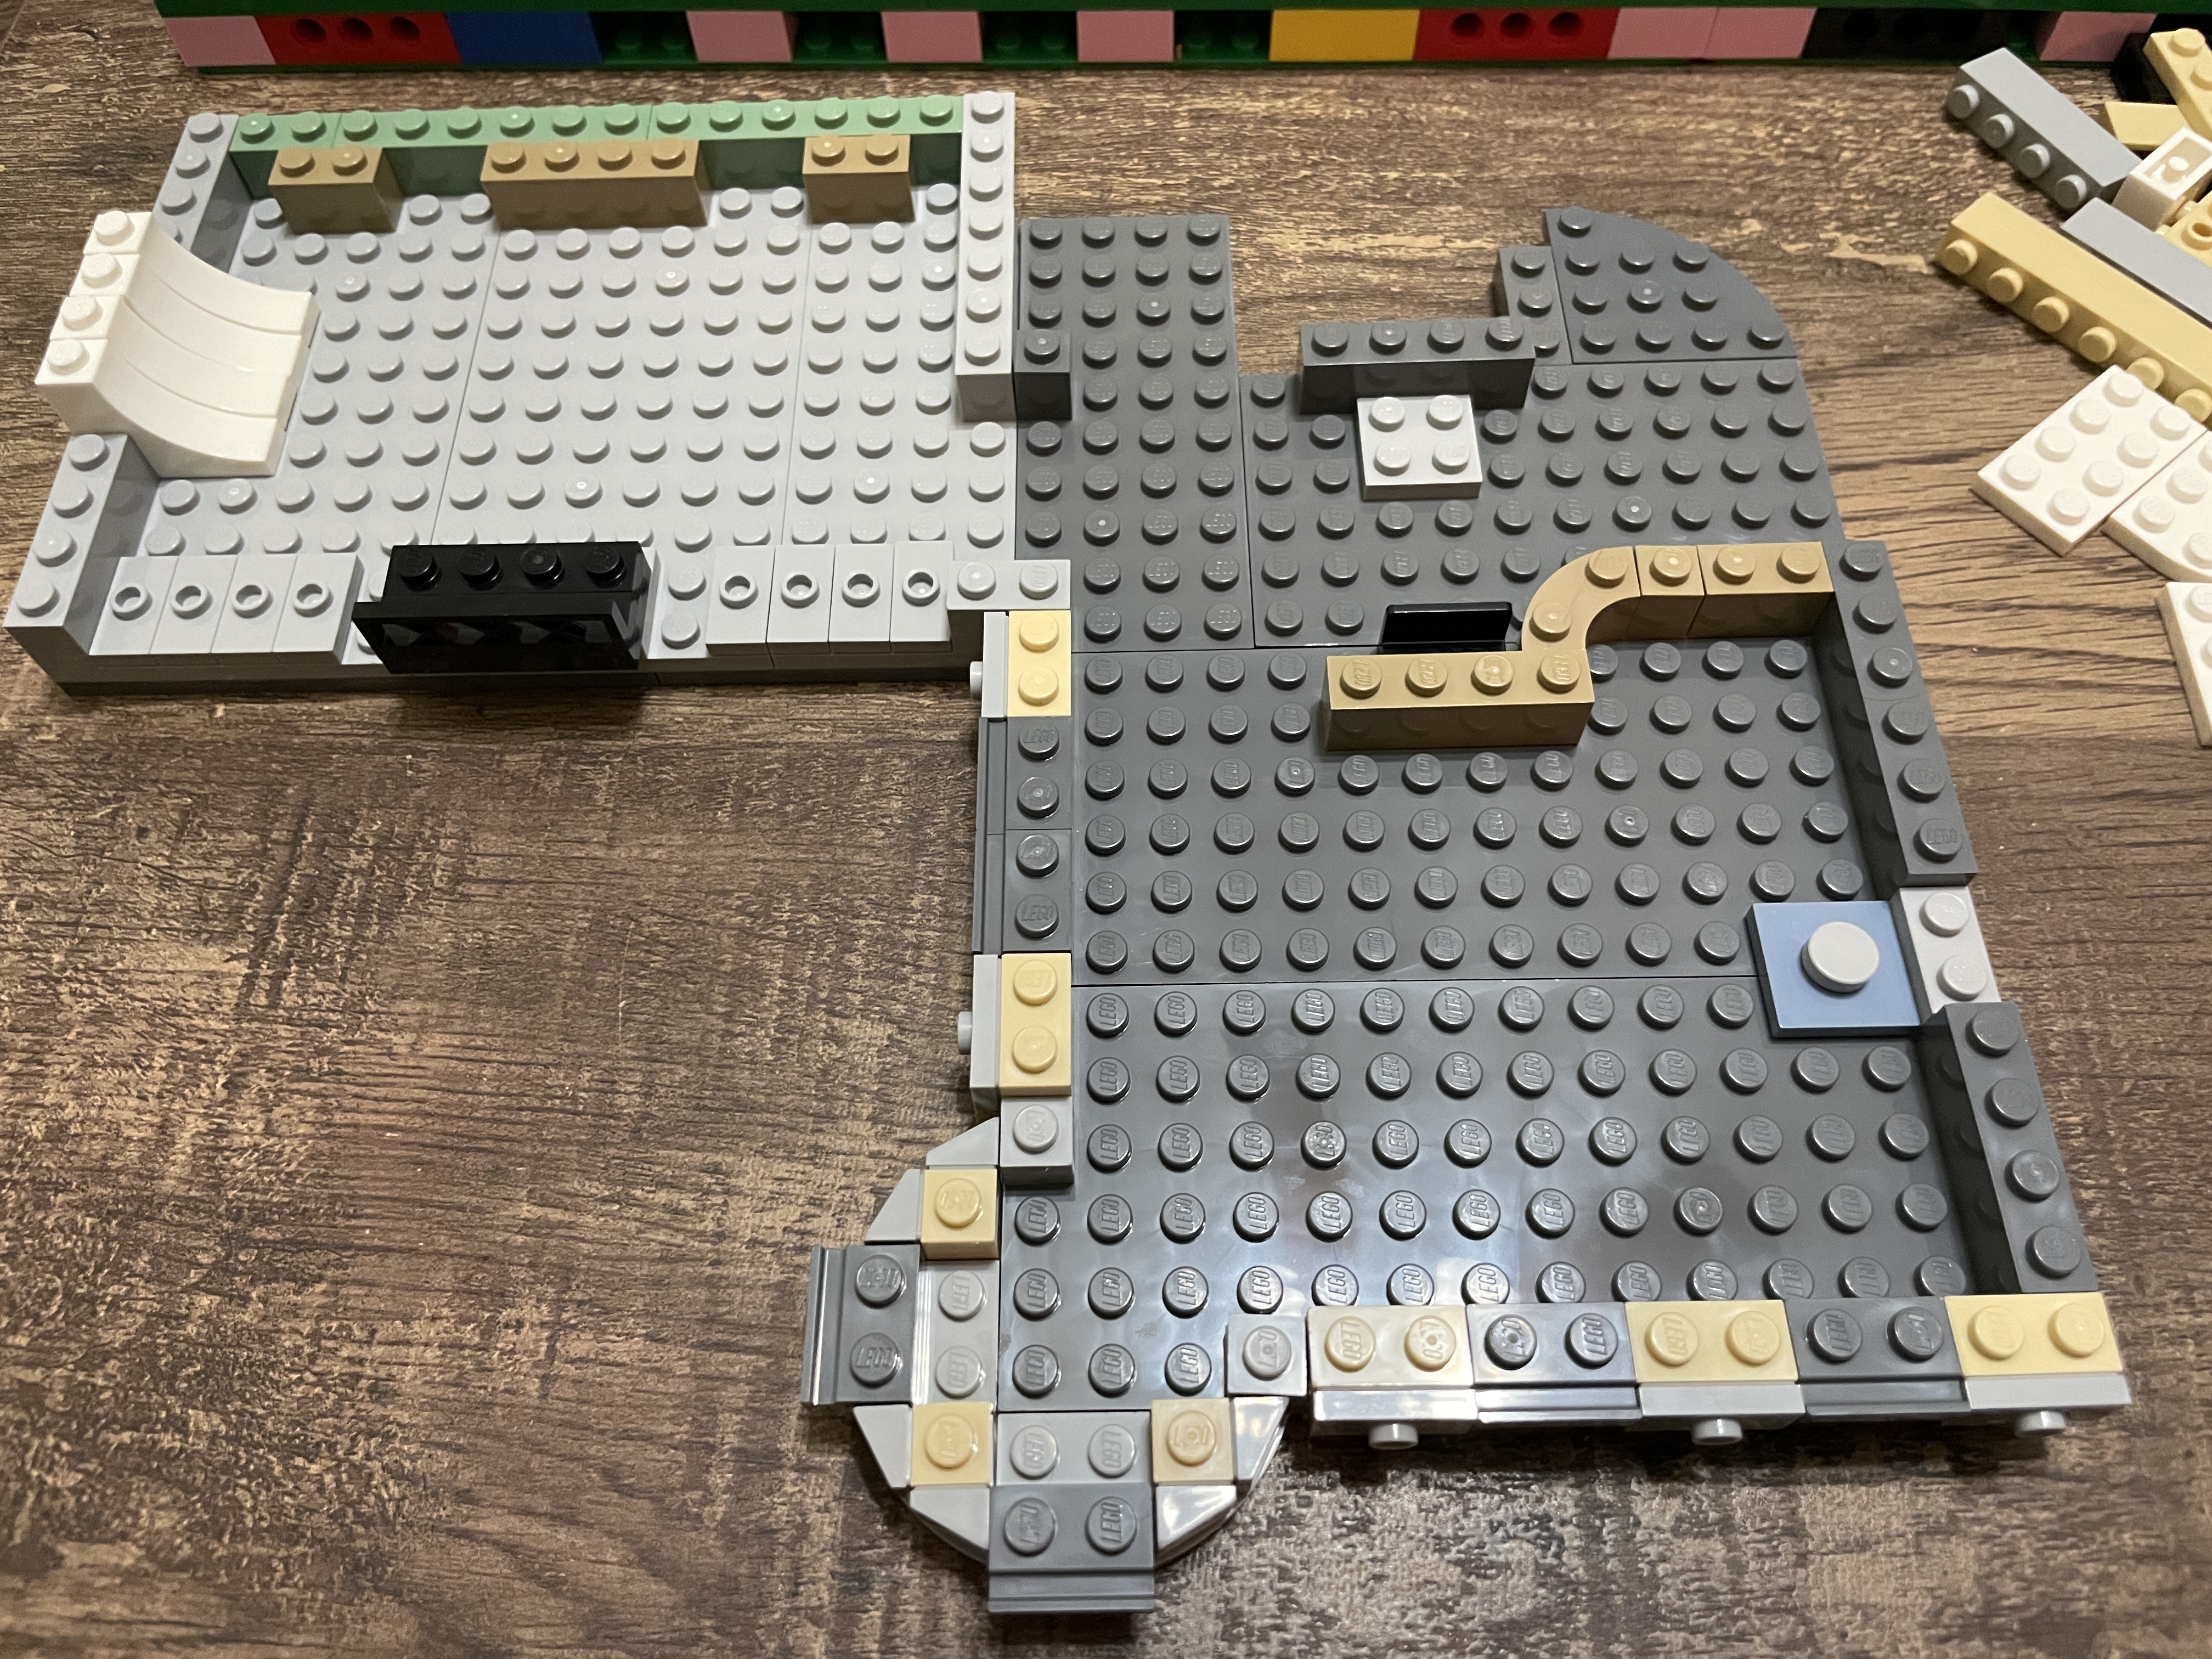
The sixth and final building stage will construct the third floor above the dentist and the photography studio. First up is making the base with light and dark grey plates. Once the floor structure is in place, the exterior walls are outlined in bricks. Above the dentist, blue tiles create what will be a play mat in the nursery school.
The front of the patio above the photography studio is decorated with Thor’s hammers – a technique recently reused in the A-frame Cabin. This is genius, and it looks fantastic. The hammers are held in place by threading the handles through 1×1 studs with holes.

The patio starts to take shape, with the dish area outlined with dark grey jumpers. A stovetop area sits to the left, and a small seating area aligns with the opposite wall. A leafless tree takes a spot on the patio too. In the nursery, a bathroom begins to develop in the corner.
A wide reclining chair takes up much of the nursery, with a sink and bottle warming station next to it. Placing the mother and baby into the scene brings it to life. Next to the play mat is a fabulous mini-build of a train track. On a shelf are a couple of toys, and there is a print piece as a child’s book.
In the cove, a mini Efill Tower sits proudly – a nice nod to the Lego models of this landmark. This room is packed with details and fun finds and only highlights the emptiness of other rooms in the square.

Like the floor below, the walls are primarily pale yellow, with detail added with nougat tiles attached to SNOT bricks. The front windows have red slopes acting as awnings. A couple of doors mark the entrance to the floor, and the other separates the bathroom. Finally, the room has a printed tile picture on the far wall.
The patio area (a weird design choice for a shopping and resource center – such a thing would be best in an apartment building) has a ladder made from modified 1×2 plates on one wall. Modified brick allows for clips in the dish area that hold cups and a pot. The cooker has an extractor fan and a frying pan.
The patio area is sealed off with two large black molded curved pieces. They are flanked with light grey slopes and decorated with black fence elements. This design choice does not convince me, as they are unwieldy and quite different from the rest of the build.
The top of the nursery is tiled off, allowing for easy placement and removal of the final roof.

Once again, dark grey plates make the roof floor, with light grey plates used to provide structural support. The back of the roof is outlined with white tile, whereas the front alternates between white slopes and jumpers. Onto these foundations, tile, slopes, and arches combine to generate a smooth yet ornate design. A white bird found a nook here to call home.
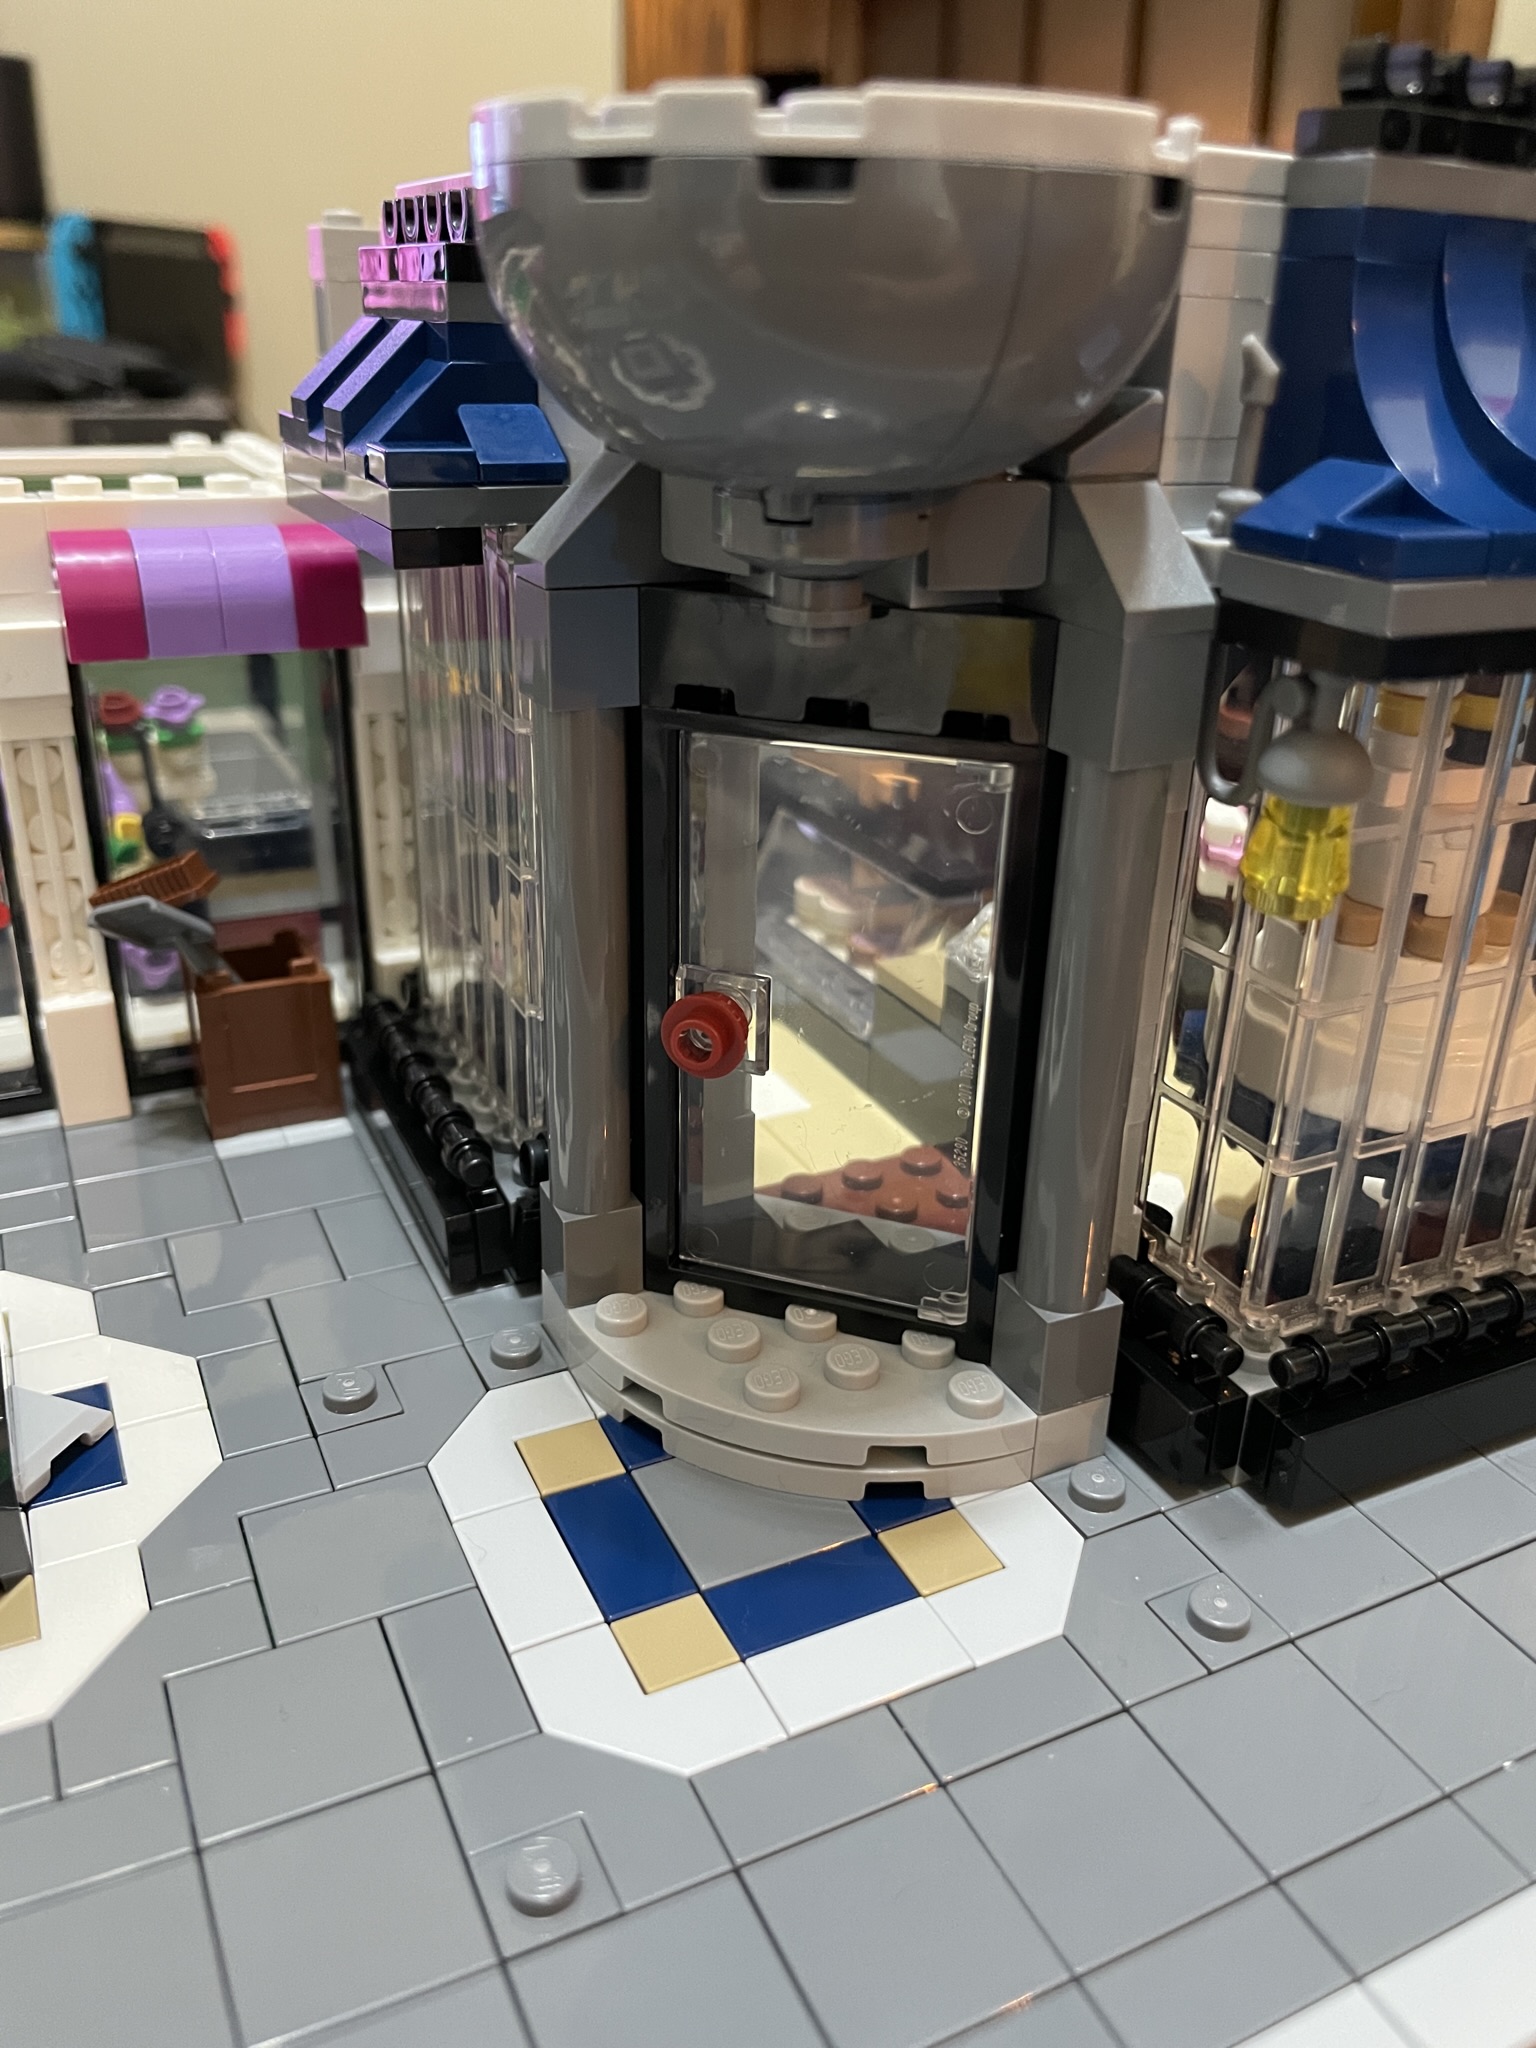
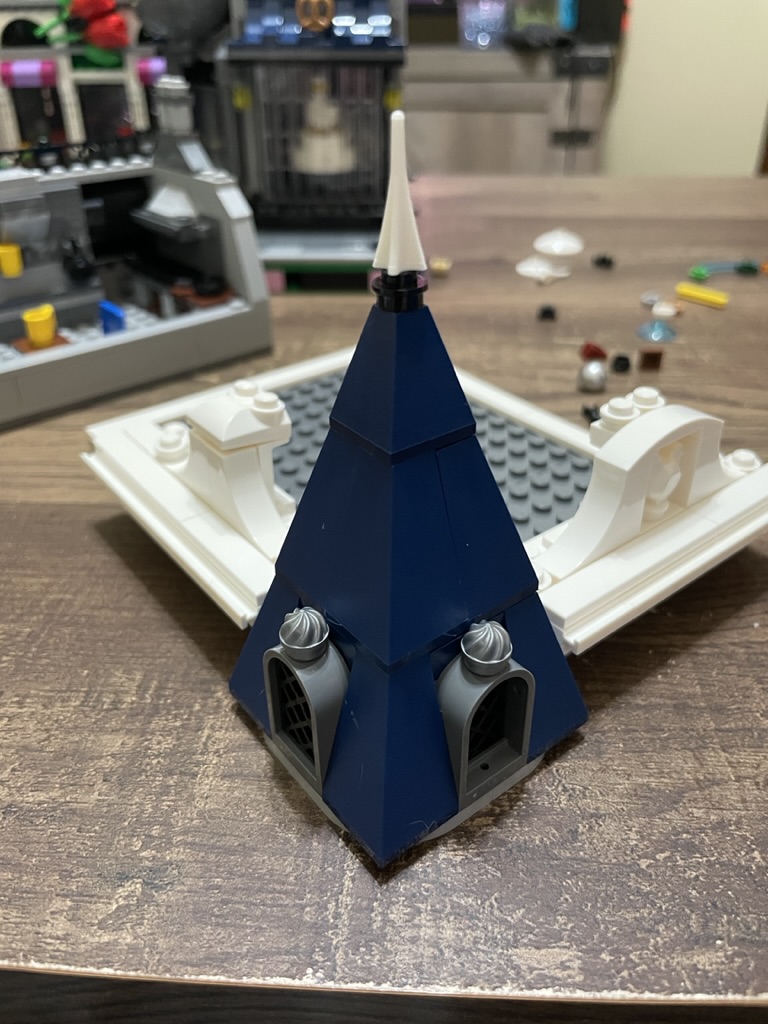
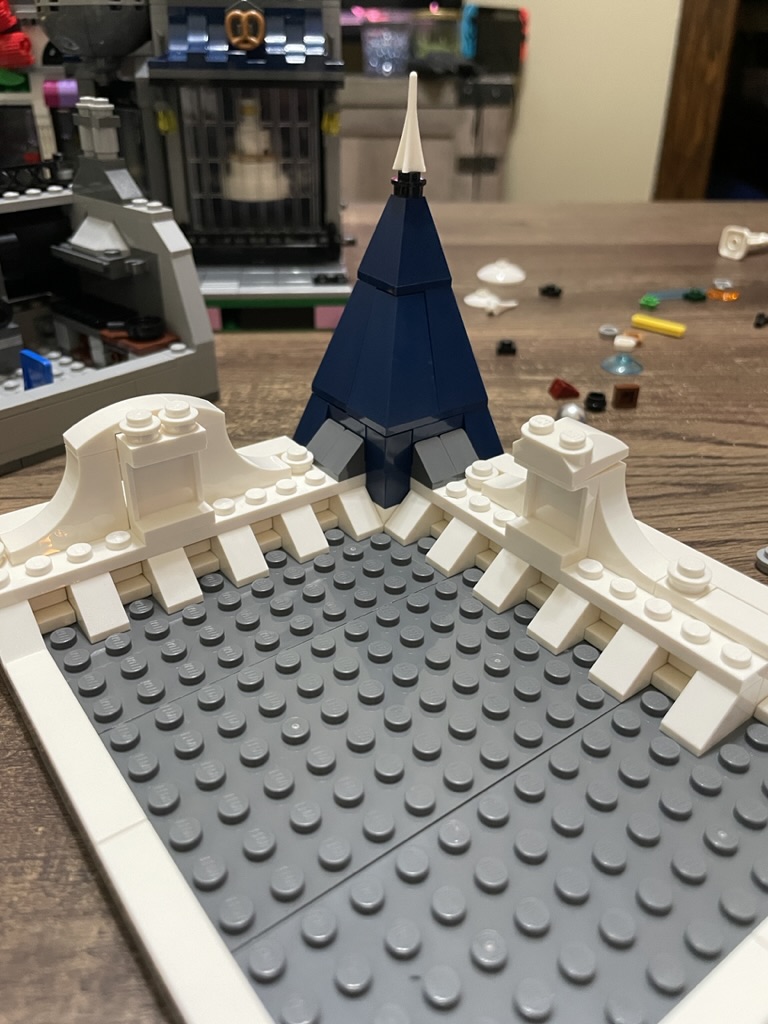
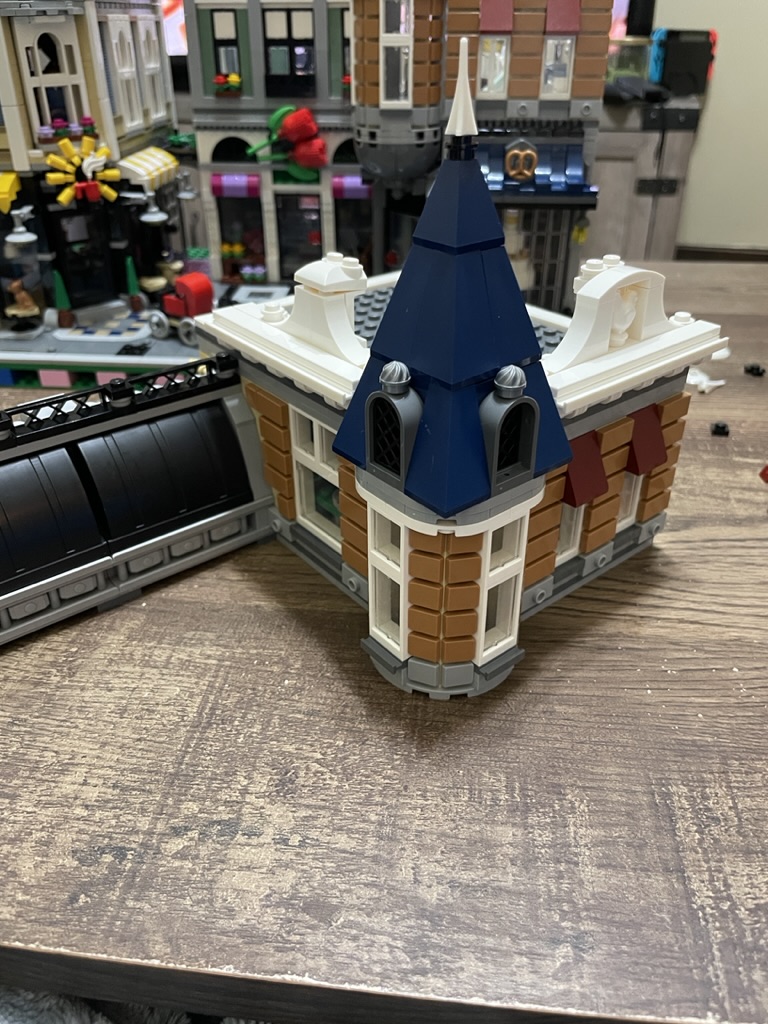
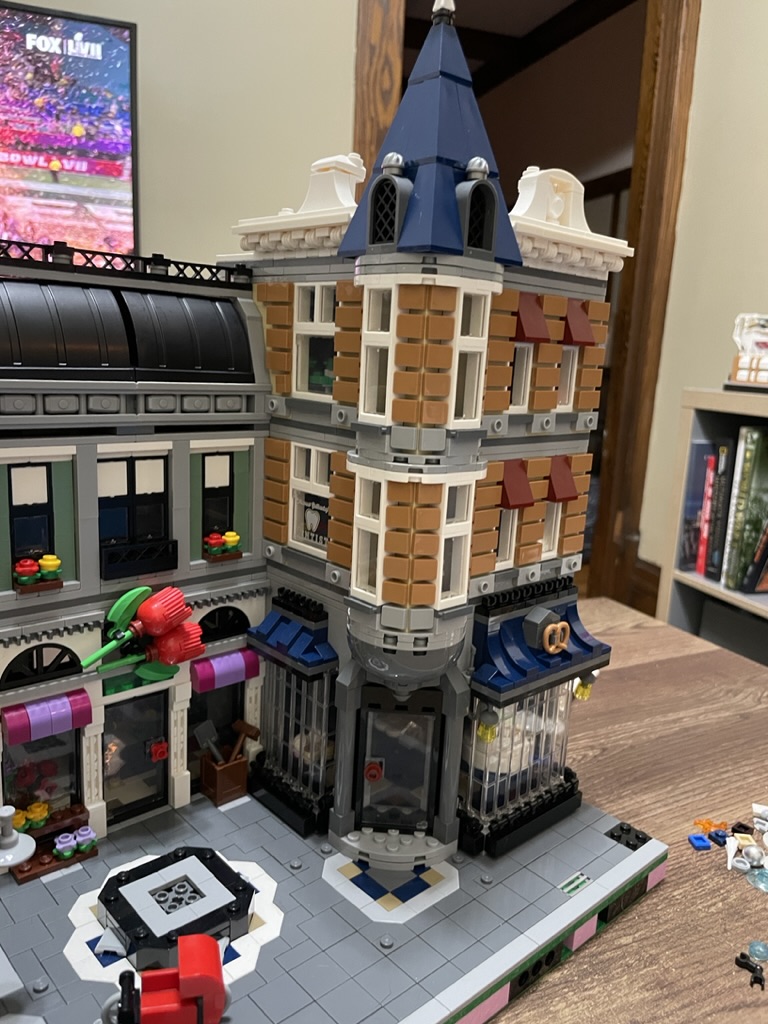
The circular cove section is covered with large dark blue slopes to create a pyramid. Inset to this design are two dark grey curved windows, with a decorative stud on top. Finally, a white spike is placed to bring the pyramid to a definitive point. Once positioned on the third-story layer, you can appreciate the blue element’s height. As the blue ties in with the ground floor, it is fitting.

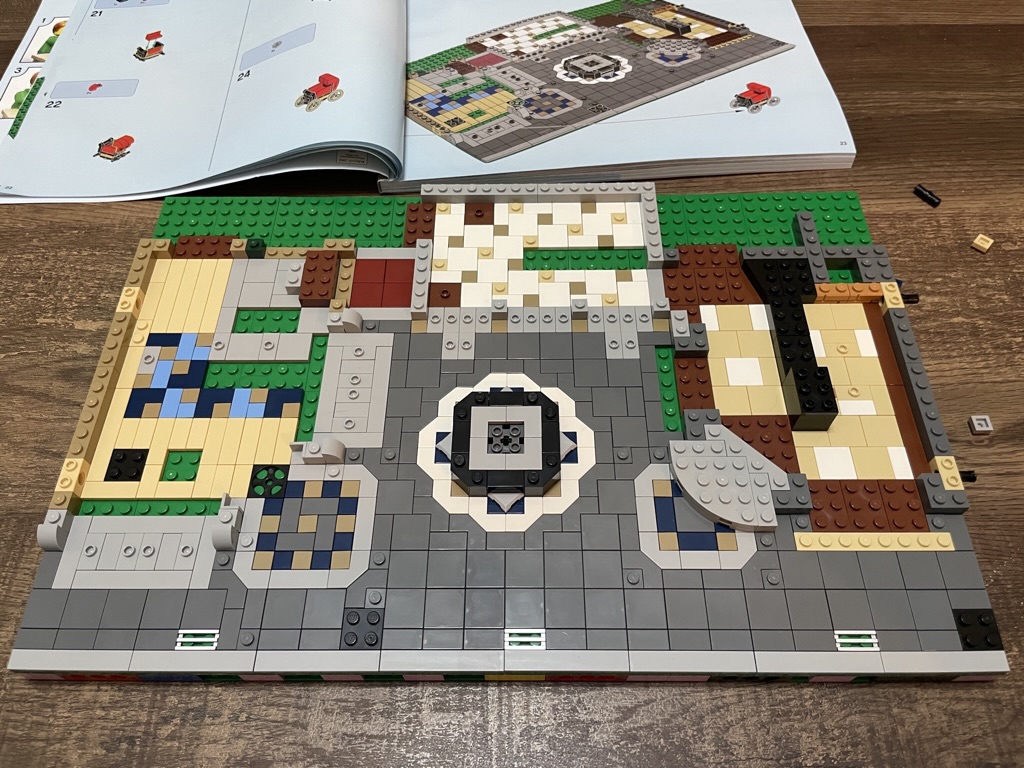
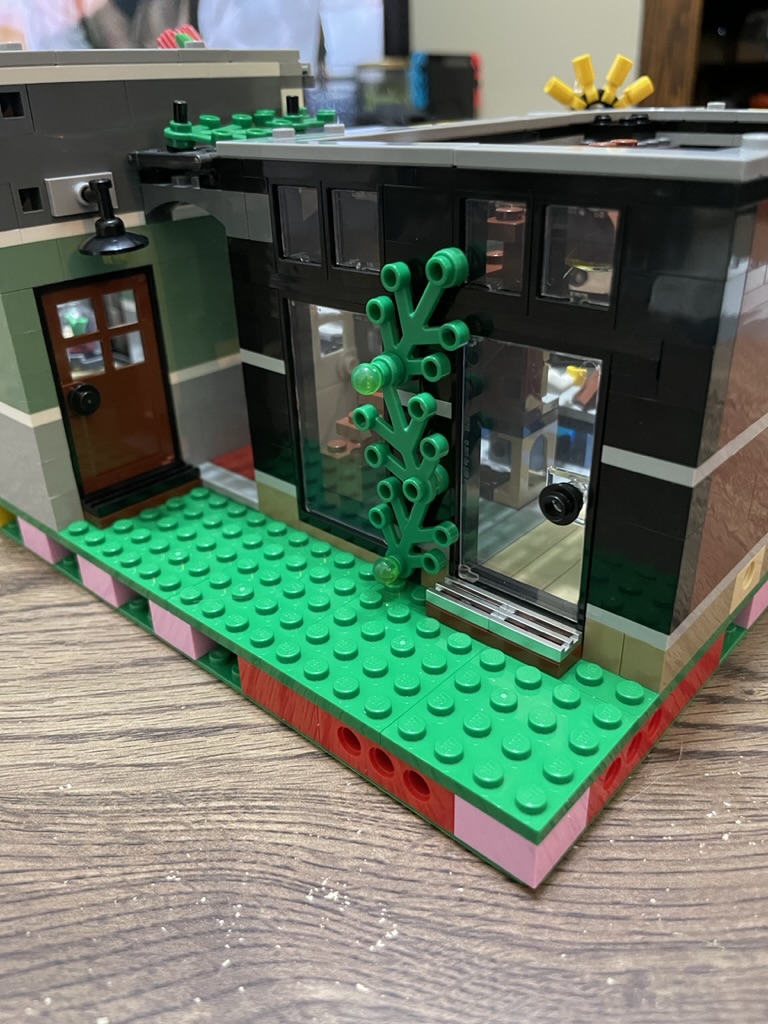
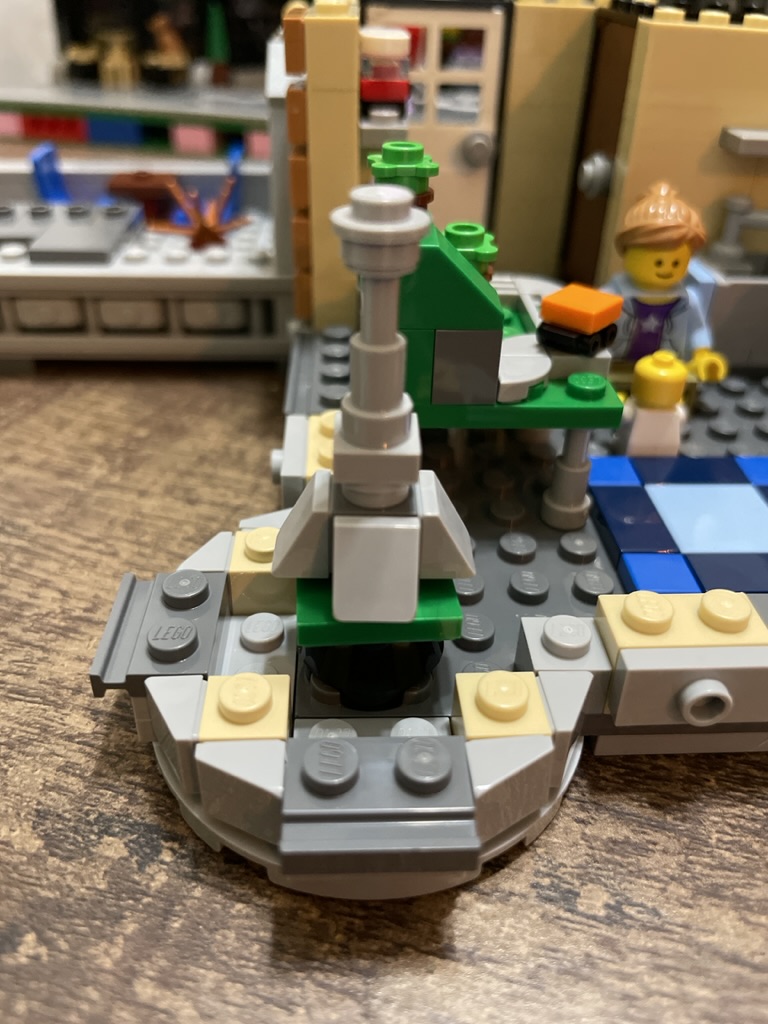
Only one element left to complete, and then Assembly Square can be open for business – the fountain’s construction. It is a straightforward yet effective build using two colors of inverted discs – white for the fountain and transparent blue for the water. This delightful feature will be the center point of my young city.
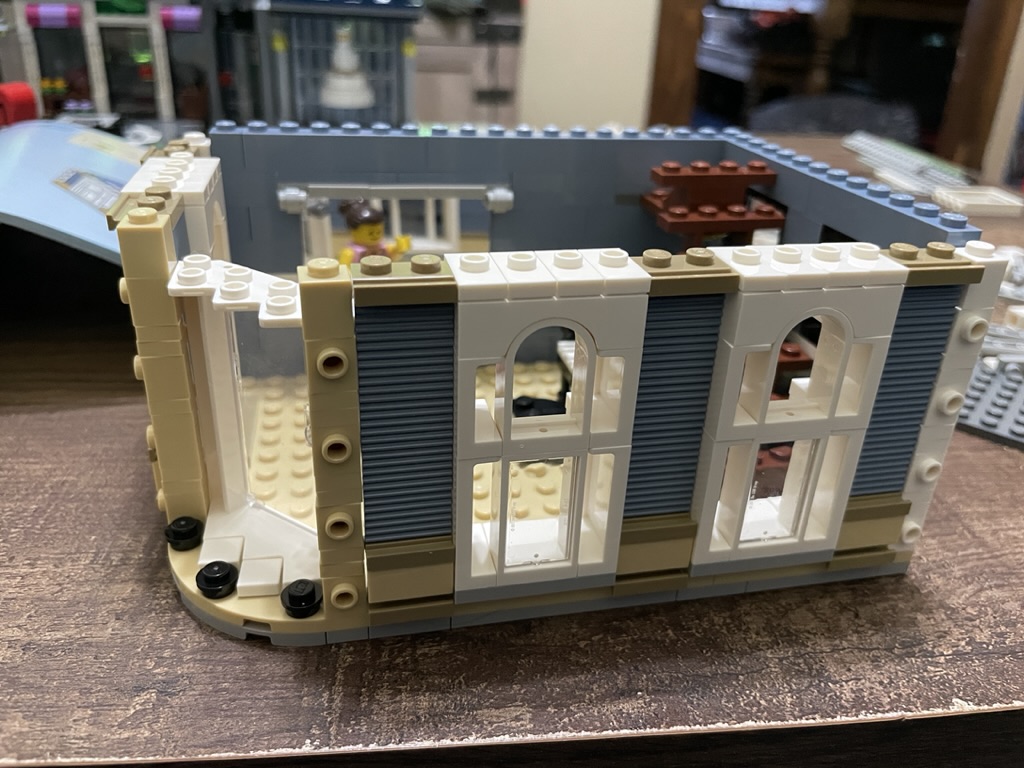
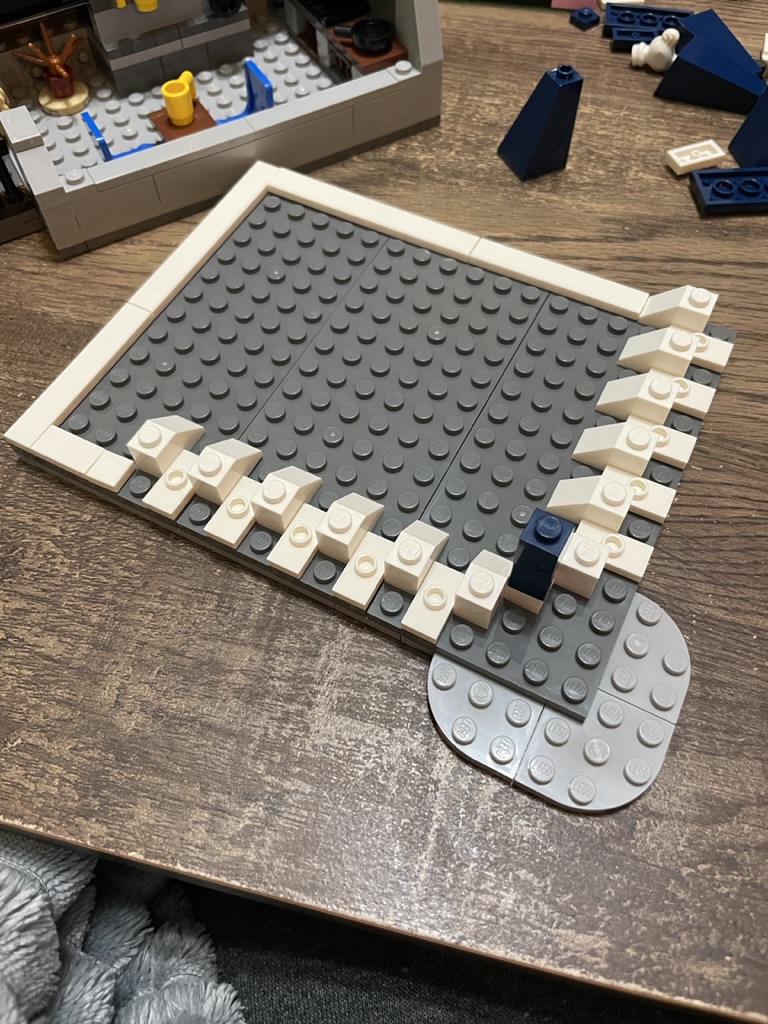
I’ve included a picture with a WIP road MILS plate. My city begins!
Ratings
Build: 5/5
If you are a city builder or like Lego buildings, you are going to enjoy this set immensely. It is a classic system build with brick, plate, and tile layers. What makes modular buildings stand out is the techniques employed to generate new textures and aesthetics using standard pieces. Every Lego builder will find something in the build that will impress, as the part usage in this set is spectacular. It is full of delightful mini-builds, from the pram, to the camera, to the incredible dentist’s office.
The instructions are easy to follow, yet everything is exciting and varied. As with all sets in the modular buildings collection, there are no stickers – everything is a printed piece. If I had any criticism, it would be that the build stages were too large – however, that is something Lego has rectified since this set’s release five years ago. Yes, it means less plastic, but smaller stages help pace the build better.
Display: 4/5
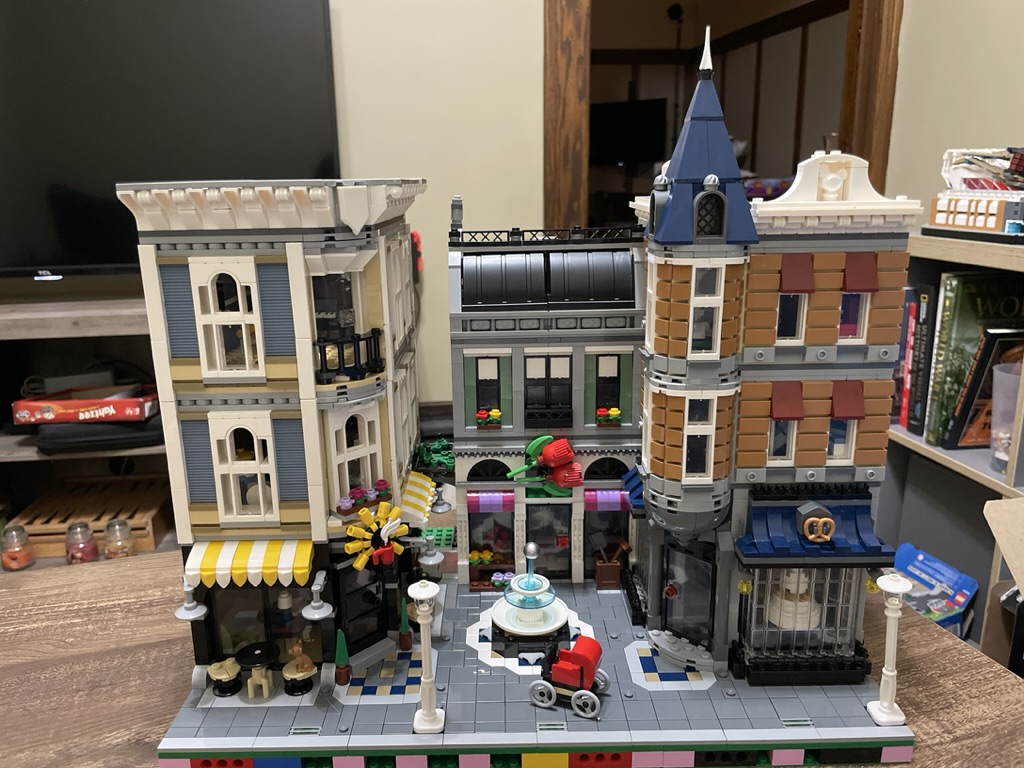
While Assembly Square is a stunning set, they tried to cram too much into the exterior of the build to commemorate the 10th anniversary of the series. Too many conflicting architectural styles are thrown together, ruining the cohesiveness of the build. Of course, a balance must be found between avoiding boring and repetitive and delivering an inspired design. Frustratingly, each section is gorgeous and mesmerizing individually.
I adore the main square with the fountain, and it draws the eye more than any other element. There is no room for argument that the front is marvelous; however, the rear is in deep contrast. It is bland and depressing. Luckily, in most set-ups, you won’t see the back, and that is probably why the designers didn’t focus on this aspect.
Price: 5/5
Assembly Square did not get a price hike, unlike some other larger sets during 2022, so it is one of the best-priced sets on the market.
As an unlicensed set, you get more bang for your buck too. The price per piece (PPP) is an outstanding 7.5 cents, highlighting that you’re getting a lot of parts for your money.
The set does include some expensive elements. These include musical instruments, fences, stairs, and large slope elements. There are also nine minifigures, including a much sought-after baby.
Final thoughts
There are only a few things that prevent this set from being perfect. Some interiors seem unfinished and empty. The minifigures could have better printing and more included to allow customers in the shops. I find the staircase placements bizarre, and a rooftop cook area is out of place – who would use this space?
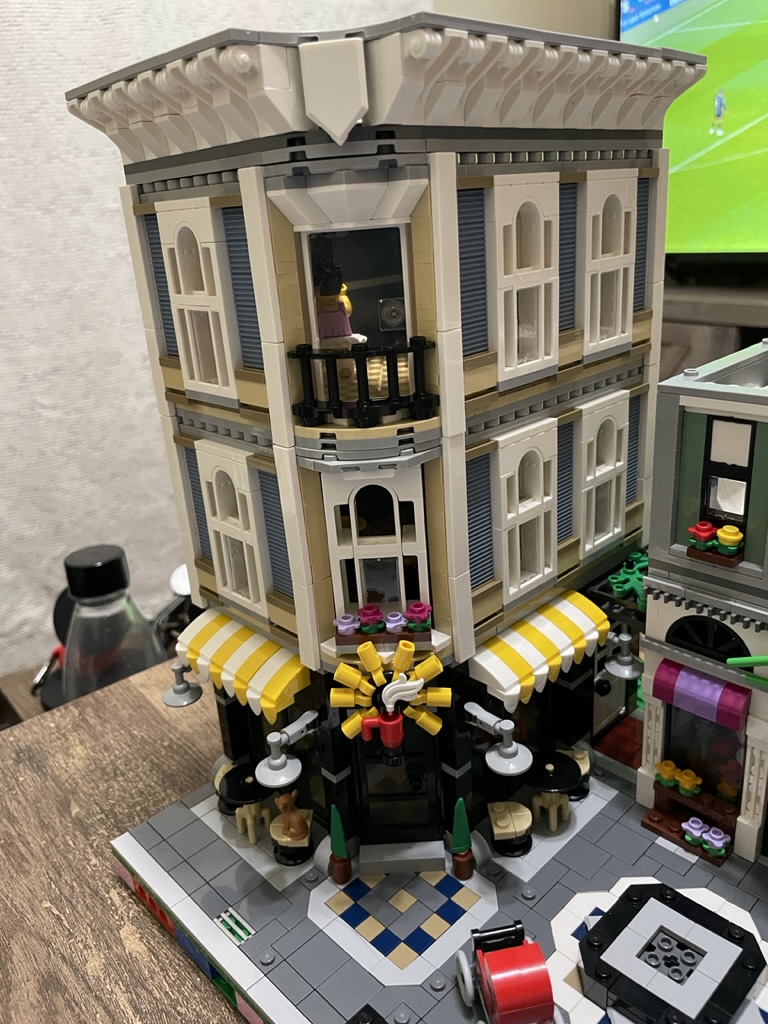
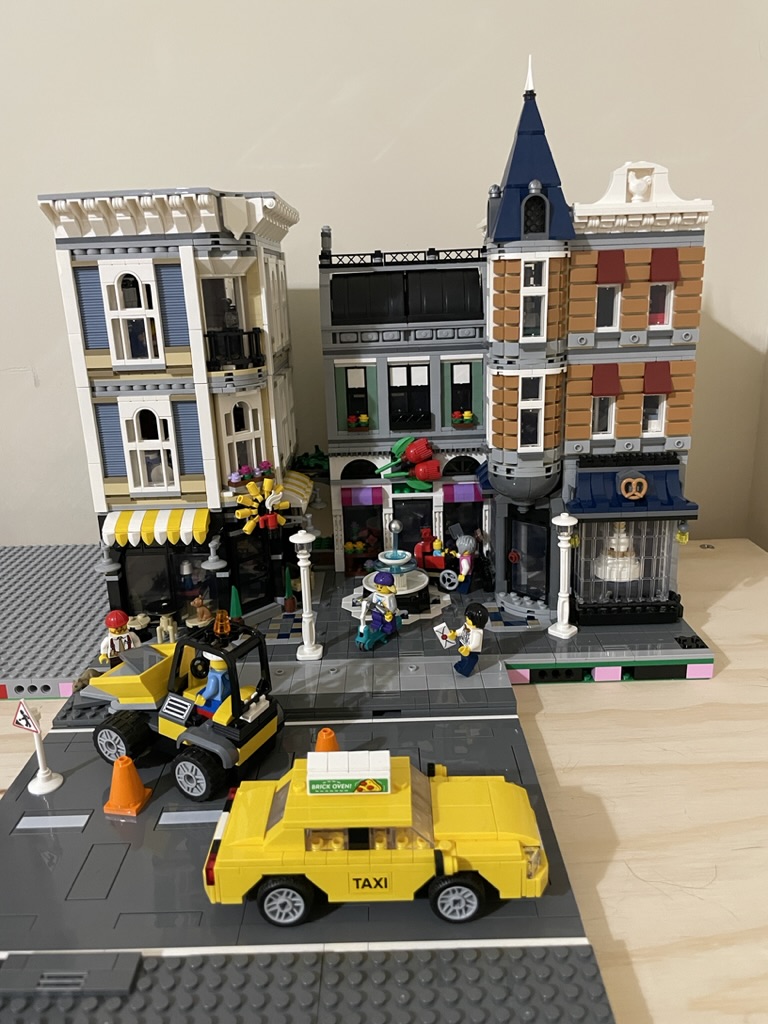
Despite these drawbacks, it is a remarkable set, and I am delighted to have started my modular journey with this one. I’ve seen this displayed on shelves alone, in a row of modulars, and as part of a city. In each instance, it looks incredible.
Assembly Square is retiring at the end of 2023, so if you don’t have this yet, I suggest you pick it up before then.
Buy the Set
LEGO US
LEGO CAD
LEGO AUS
LEGO UK

Leave a comment