

Theme: Marvel
Age: 9+
Available: Jan 1st, 2022 –
Why I bought this set
Previews for this set greatly influenced my decision to collect flying objects. From the first leaked images to the official reveal, I was excited about this, and I don’t care much about spaceships. I adore the Avengers and knew I had to have this as part of my collection as it looked fantastic and detailed. I wanted the build and the minifigures, and the $100 price point was acceptable. The set could have been a day-one purchase, and I almost bought it on New Year’s Day. I was patient, though, and I purchased the set when I wanted an available GWP (the ambulance rescue). This is my first Quinjet, and I couldn’t think of a better place to start my collection of them.
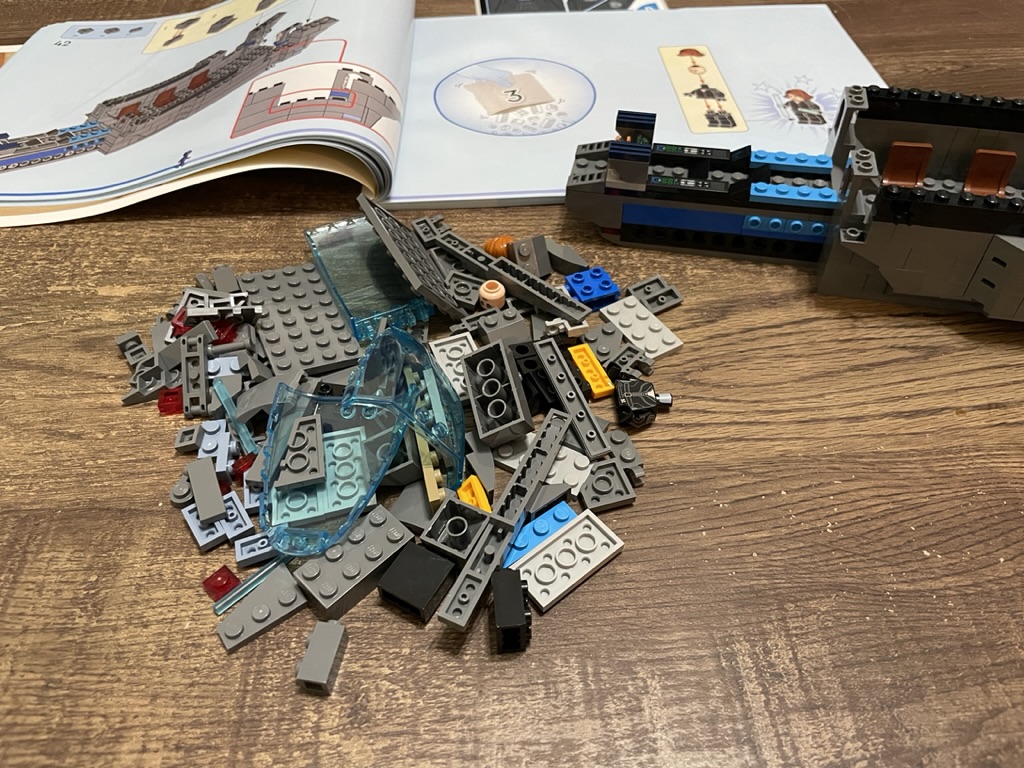
The build
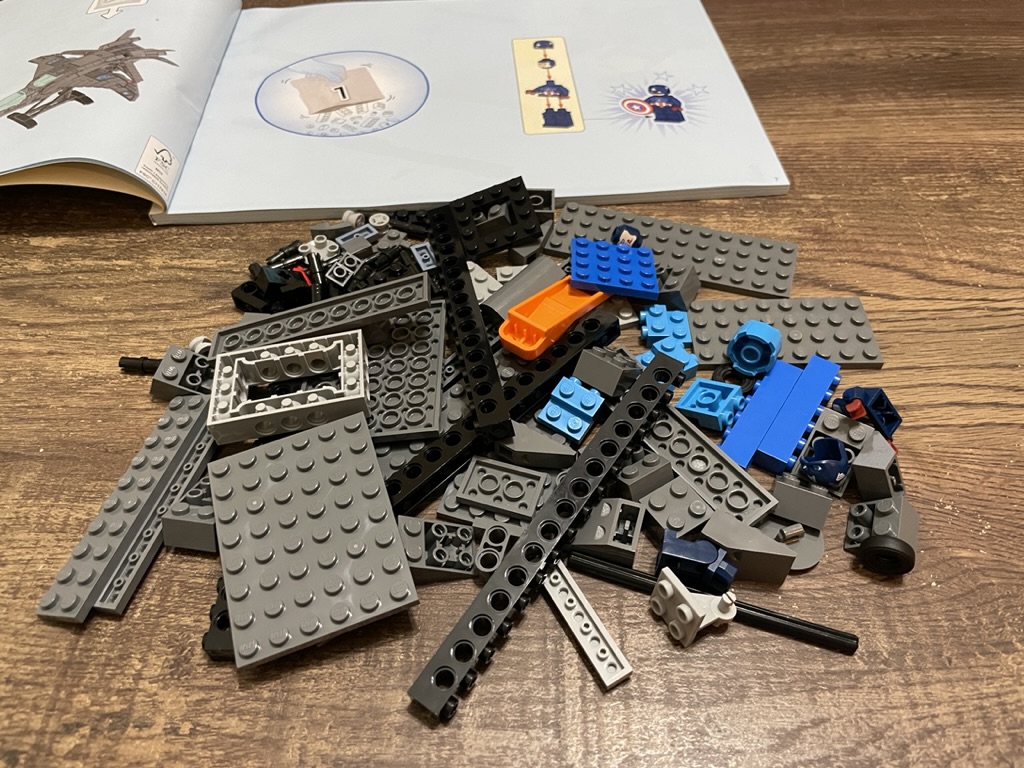
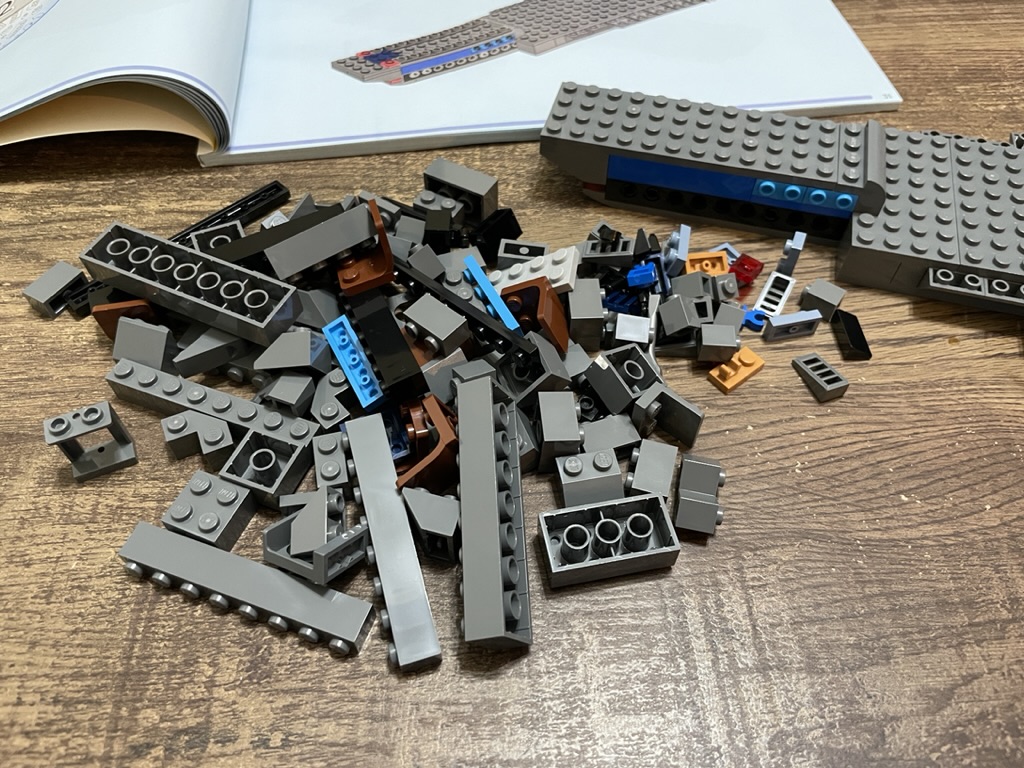
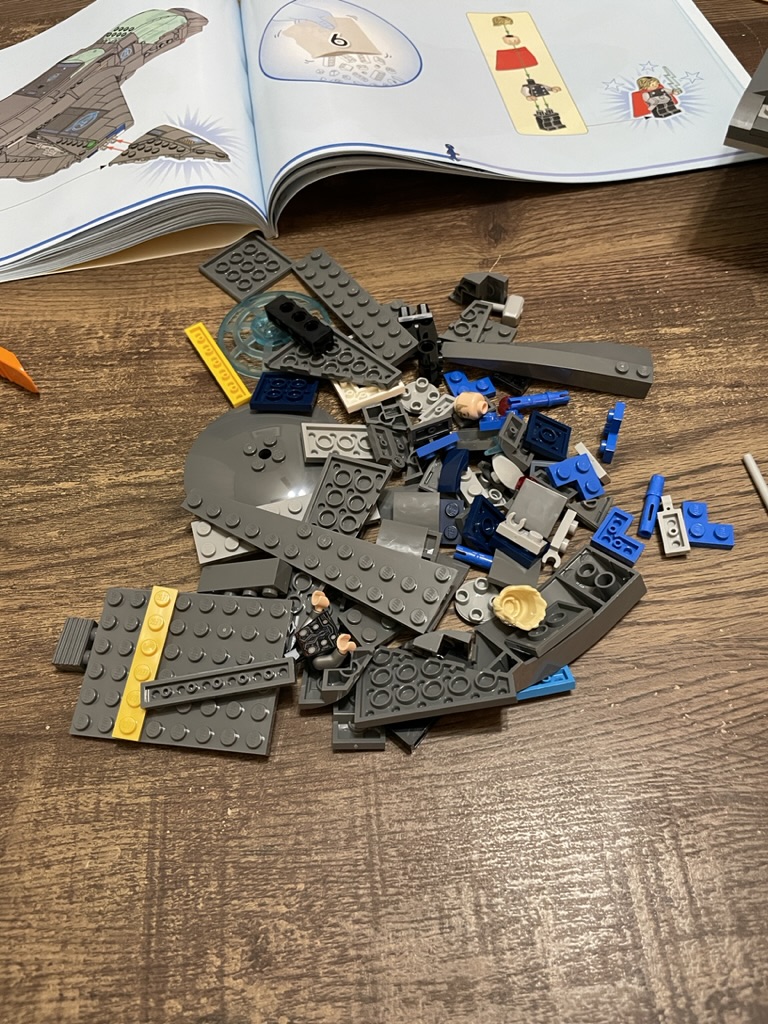
The Avengers Quinjet comes in typical Marvel packaging, showing that it is part of the Infinity saga at the top right of the box. The set is front and center, and the five minifigures are at the bottom. It’s 795 pieces with seven build stages, one instruction booklet, and two sticker sheets – one for SHIELD and one for Avengers motifs. Controversially, you must choose which sticker set you want to use, as the set does not provide additional pieces to switch the build between the two options. I went with the Avengers as I love them, and the blue on their stickers would look better than the grey of the SHIELD logo.


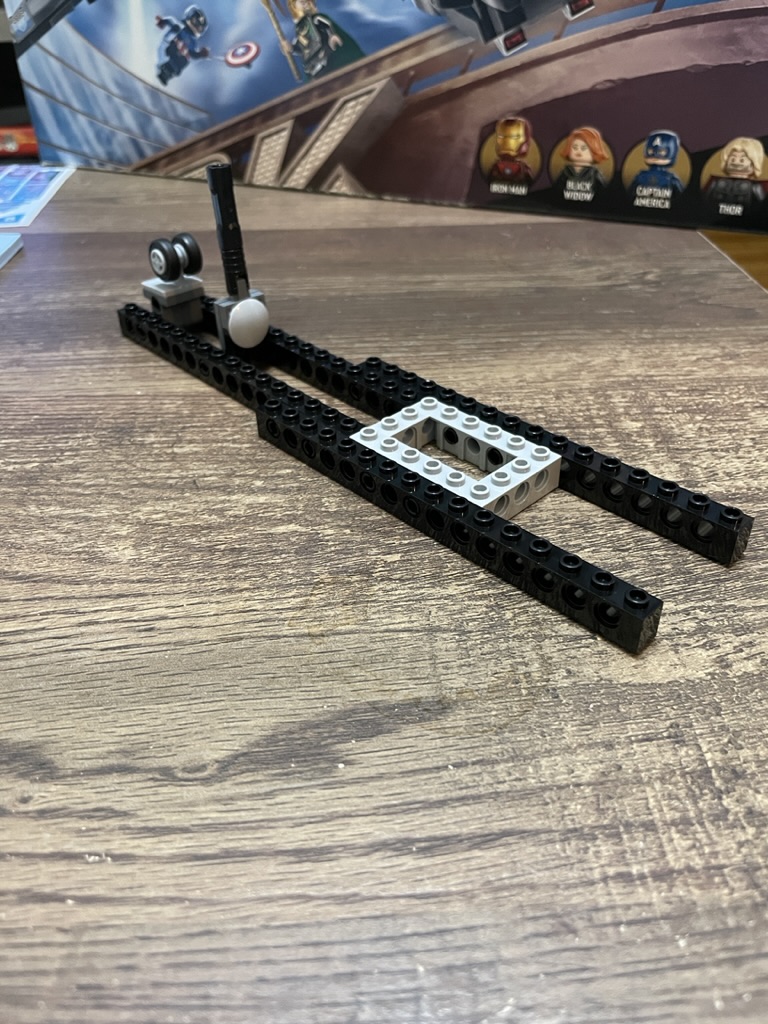
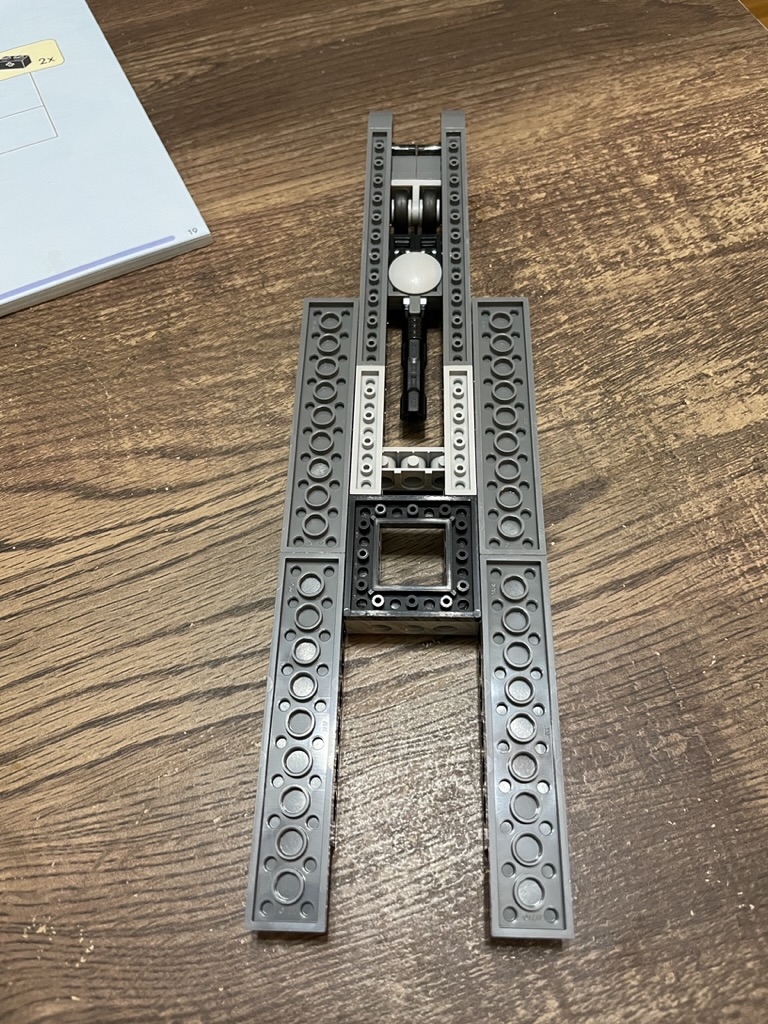
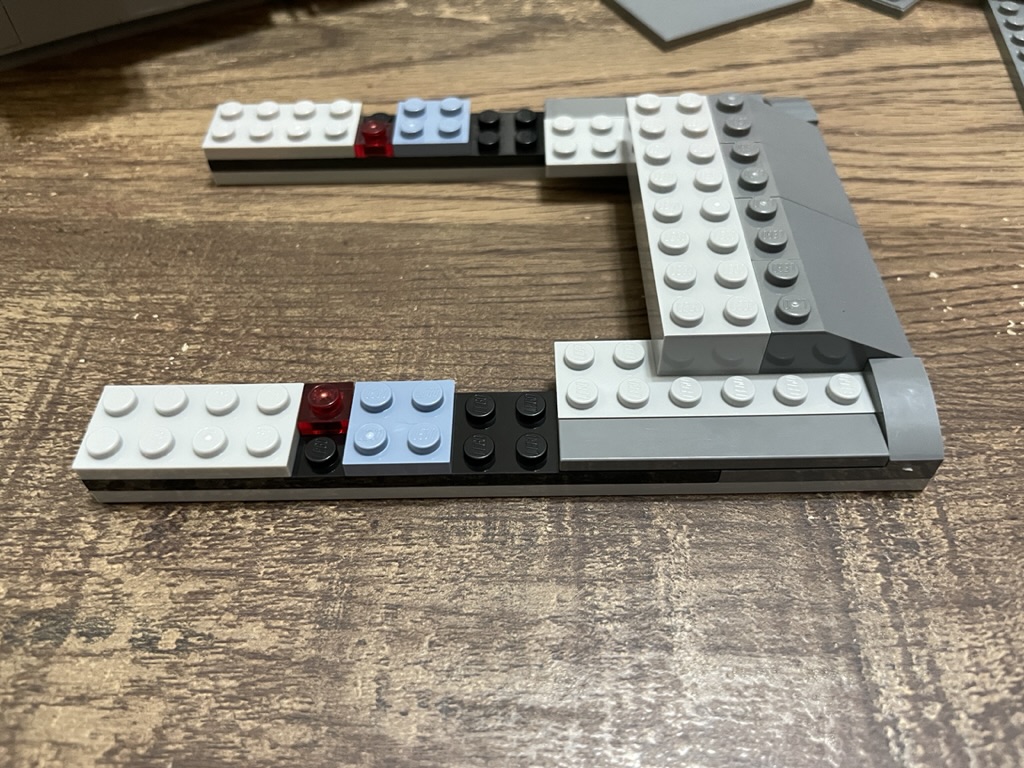
The first aspect of the build is using a series of technic bricks to generate the foundation of the aircraft. At the front, we have the landing gear and the front gun that tuck inside when not deployed. The underside of the bricks is covered in plates, generating a flat base and an anchor point for inverted slopes to start the fuselage. With the slopes in place, the jet’s rear has a couple of black modified plates with clips that will hold the cargo door. An axel with clips is inserted through the technic bricks to hold the rear landing gears. At the front, two transparent red 1×1 tiles are placed as warning lights so that other aircraft can visualize the vessel in flight. A few of these tiles are dotted around the design for this purpose.
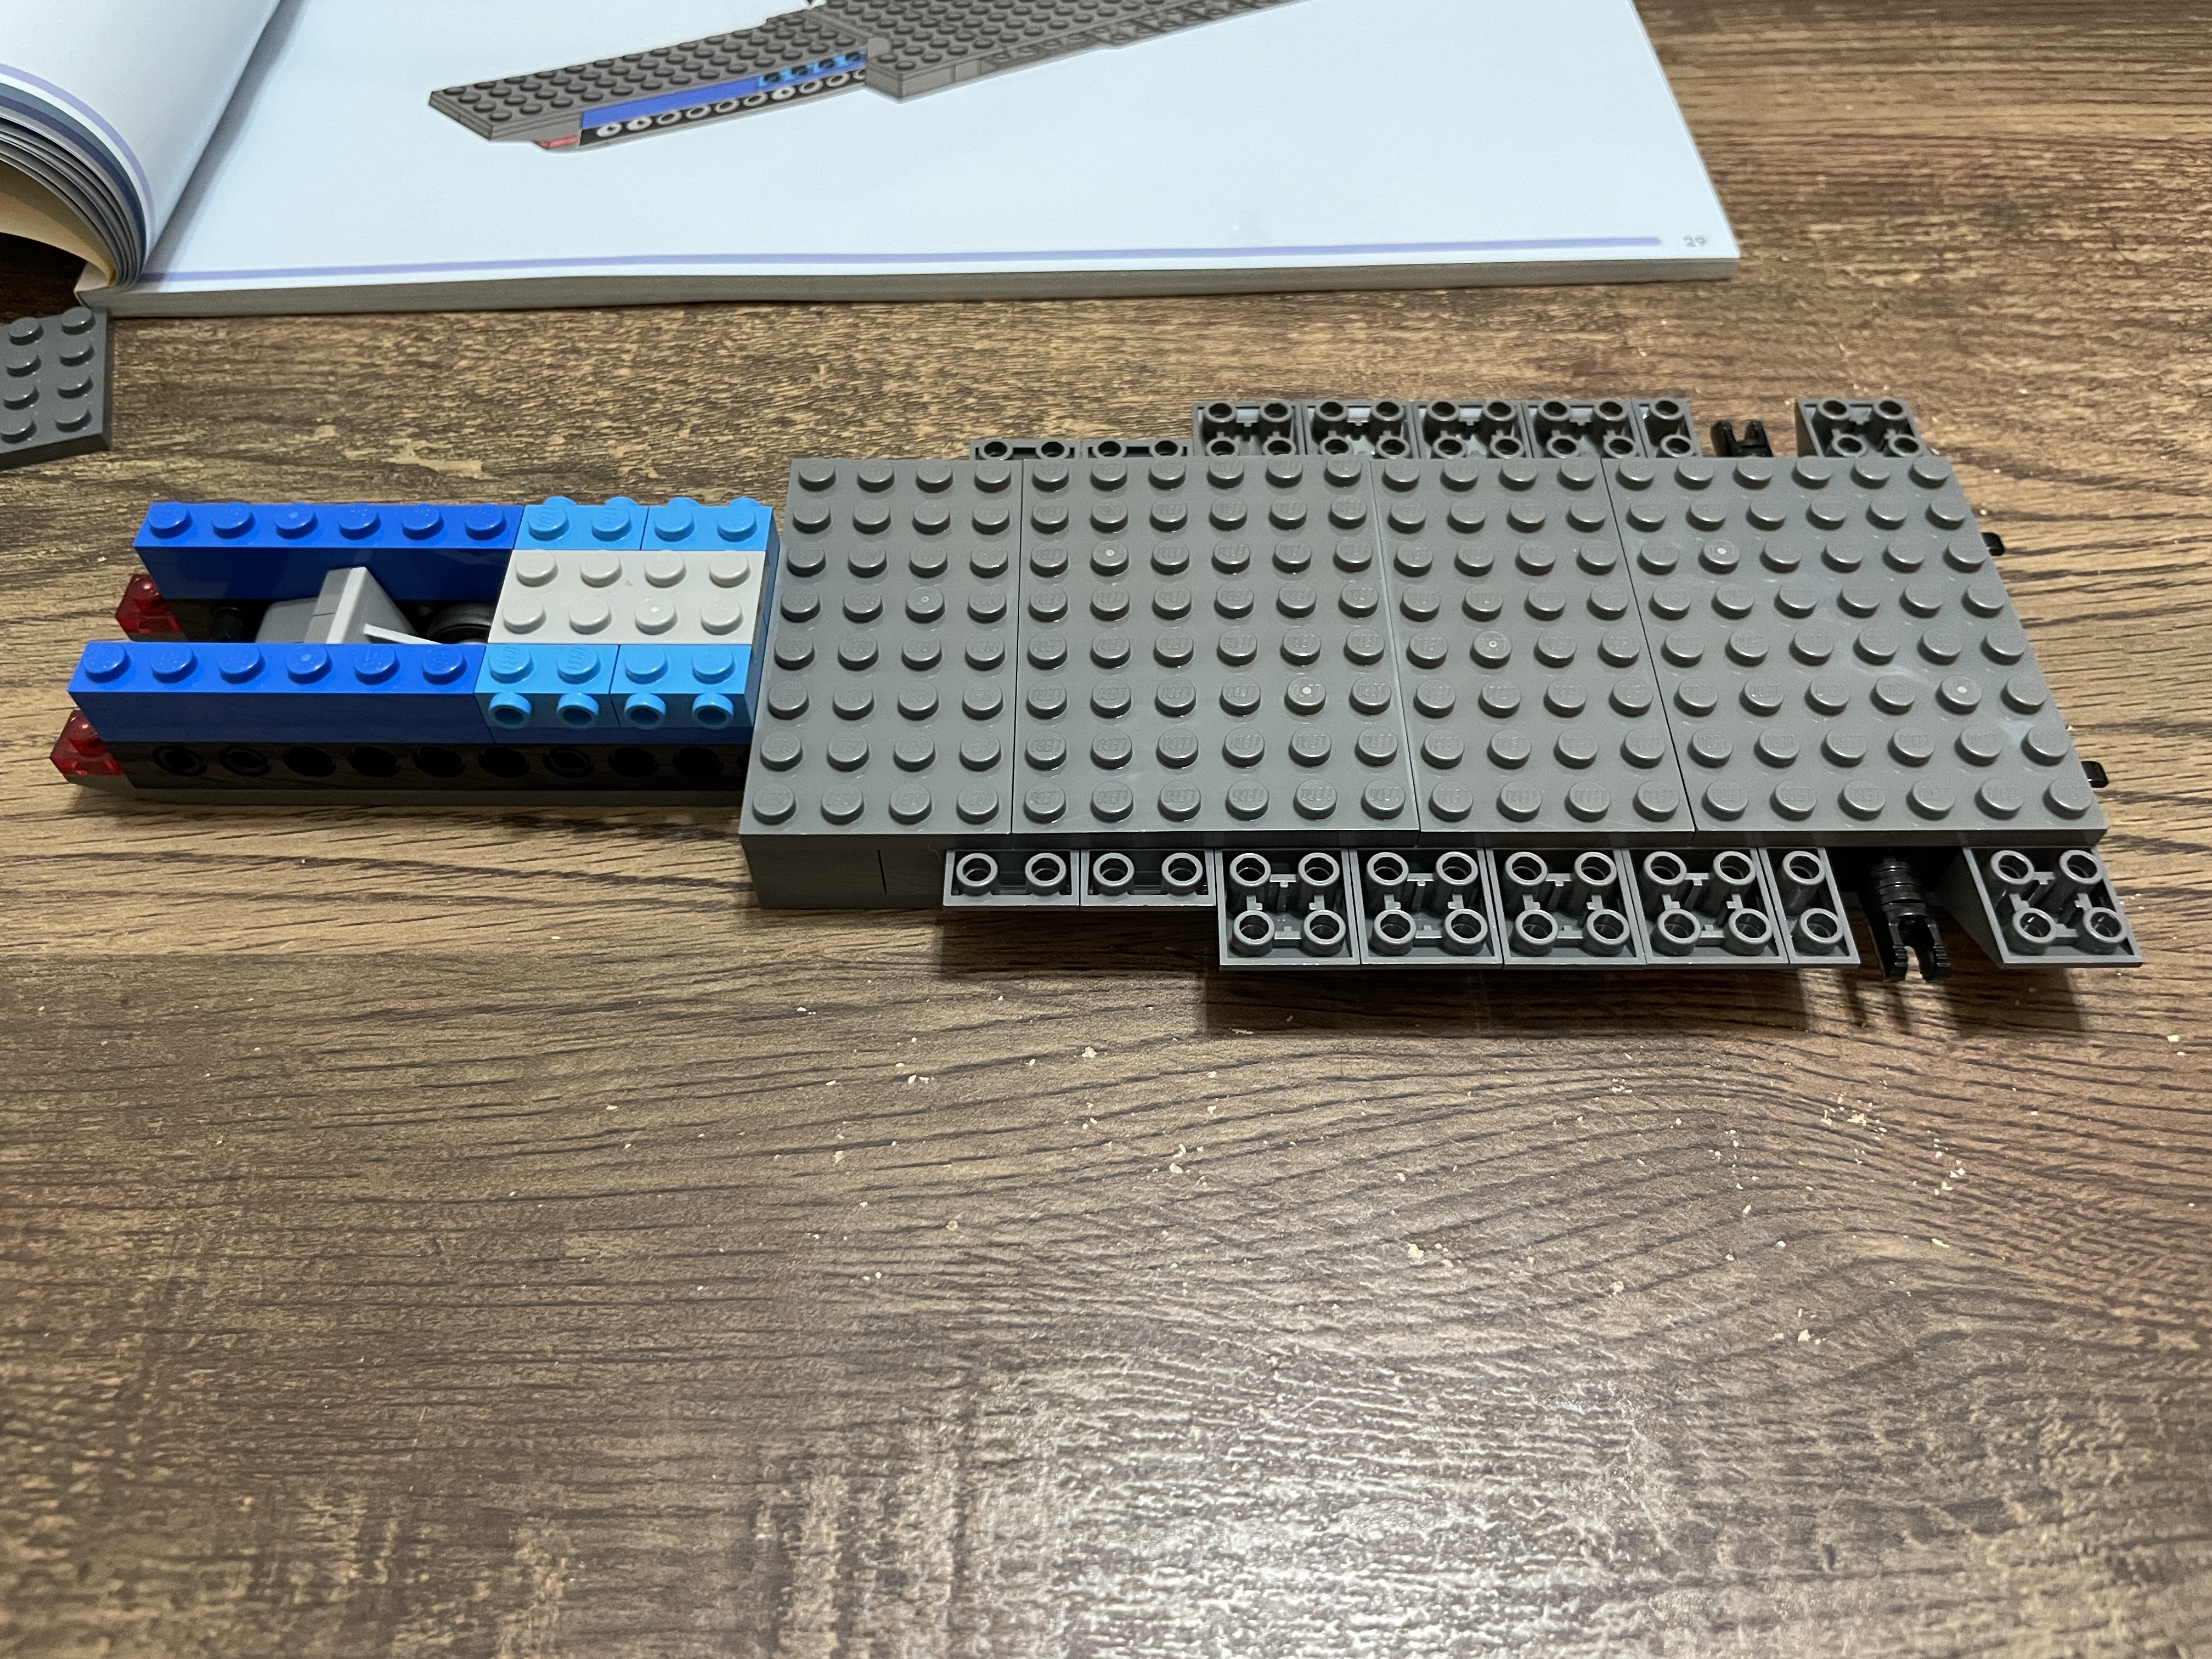
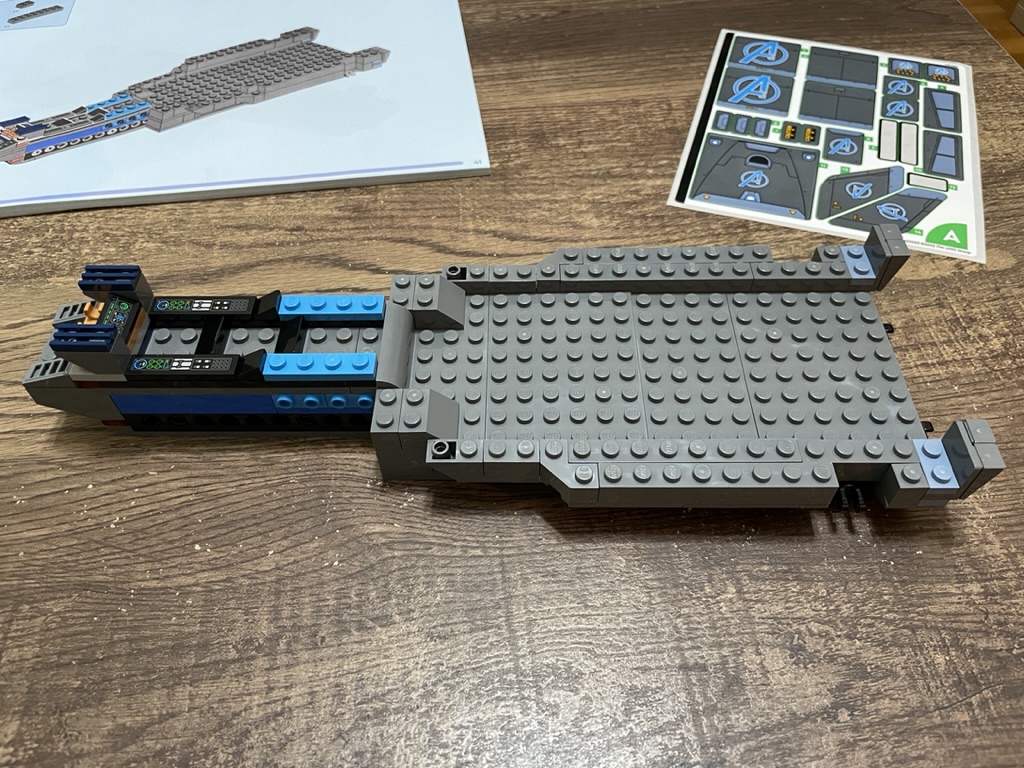
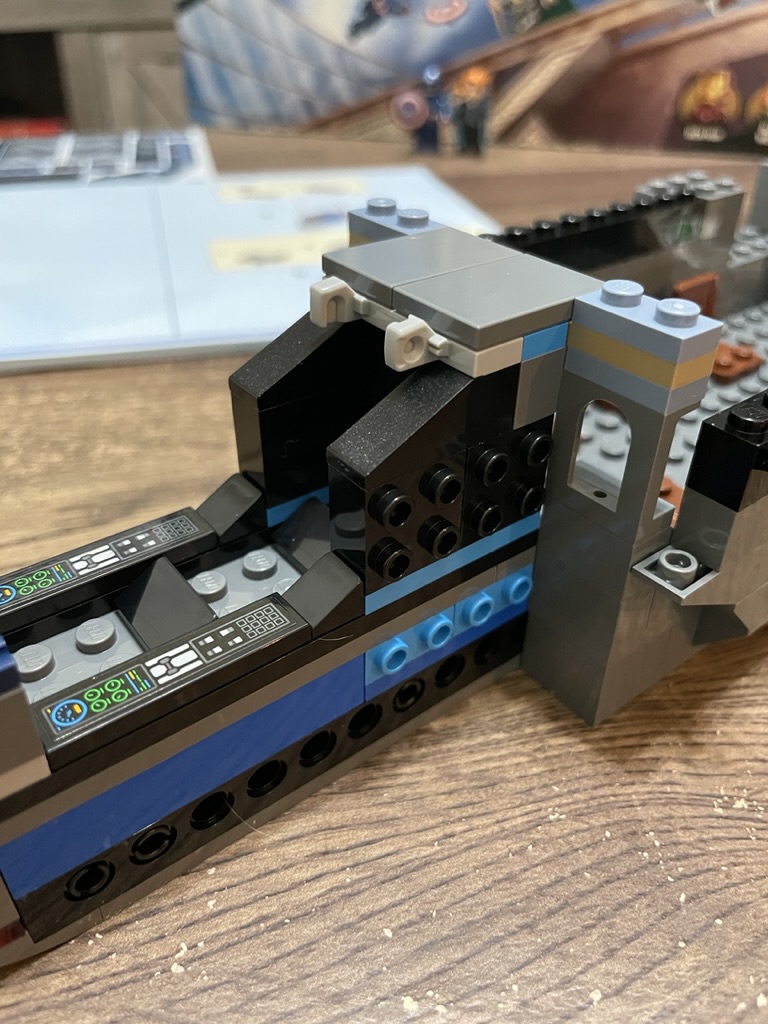
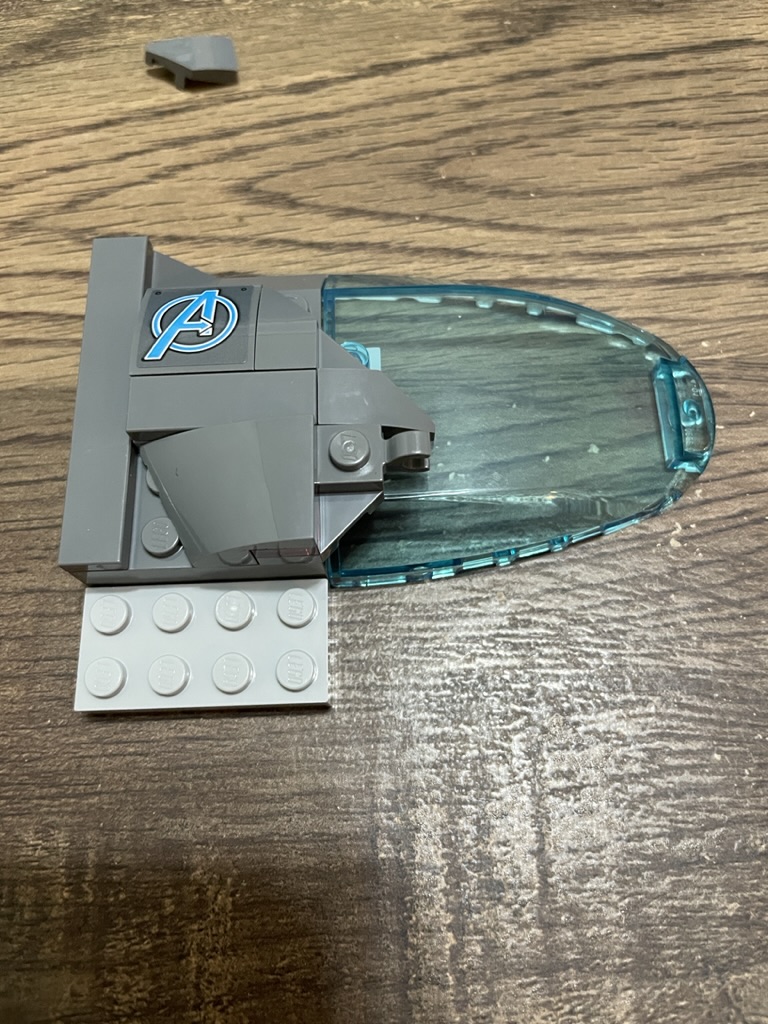
The floor of the cargo bay starts with a single dark grey plate that conceals the technic bricks that were the structural foundation of the jet. The narrow section at the front will become the cockpit, and it’s framed with two 1×6 blue bricks and four 1×2 studs not on top (SNOT) bricks sitting behind them. The cockpit’s floor is primarily a 4×12 dark grey plate with a modified curved plate at the rear. Inverted slopes streamline the front of the design.


Stage two builds on the foundation, and the first sticker elements are deployed. The cockpit comes to life with sticker control panels on either side of the two seats, separated by a black wedge. The six available studs at the rear cannot be used for seating as the area will be too narrow once the build is complete. Another sticker element provides a front console, navy blue grills provide texture, and a modified yellow plate offers clips that will attach the jet’s nose.
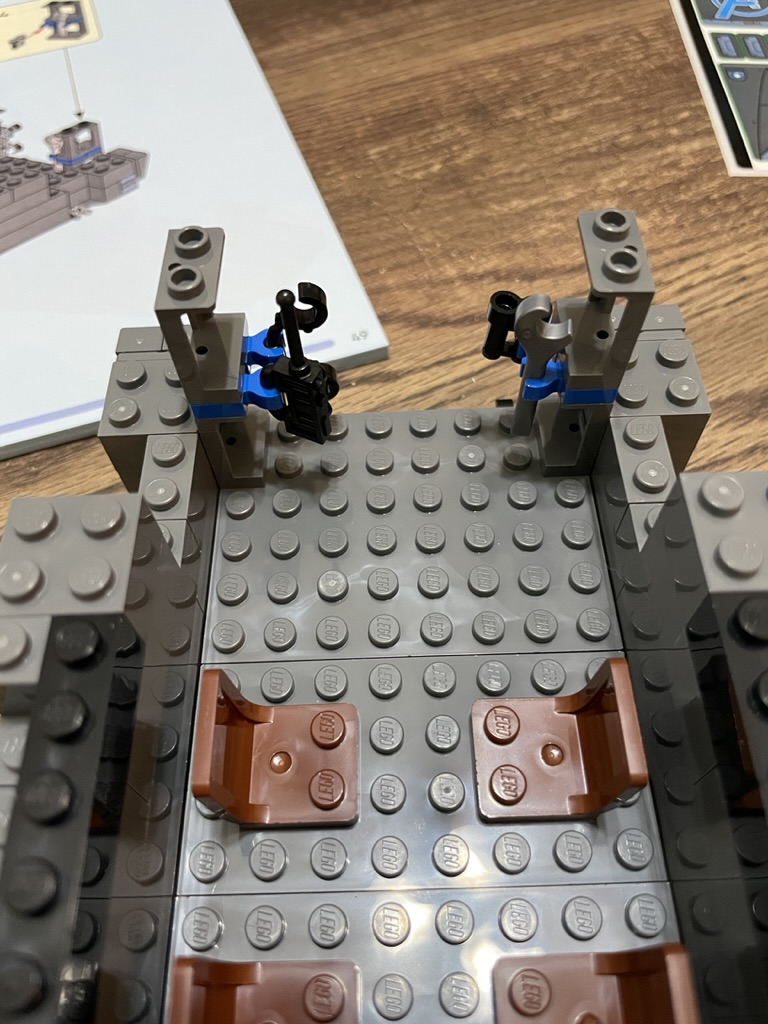
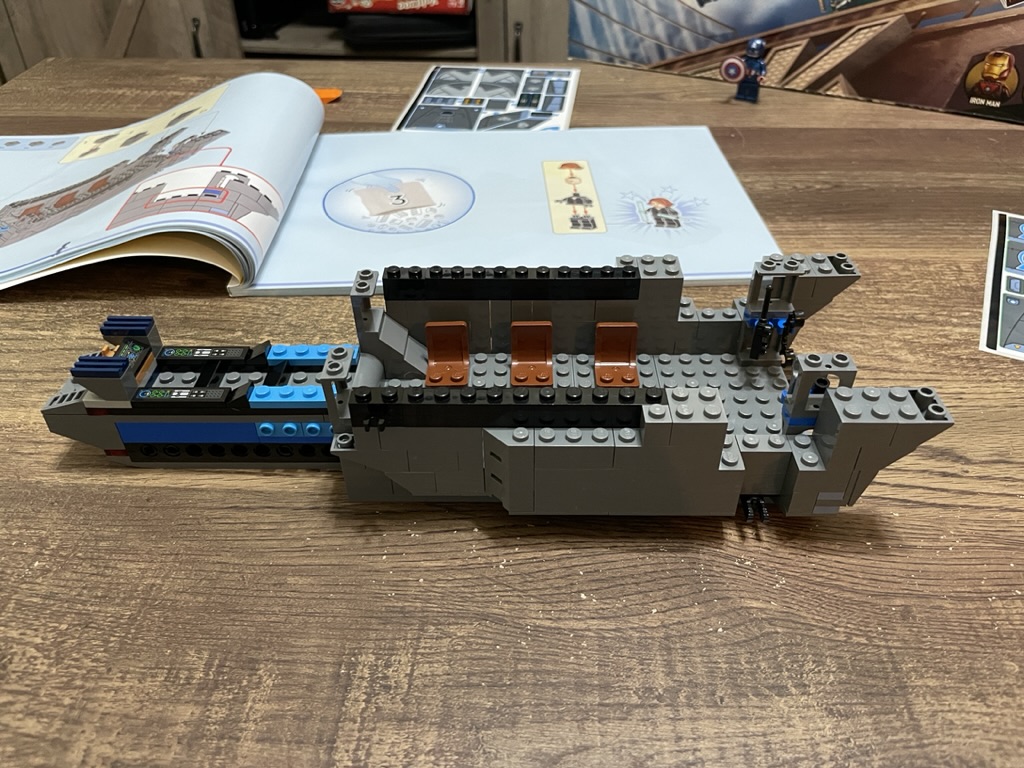
The fuselage starts to rise with a layer of mostly 1x dark grey bricks. Corner wedge bricks and inverted slopes soften some edges. Six brown chairs are added inside the cargo bay to hold our heroes. It looks empty and dull, but I don’t know what else I want to see there. A tool bench or another computer console station? At the rear, we have a mini tool bay with handcuffs, a radio, a spanner, and binoculars. It’s well designed for the Avengers to grab something they need before jumping out of the bay door.
By the end of stage two, the interior of the Quinjet is finished, and the fuselage footprint is outlined.


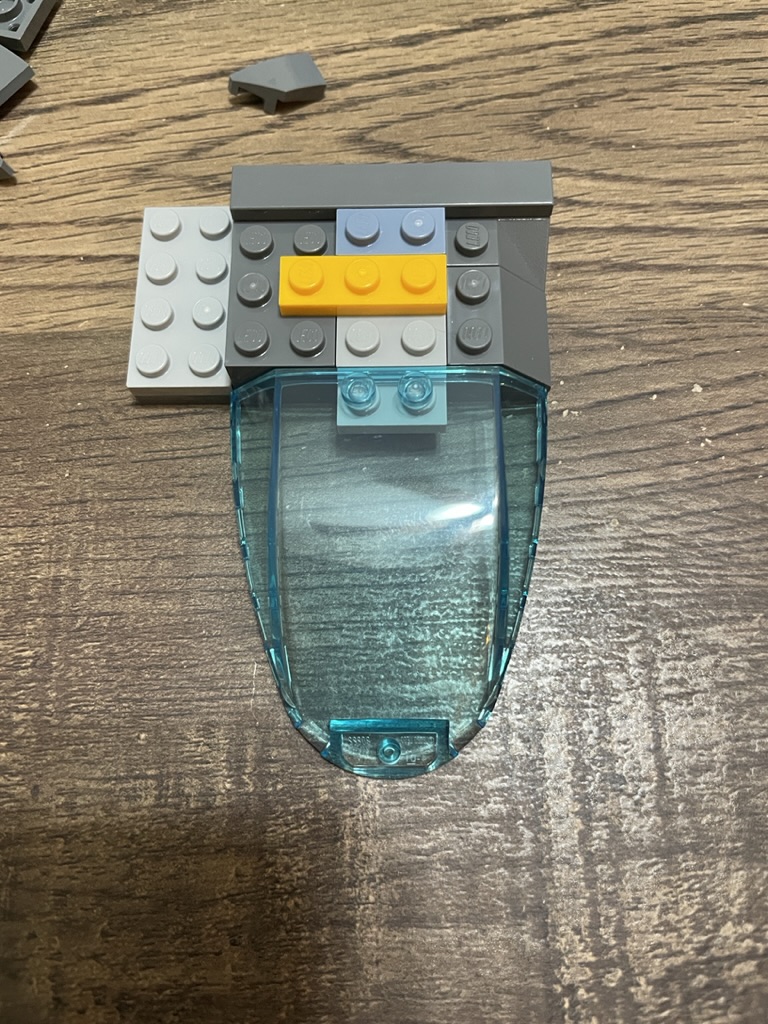
Stage three introduces the transparent blue coverings for the cockpit, a highlight of the build for me. First, we need to construct an anchor point for the canopy. The rear of the cockpit has black SNOT bricks placed onto the top of the light blue plate, and one SNOT brick is covered with a slope to provide a polished appearance. The other SNOT brick has two 1×1 bricks anchoring the modified plate with clips covered in dark grey tile.
The nose of the jet is a series of tiled-covered elements which generate a beautiful exterior and sit on the previously constructed base. There is a prominent sticker element that you will want to align as perfectly as the human eye allows. You’ll be looking at it every time you see this build!

The sides of the cockpit are the next segments, and each side is a mirror construct of the other. First, several light and dark grey plates are stacked to generate the base. The transparent blue windshield, dark grey slopes, and a 1×6 tile are next. On top of this base, additional rectangular and curved sloped tiles smooth the edges and cover the studs. One curved tile has an Avengers sticker element. Next, a transparent red 1×1 plate and a dark grey modified plate with a clip were then covered with a 2×3 rounded tile slope.
To the clip, a few hinged pieces are placed together and finished with a rounded slope to cover the bottom section of the blue window. Finally, the remaining exposed studs are coved with a 1×8 curved slope, slopped grill, and a final dark grey slope. These are added to each side of the cockpit with a transparent blue cockpit cover on the top.


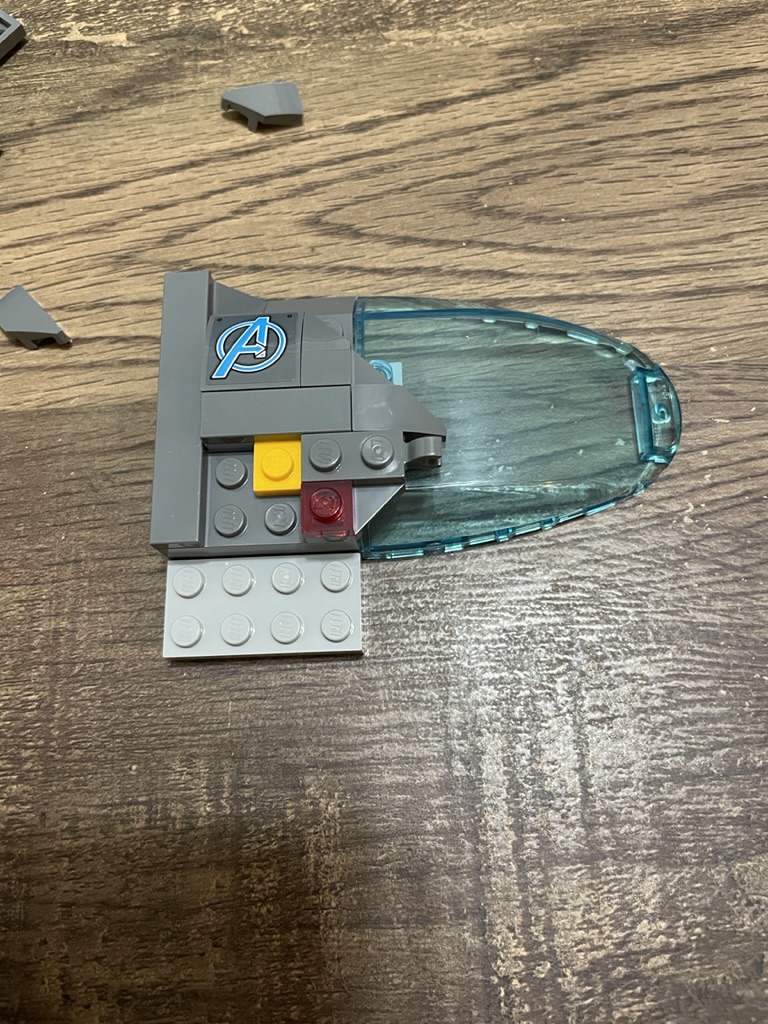


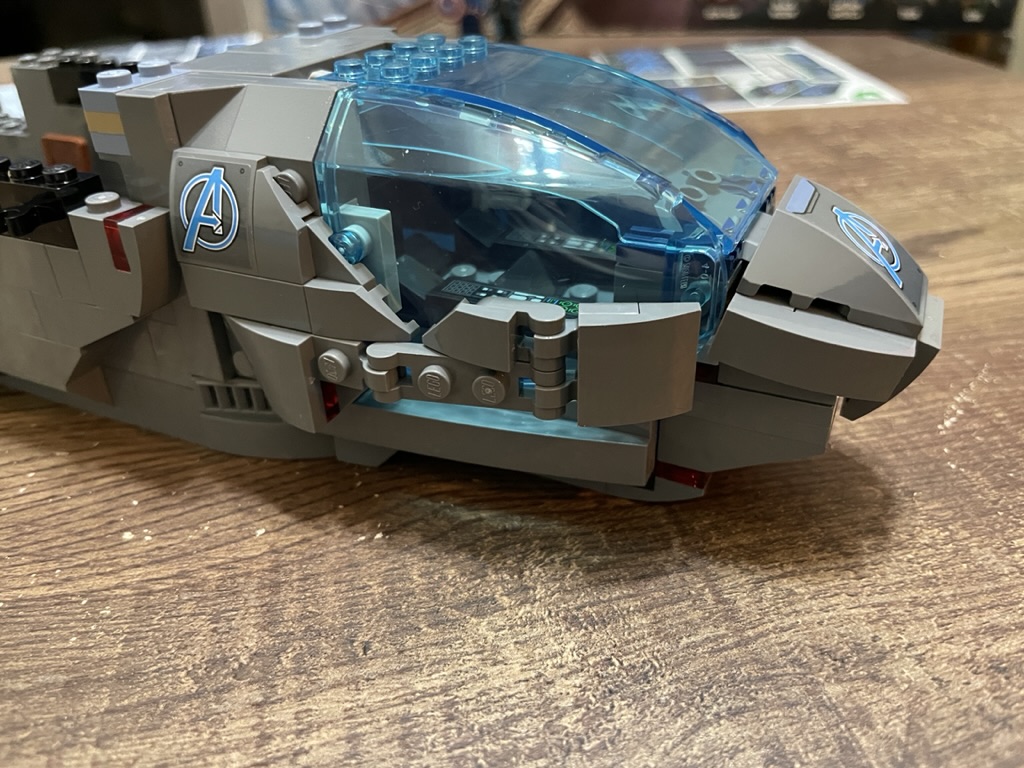
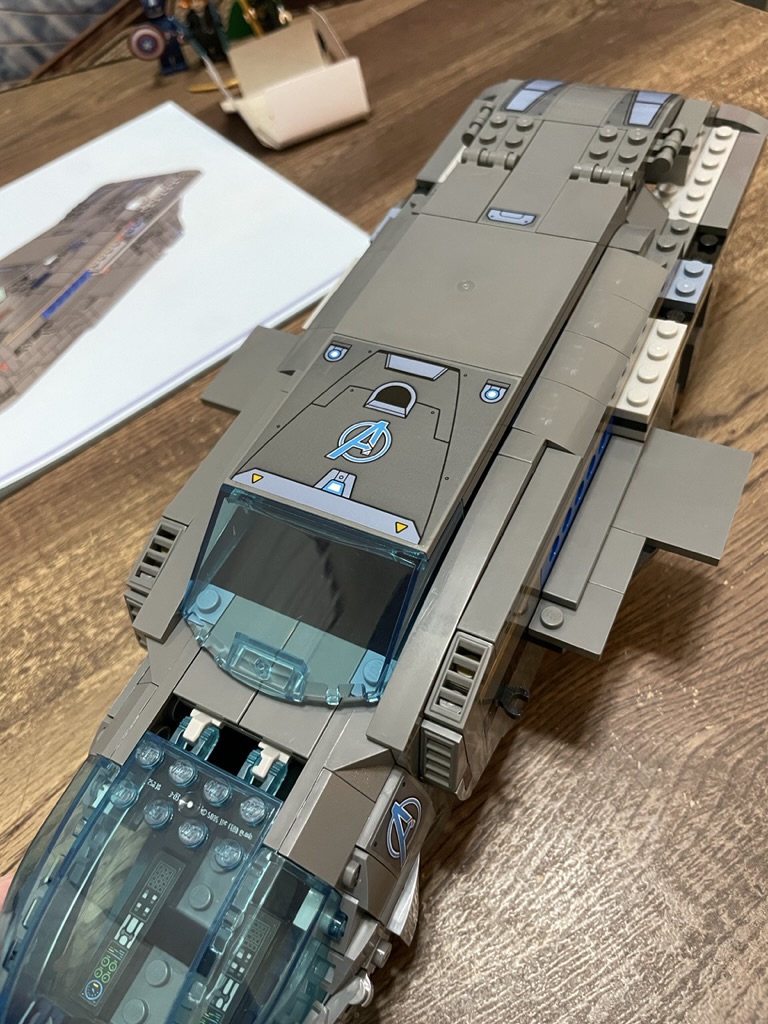
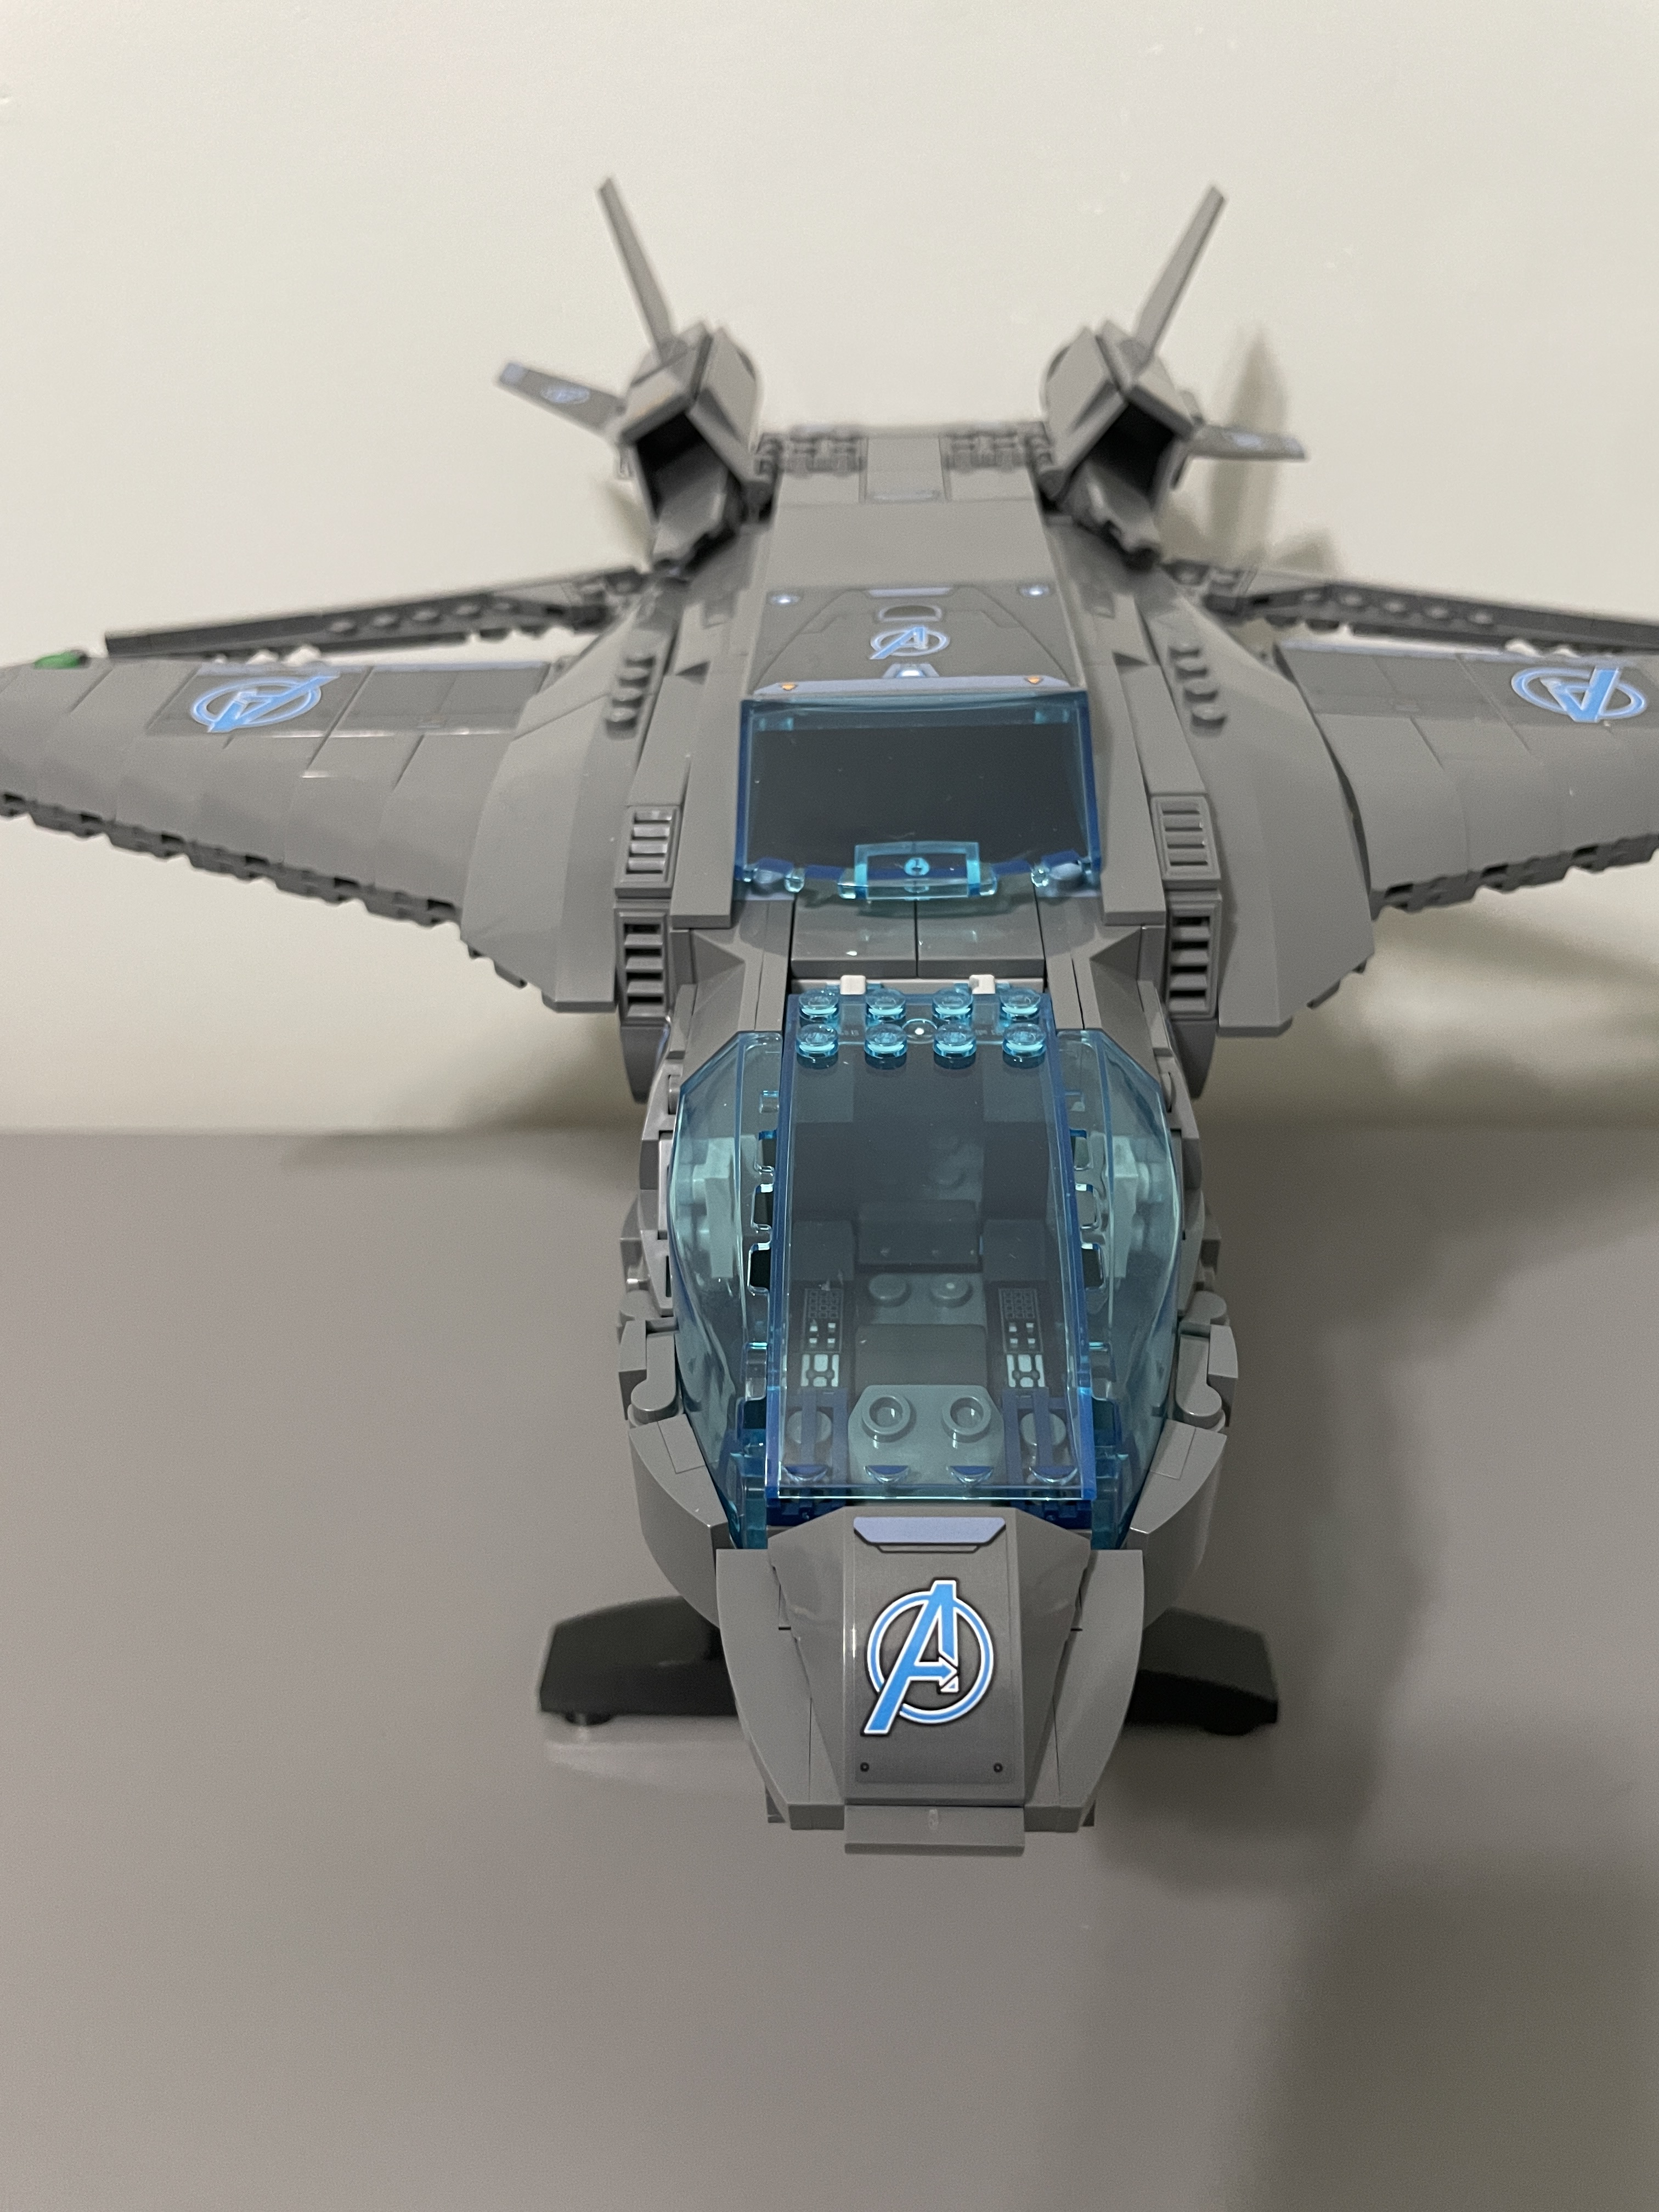
The front of the jet looks terrific with all these pieces added to give detail. I’m a fan of the design with the hinged elements to hug the sides and create a streamlined appearance. I’m glad I went for the Avengers motif, as the blue of the windshield makes the stickers’ color pop further.

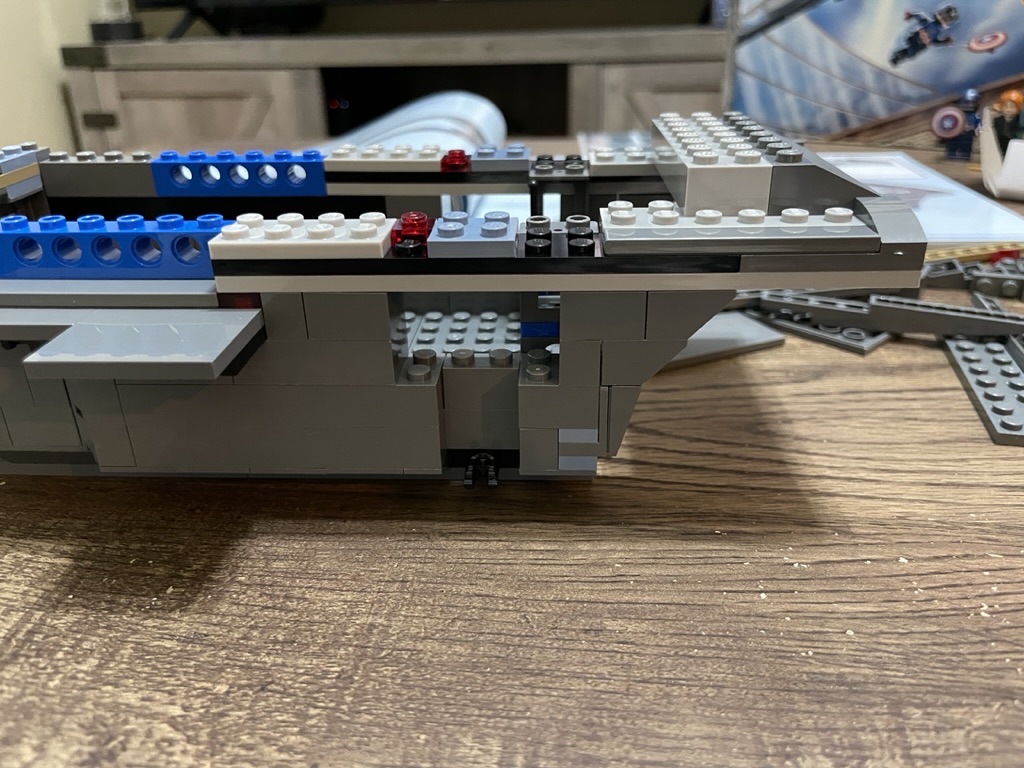
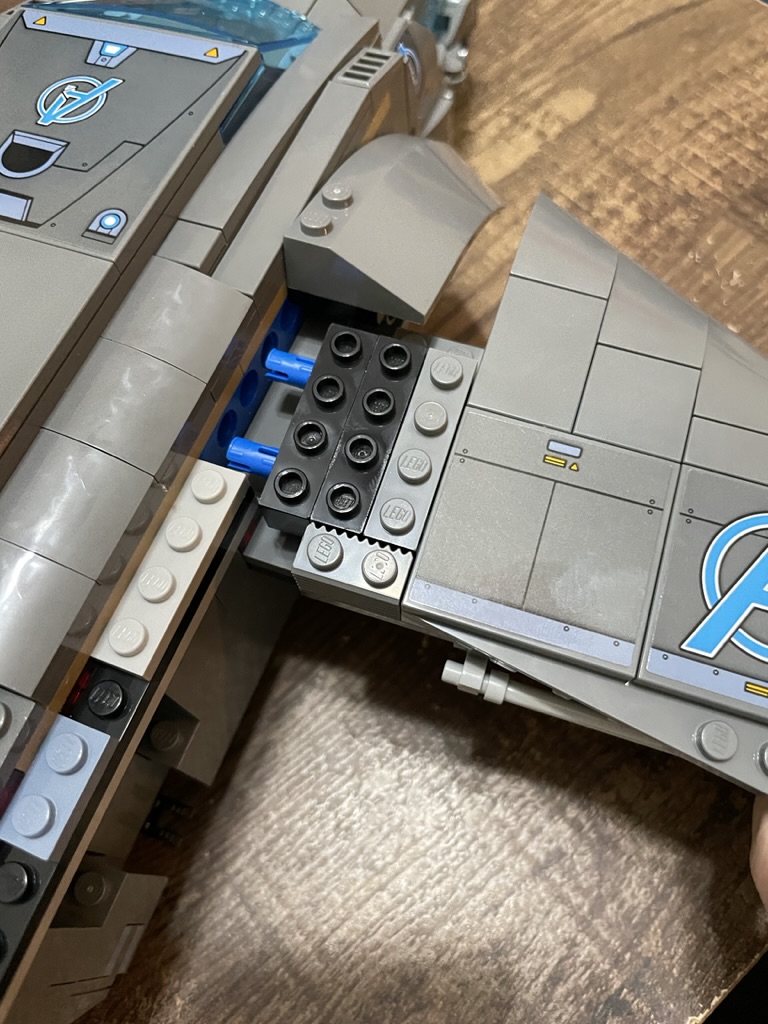
With the cockpit complete, additions to the fuselage are made to enable anchoring of the wings. First, blue technic 1×6 bricks on top of modified dark grey tiles create the start of the wing. Off the ship, black, light grey, and dark grey plate make the fuselage top, with some dark grey slope and tile elements added. At the rear, four 2×3 dark grey slopes and placed in front of a 2×8 light grey brick. Light blue, tan, and dark grey plates are layered, allowing dark grey curved slopes to connect along the edge, generating a smooth surface.


With most of the fuselage complete, the cover is next. It’s built separately and begins with connecting modified 1×2 dark grey plates with clips to dark blue and dark grey plates. Onto these three, 2×4 curved slopes are attached, and two are decorated with stickers. Additional clips and a 2×4 flat tile is added too. This element is attached to the rear with the fasteners ready for the canopy and wings.

The canopy build begins with a 4×4 light grey plate connected to a 1×6 dark grey plate with 2×3 dark grey tiles. Another sticker element here enhances the design.
Two clips on modified plates are held at the back by two additional 2×3 tiles and a large 6×6 dark grey tile on two 1×10 dark grey plates. A significant sticker element covers another 6×6 dark grey tile and sits next to the blank one. Finally, a transparent blue windshield is attached to the large tile to complete the canopy.
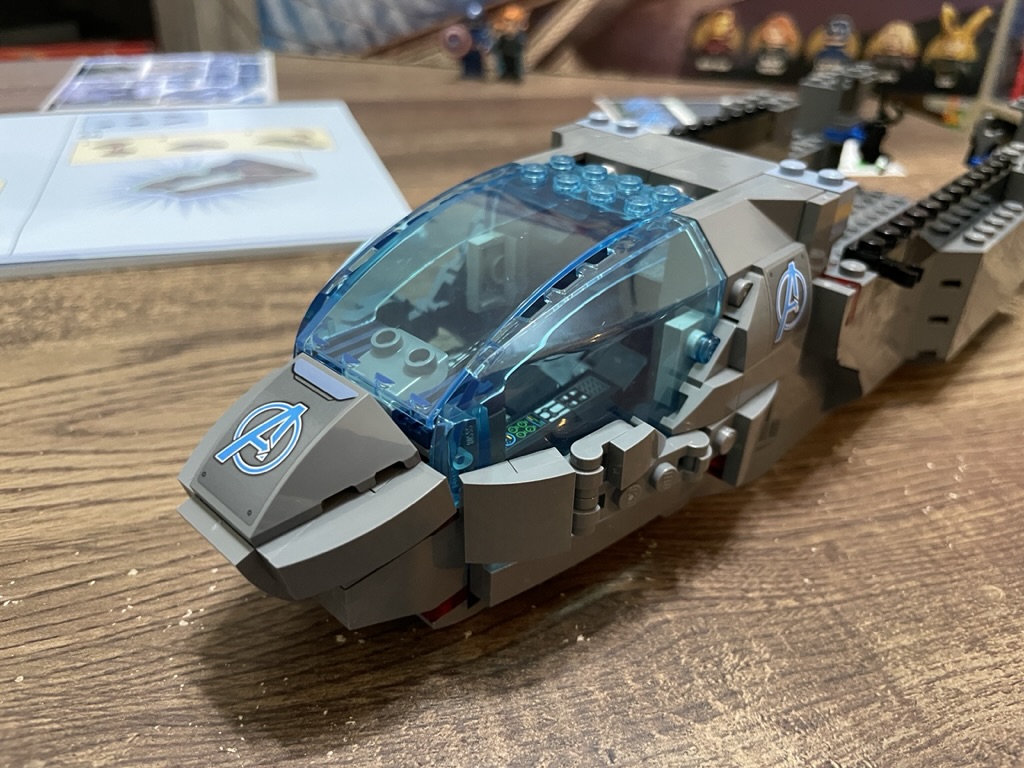
I am giddy at how fantastic this looks. The combination of blue and dark grey pieces is striking. The functionality of the roof is terrific too. Opening the back and popping the minifigures and their accessories in is easy. By the end of this stage, the entire fuselage is completed, and all that’s needed now are some wings so this jet can fly.


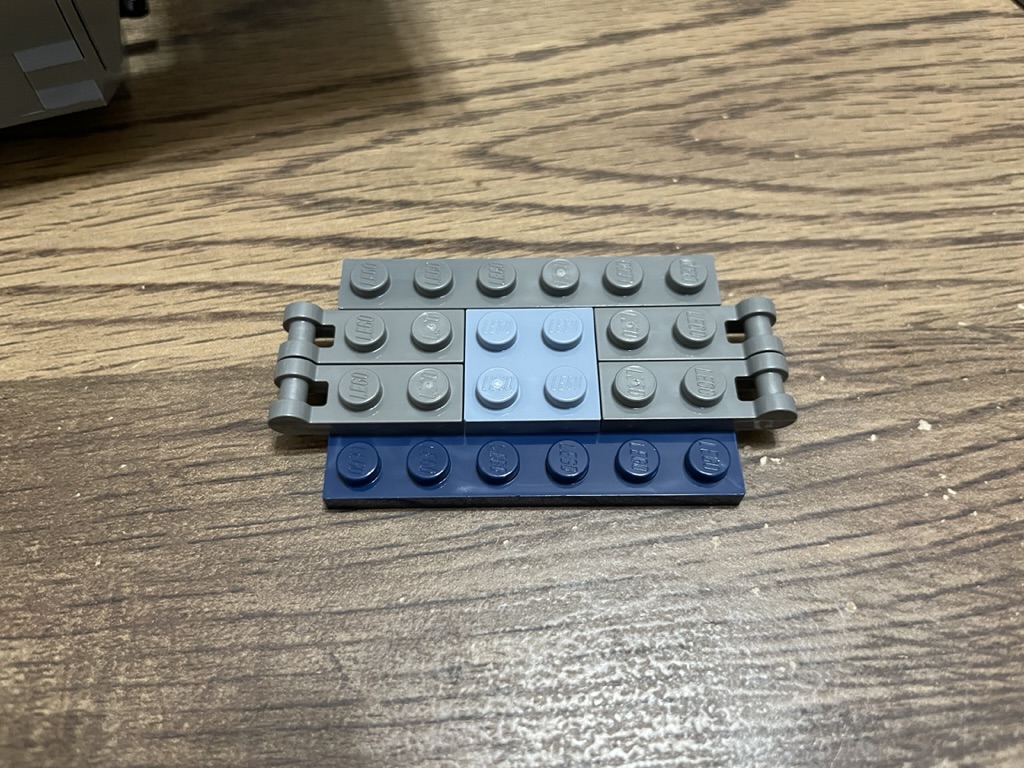
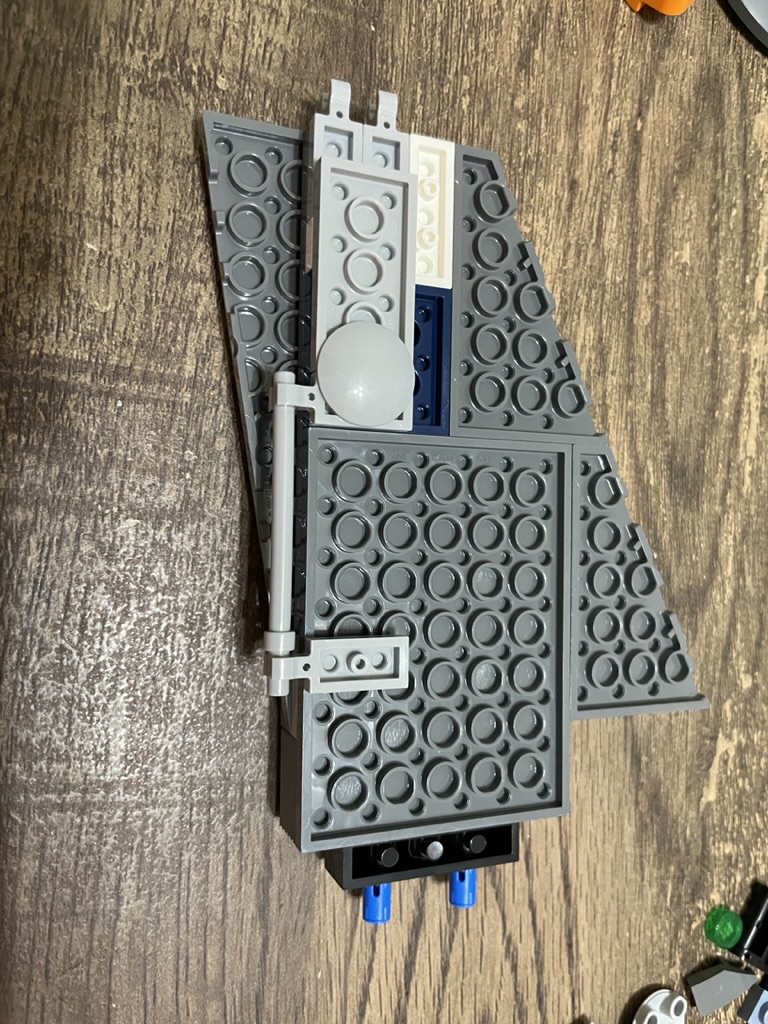
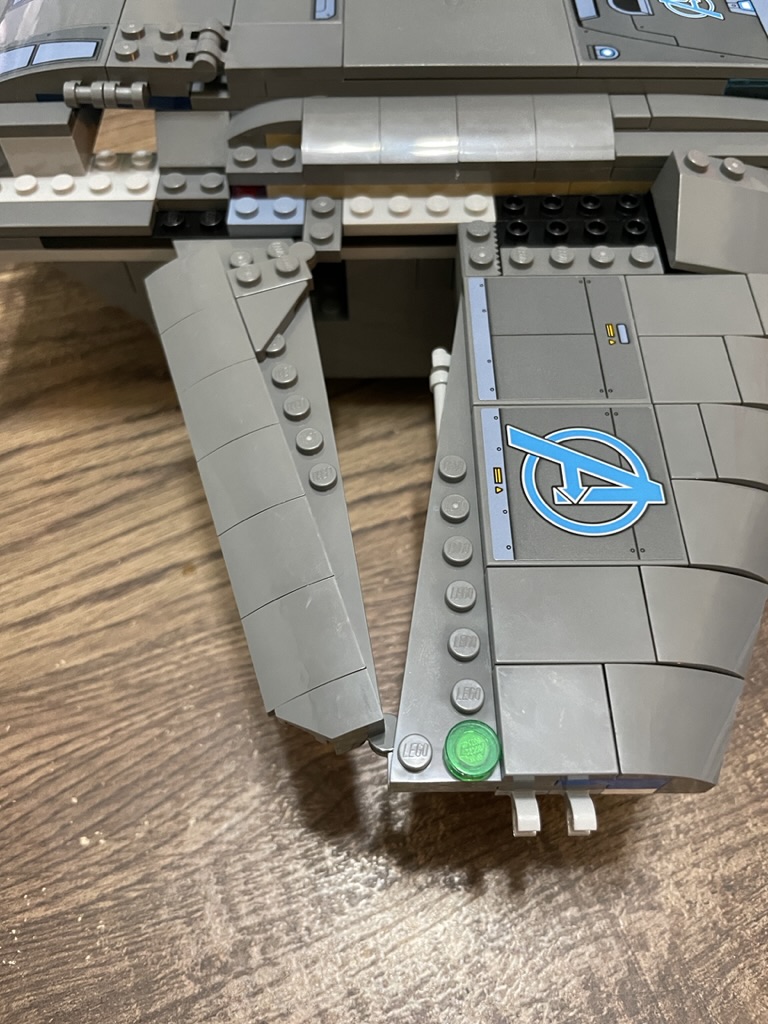
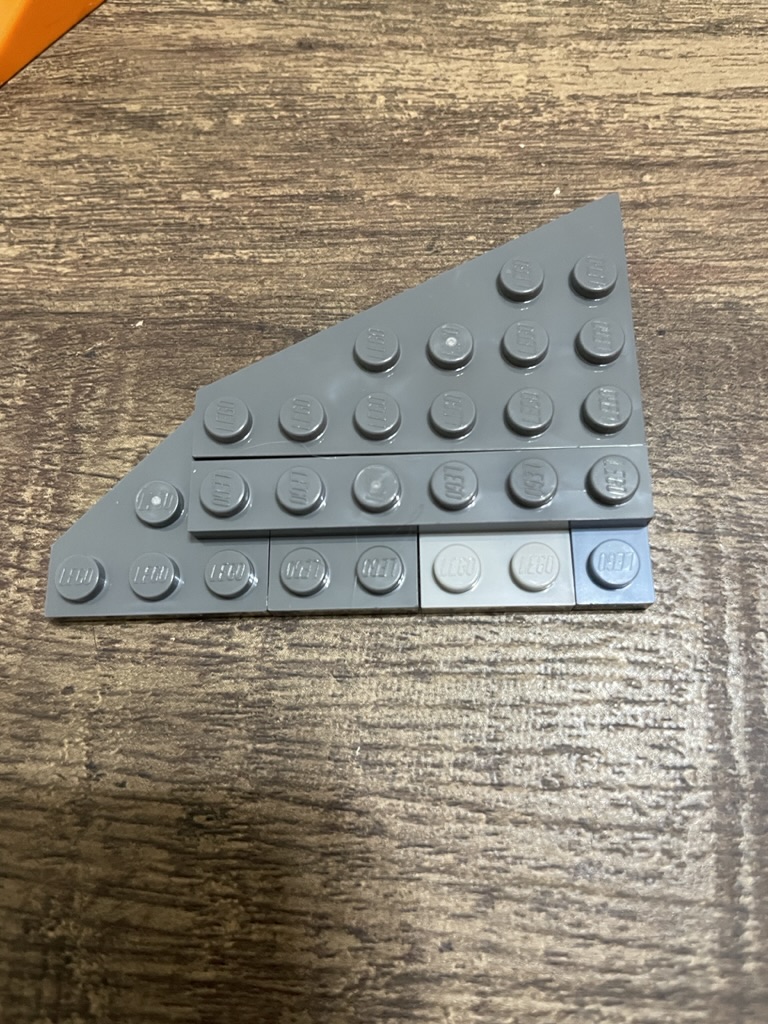
Wing construction begins with a layer of plates of various colors with a couple of clips at one end. Once flipped, further plates are added. At the chassis end, technic bricks have two blue pins inserted. These will attach to the fuselage. Further plates, mainly 2×2 dark blue, are added to anchor additional dark grey triangular plates that frame the wing.

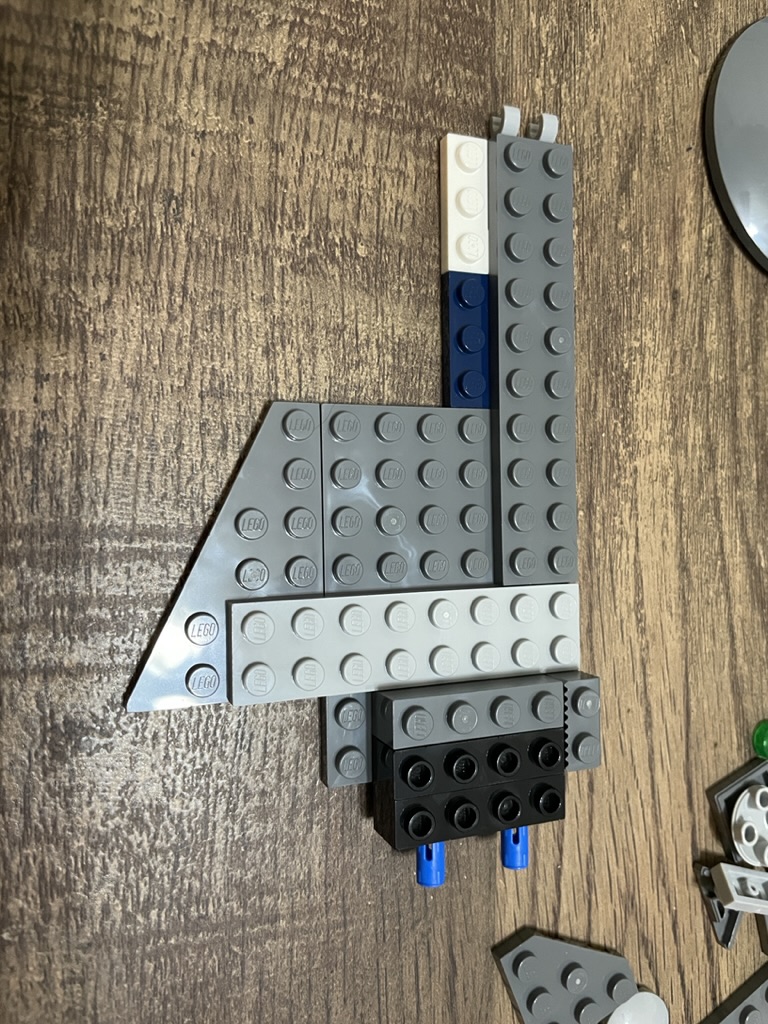

On top of dark blue plates, corner blue plates are placed with some interior bright blue and yellow 1x plates. These plates all act as the base support for the bow and flat tiles, giving the wing a smooth and aerodynamic appearance.
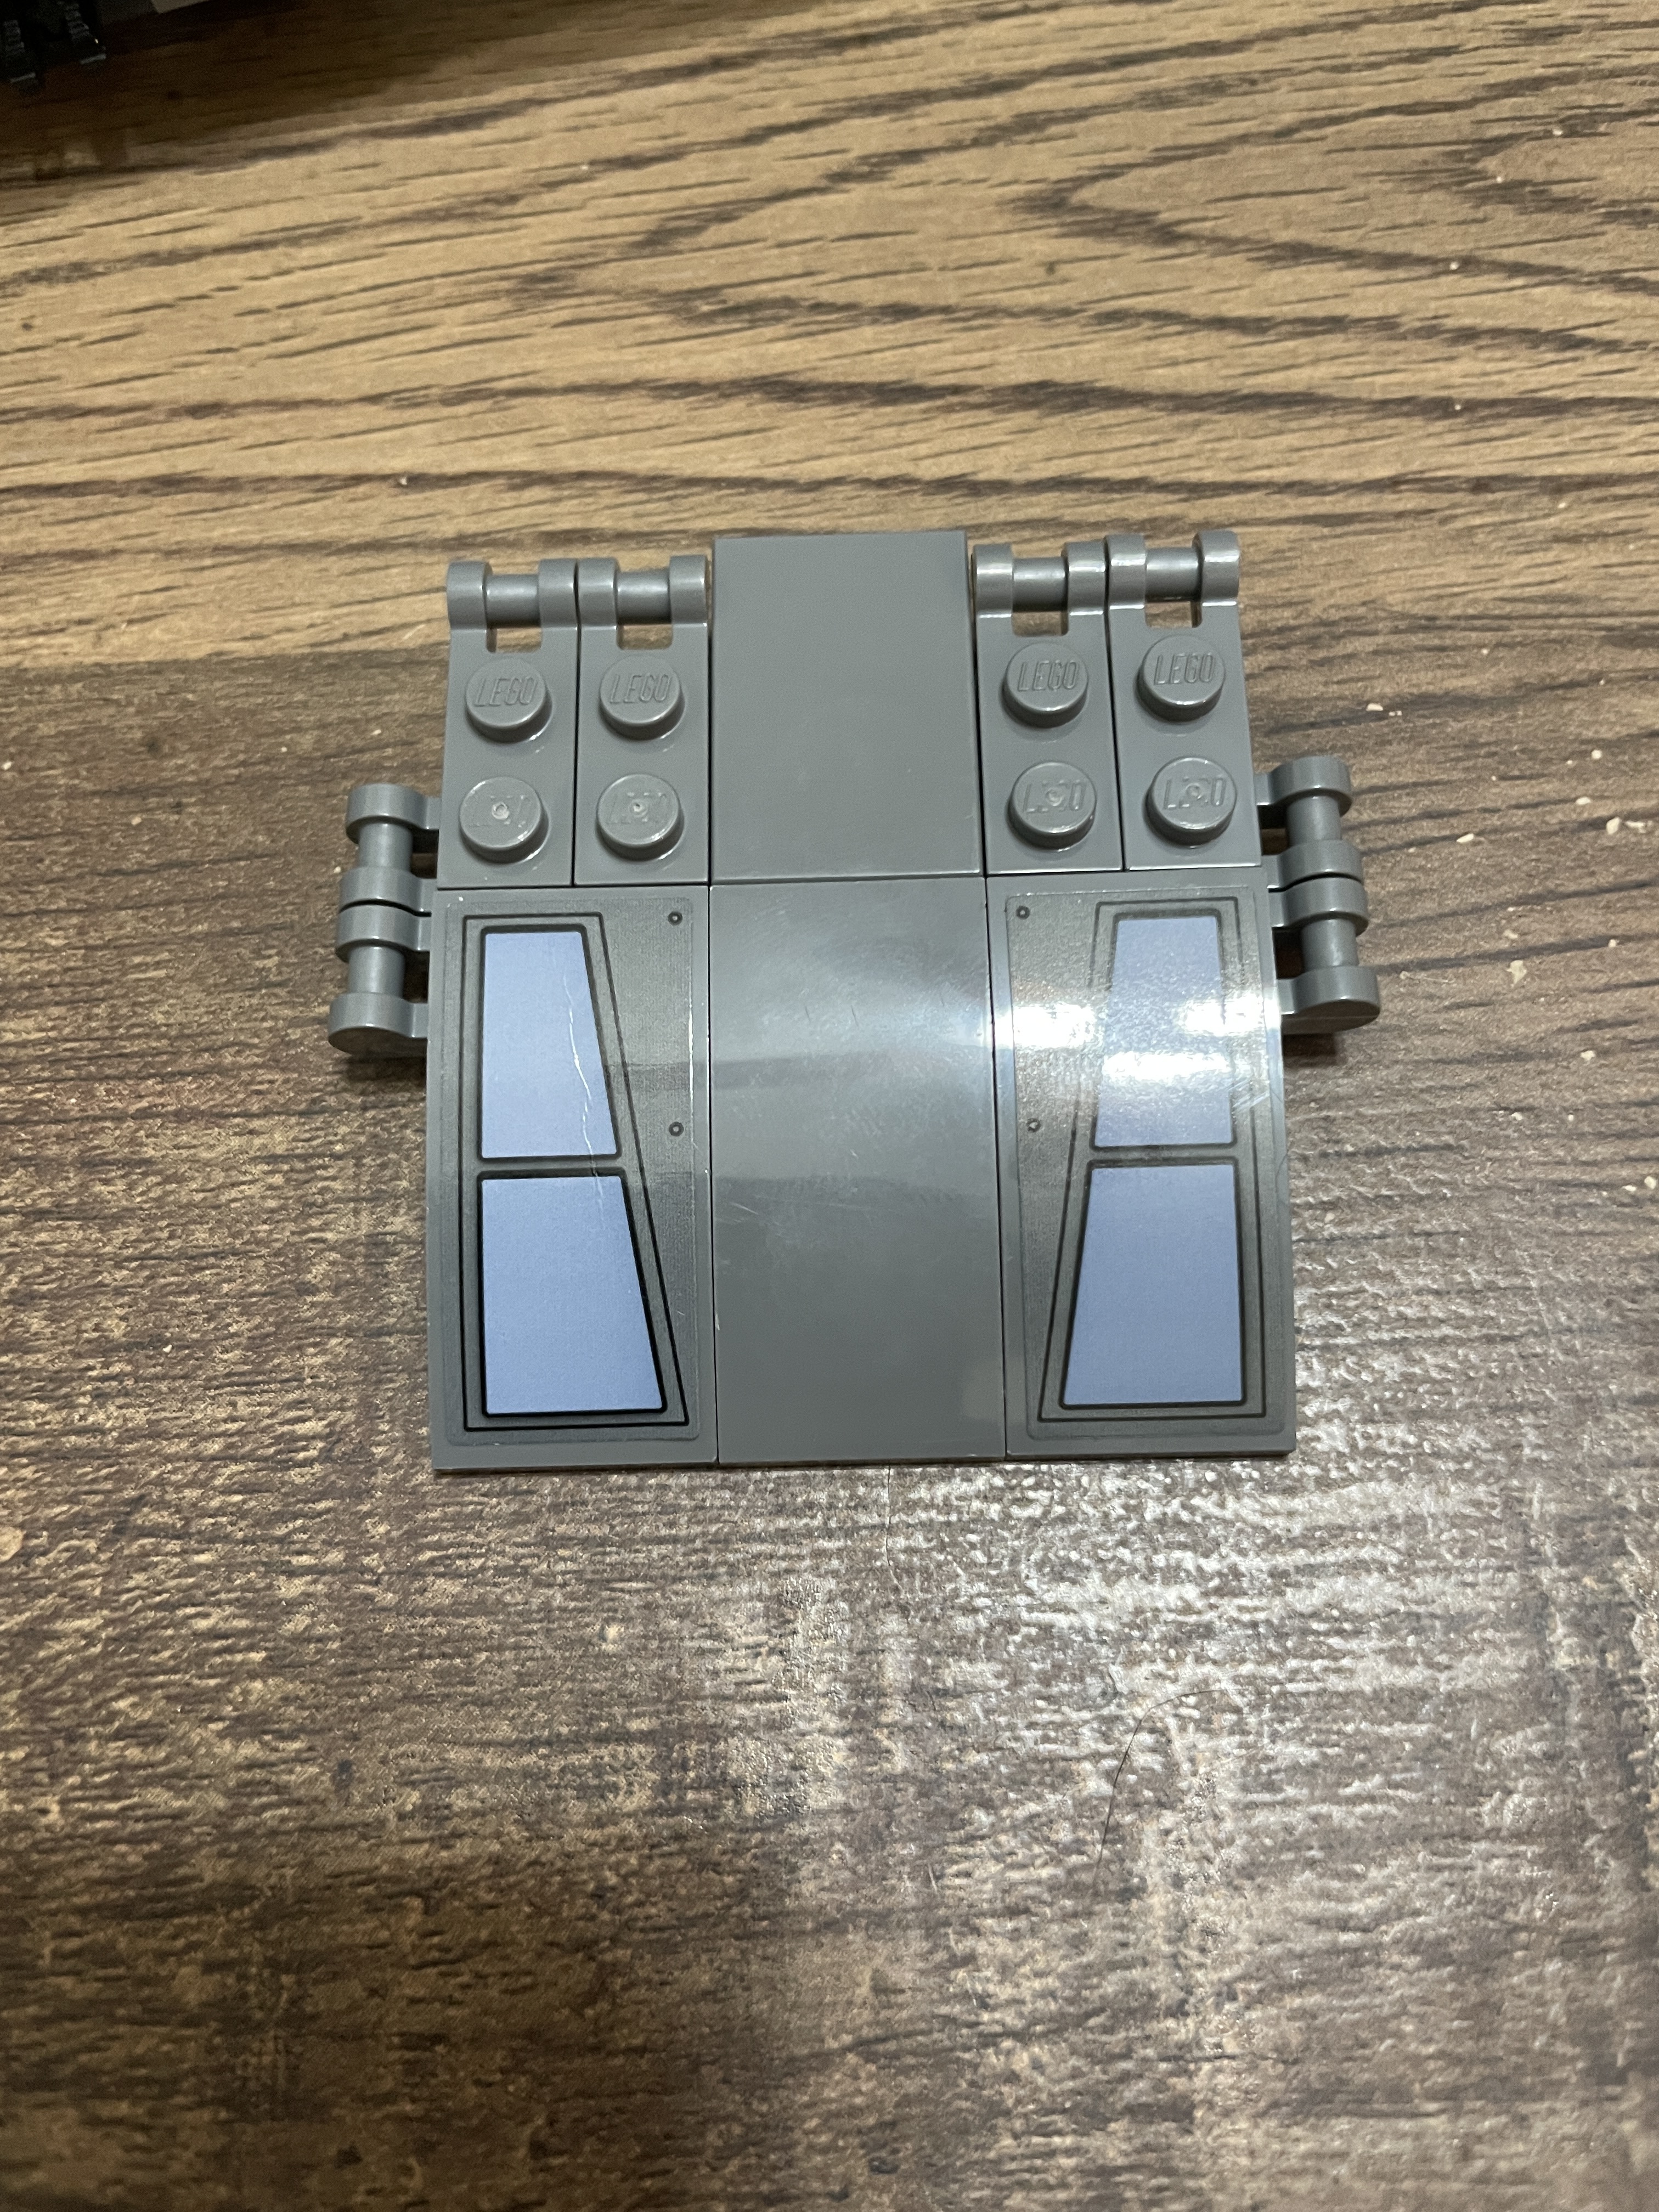
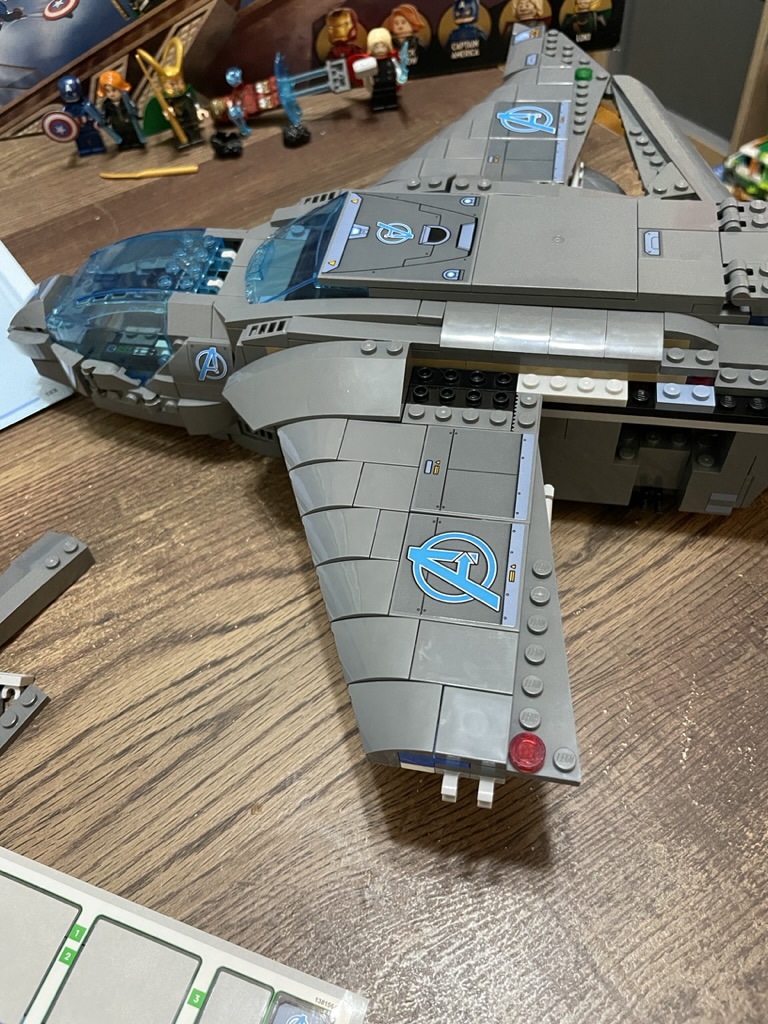
The wing has two significant sticker elements, each covering a 4×4 dark grey tile. It’s essential to get these aligned as they have lines and blocks of pale blue that would look off-putting if offset.
A rod joins the two clips underneath the wing. The completed wing section slots into position using the pins into the bright blue technic brick on the fuselage.


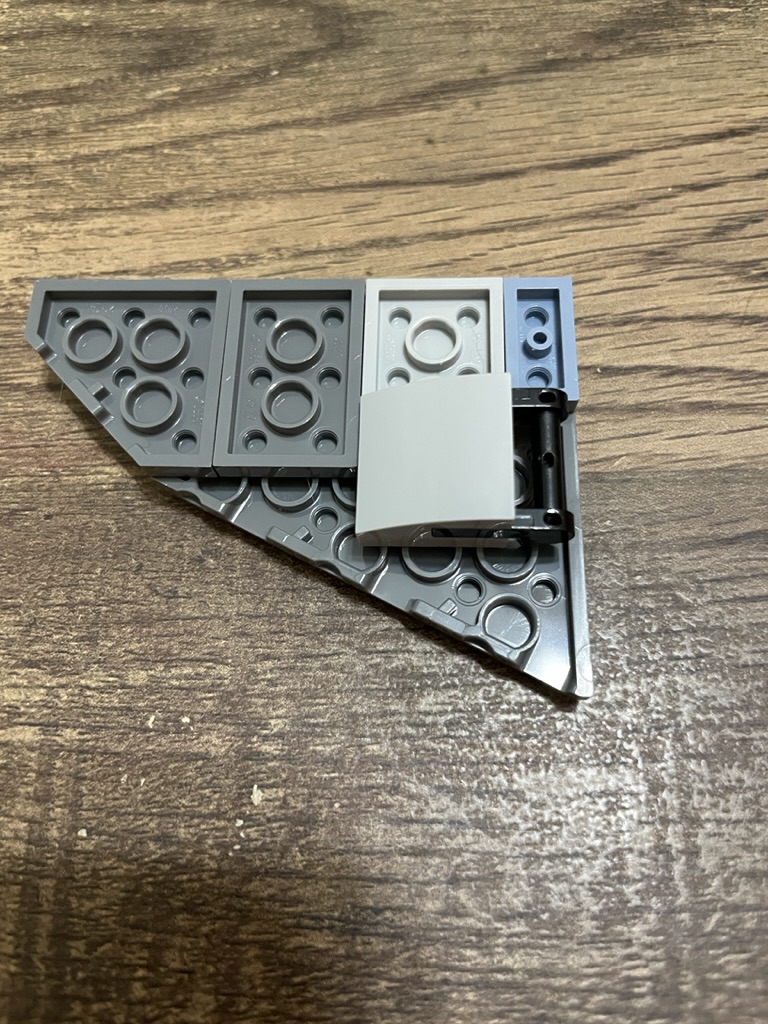
The wing design has three sections, and the back is a straightforward build of triangular plates covered in bow tiles. There are two hinges – one end on top, the other on the bottom. These hinges connect this section to the fuselage and the tip of the larger wing.
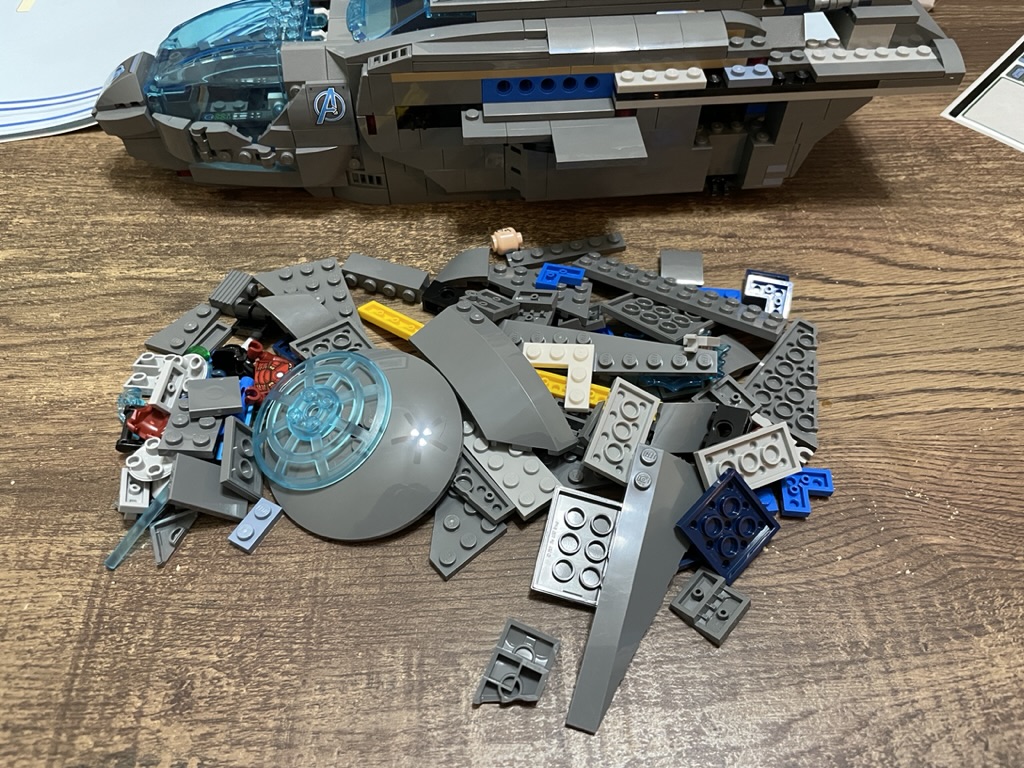
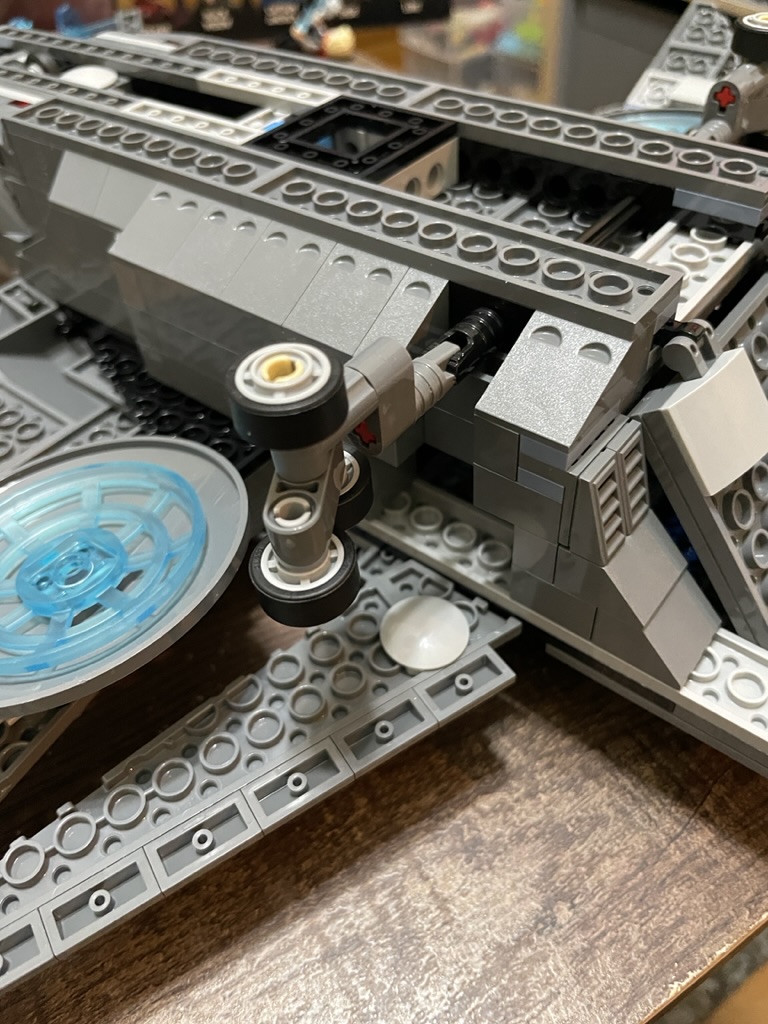
On the rod, a sizeable light-grey disc with a transparent blue wire disc connected – a practical part usage to look like the jet engines.
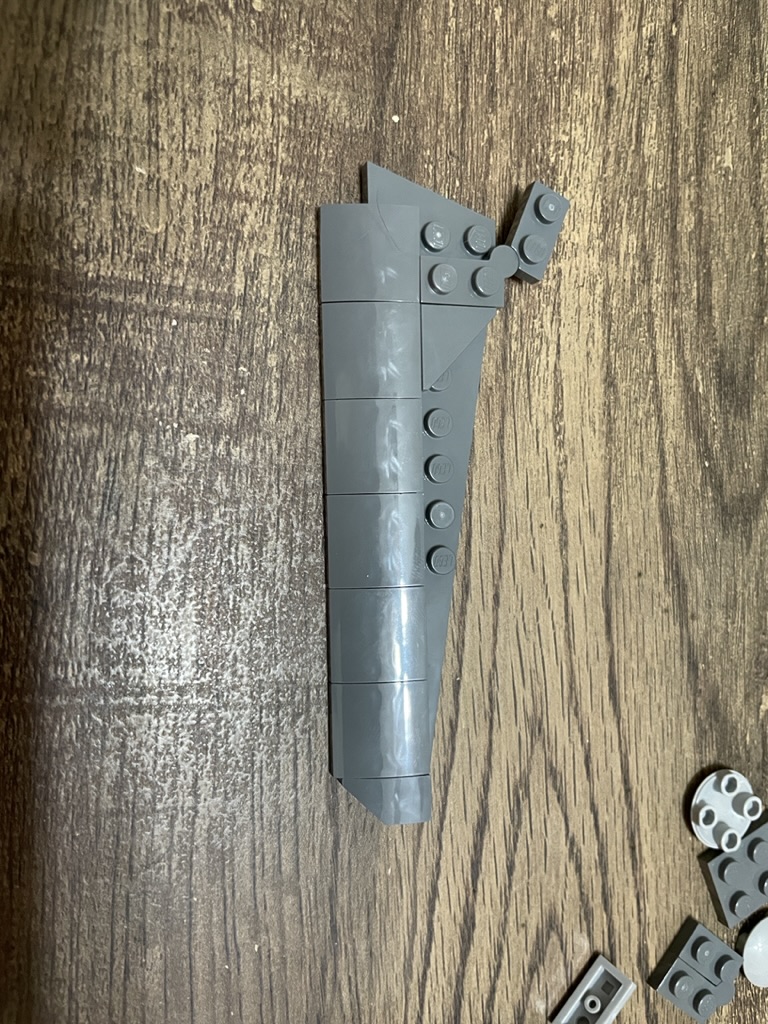
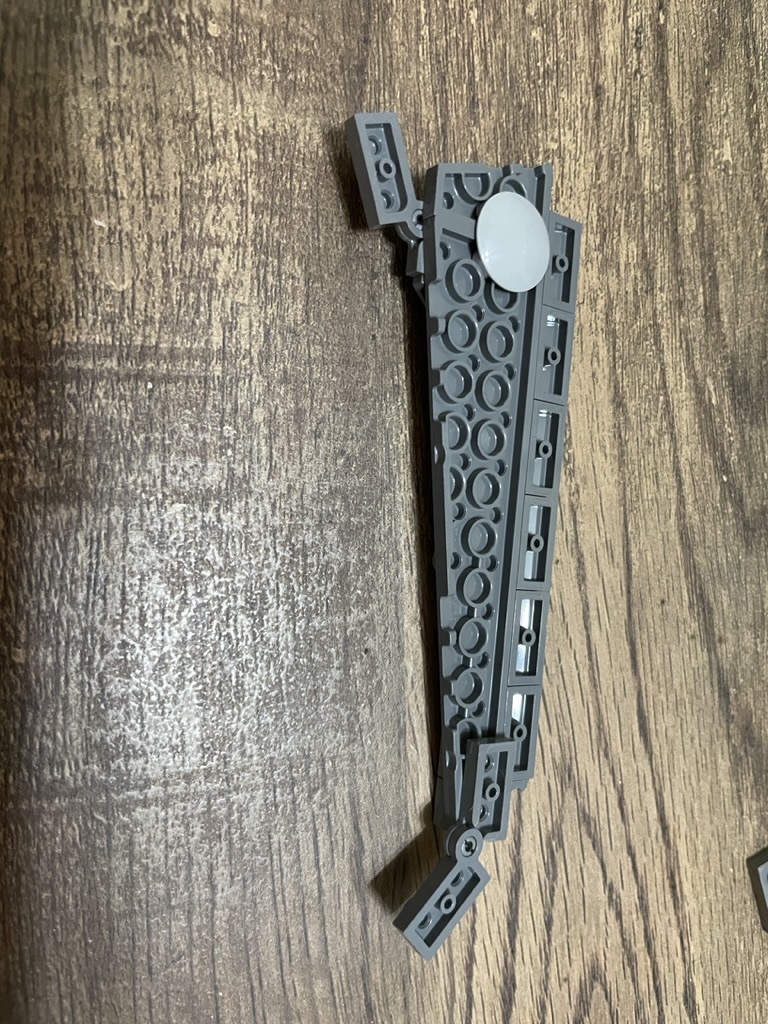

The tips of the wings are made from layering dark grey plates with a 4×6 triangular plate on top to give an aerodynamic angle. Like the main wing, the plate is covered in 2×2 bow elements and a couple of dark grey 2×2 half tiles. Two of the bow elements have sticker elements, but they are independent of each other, reducing stress on placement.
Underneath the winglet, a connector bracket with a light grey 2×2 bow will act as the anchor point to the main wing section. As it’s connected at this single point, the tips of the wings can articulate on this axis, offering further display options. This is useful for shallow shelves so that you can tilt the wings at the back downward.

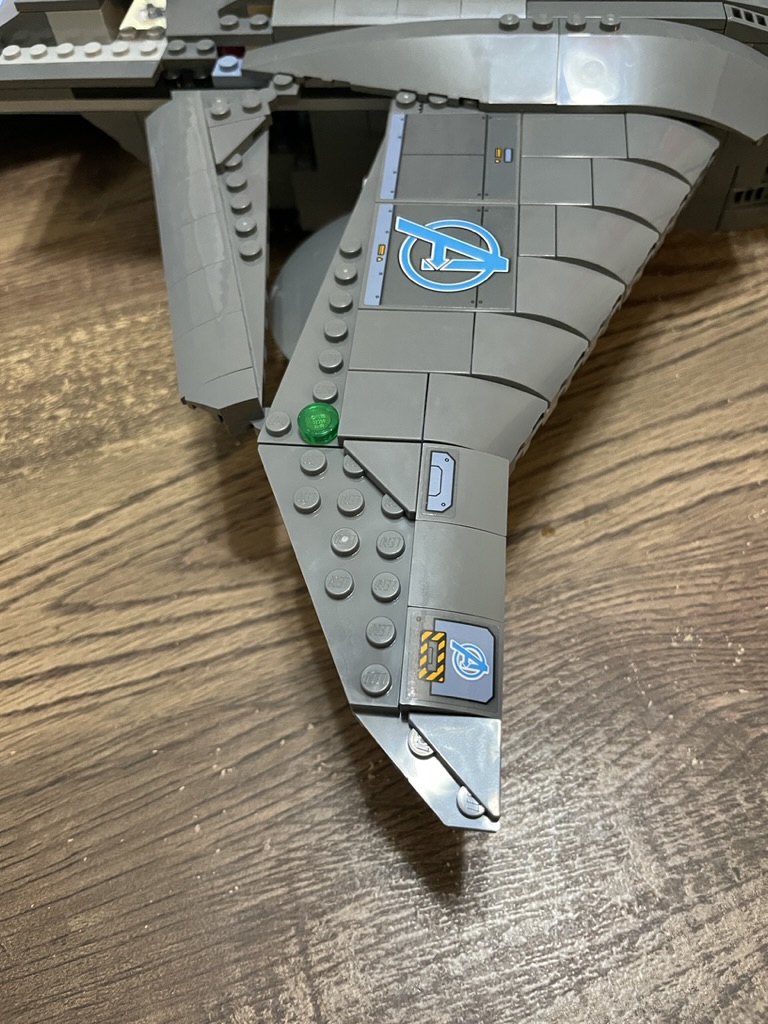
The sixth stage repeats the building process for the other wings, only the mirror image. One difference I spotted was the left side has a transparent red circular tile, and the right has a transparent green one. I would like to know if this relates to aviation practices to determine what wing you can see. Once both wings are in place, the Quinjet is almost complete!
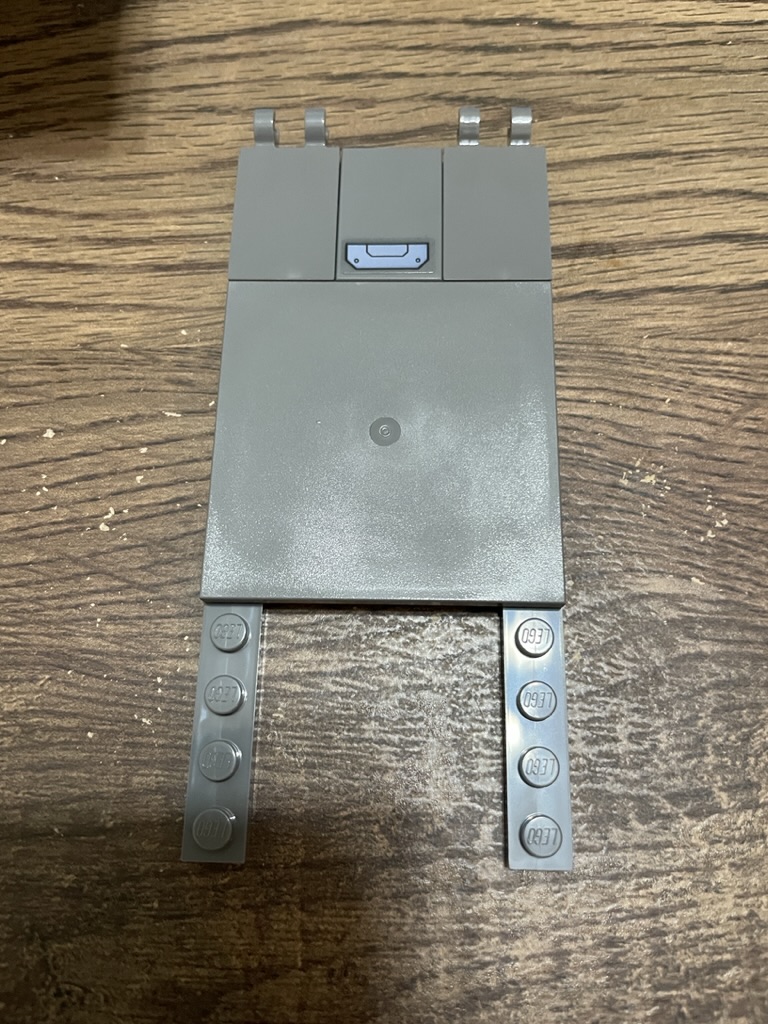
The seventh stage is building the rear landing gears and the rear engines. First, the door for the cargo bay is attached via two clips connected to an 8×8 dark grey plate. Two 1×8 dark grey tiles on either side add refinement. I Like that there are exposed studs here, making it easier to place minifigures as they are about to jump out of the plane. Two 2×2 light grey bows are underneath to prevent the plate from sliding too far.
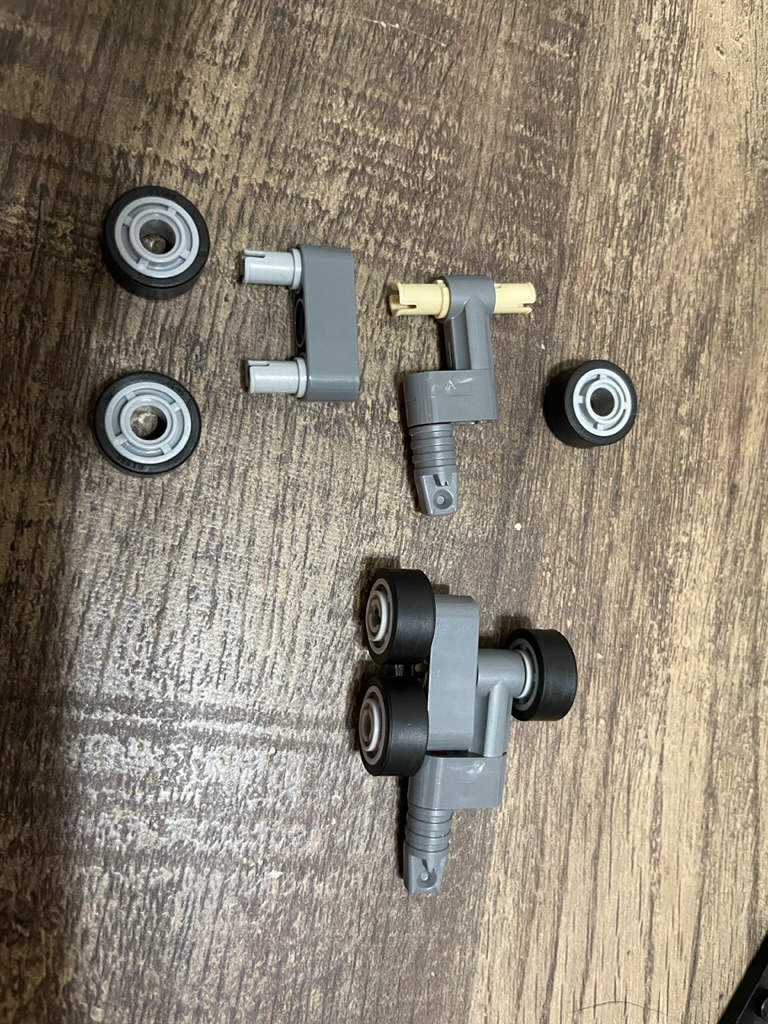
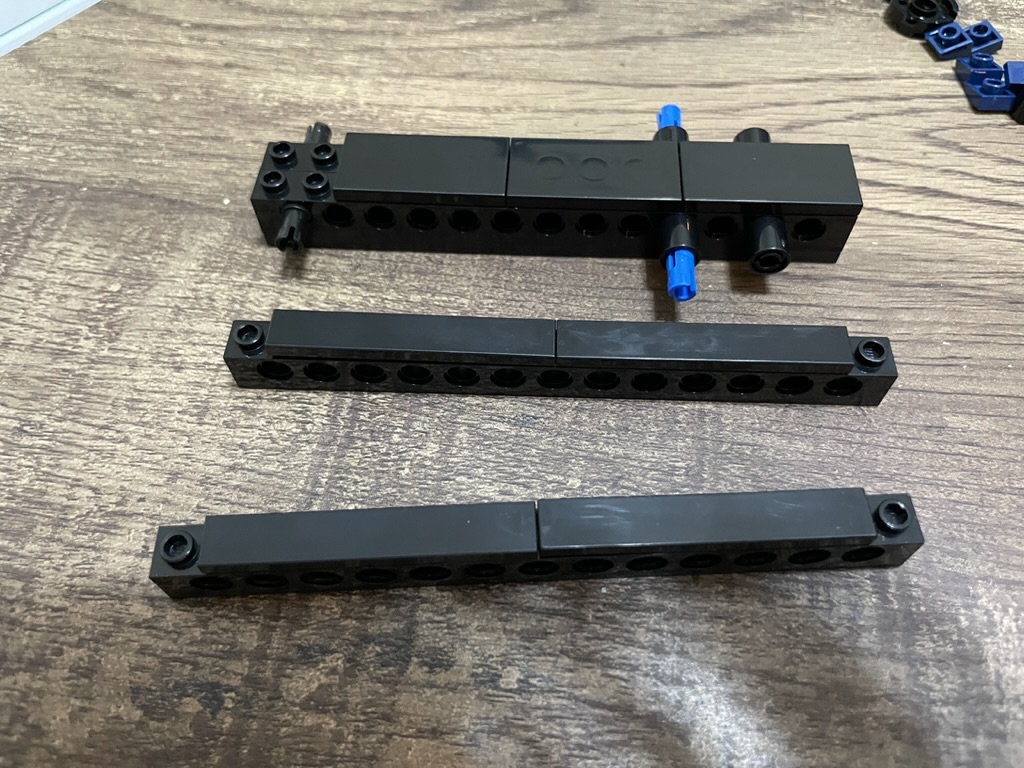
The landing gears are the same on both sides, and my picture shows the parts partially built and then the fully assembled version. The technic pins allow the wheels to articulate, essential for storage and use as landing gear. The landing gears are attached to the fuselage via the black connectors added near the beginning of the build.


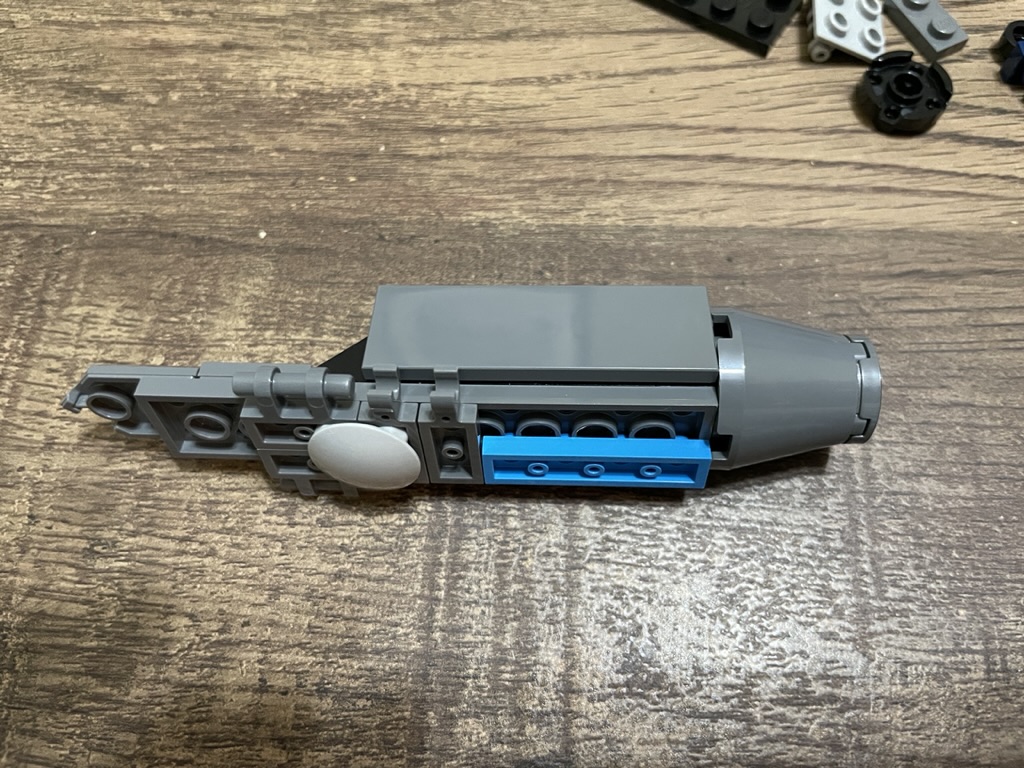
The rear engine build begins with stacking SNOT bricks on a 2×10 light grey plate. A 1×2 technic brick is placed at one end, and a rod is inserted. Underneath are clips and connectors – needed to put these on the jet. At the rear, a large circular cone with a round tile create the look of an engine.
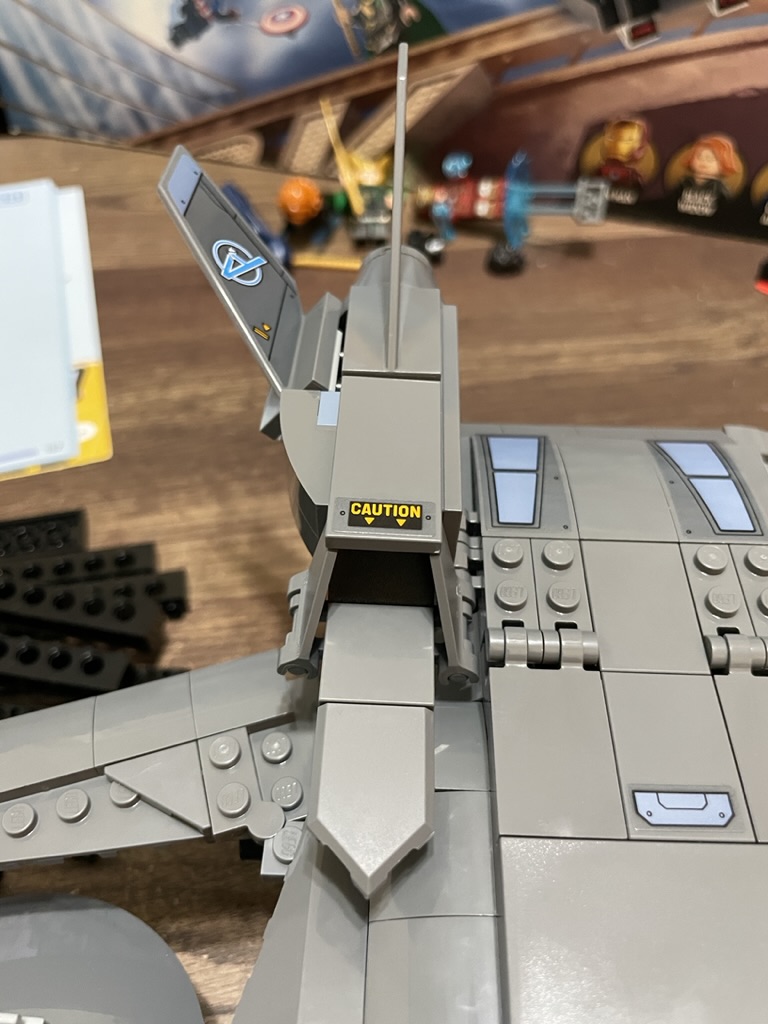
A dark-grey tile covers the black SNOT bricks. On the other side, a wing element gets the sticker treatment at the top of the structure. You can also see a shield piece used at the tip. More SNOT bricks are covered with a dark grey bow, creating a polished and streamlined appearance. A further wing element is placed at the rear, and a 2×4 grey tile adds a caution sticker. Very wise – do not want to mess with an engine!


The entire structure is placed on top of the Quinjet, just behind the wings, by clipping into the connections. This method of affixing allows the engines to sit at different positions if you don’t want them flush with the fuselage.
You mirror the build to make the engine for the other side. The Quinjet is now complete, and all it needs is a stand!


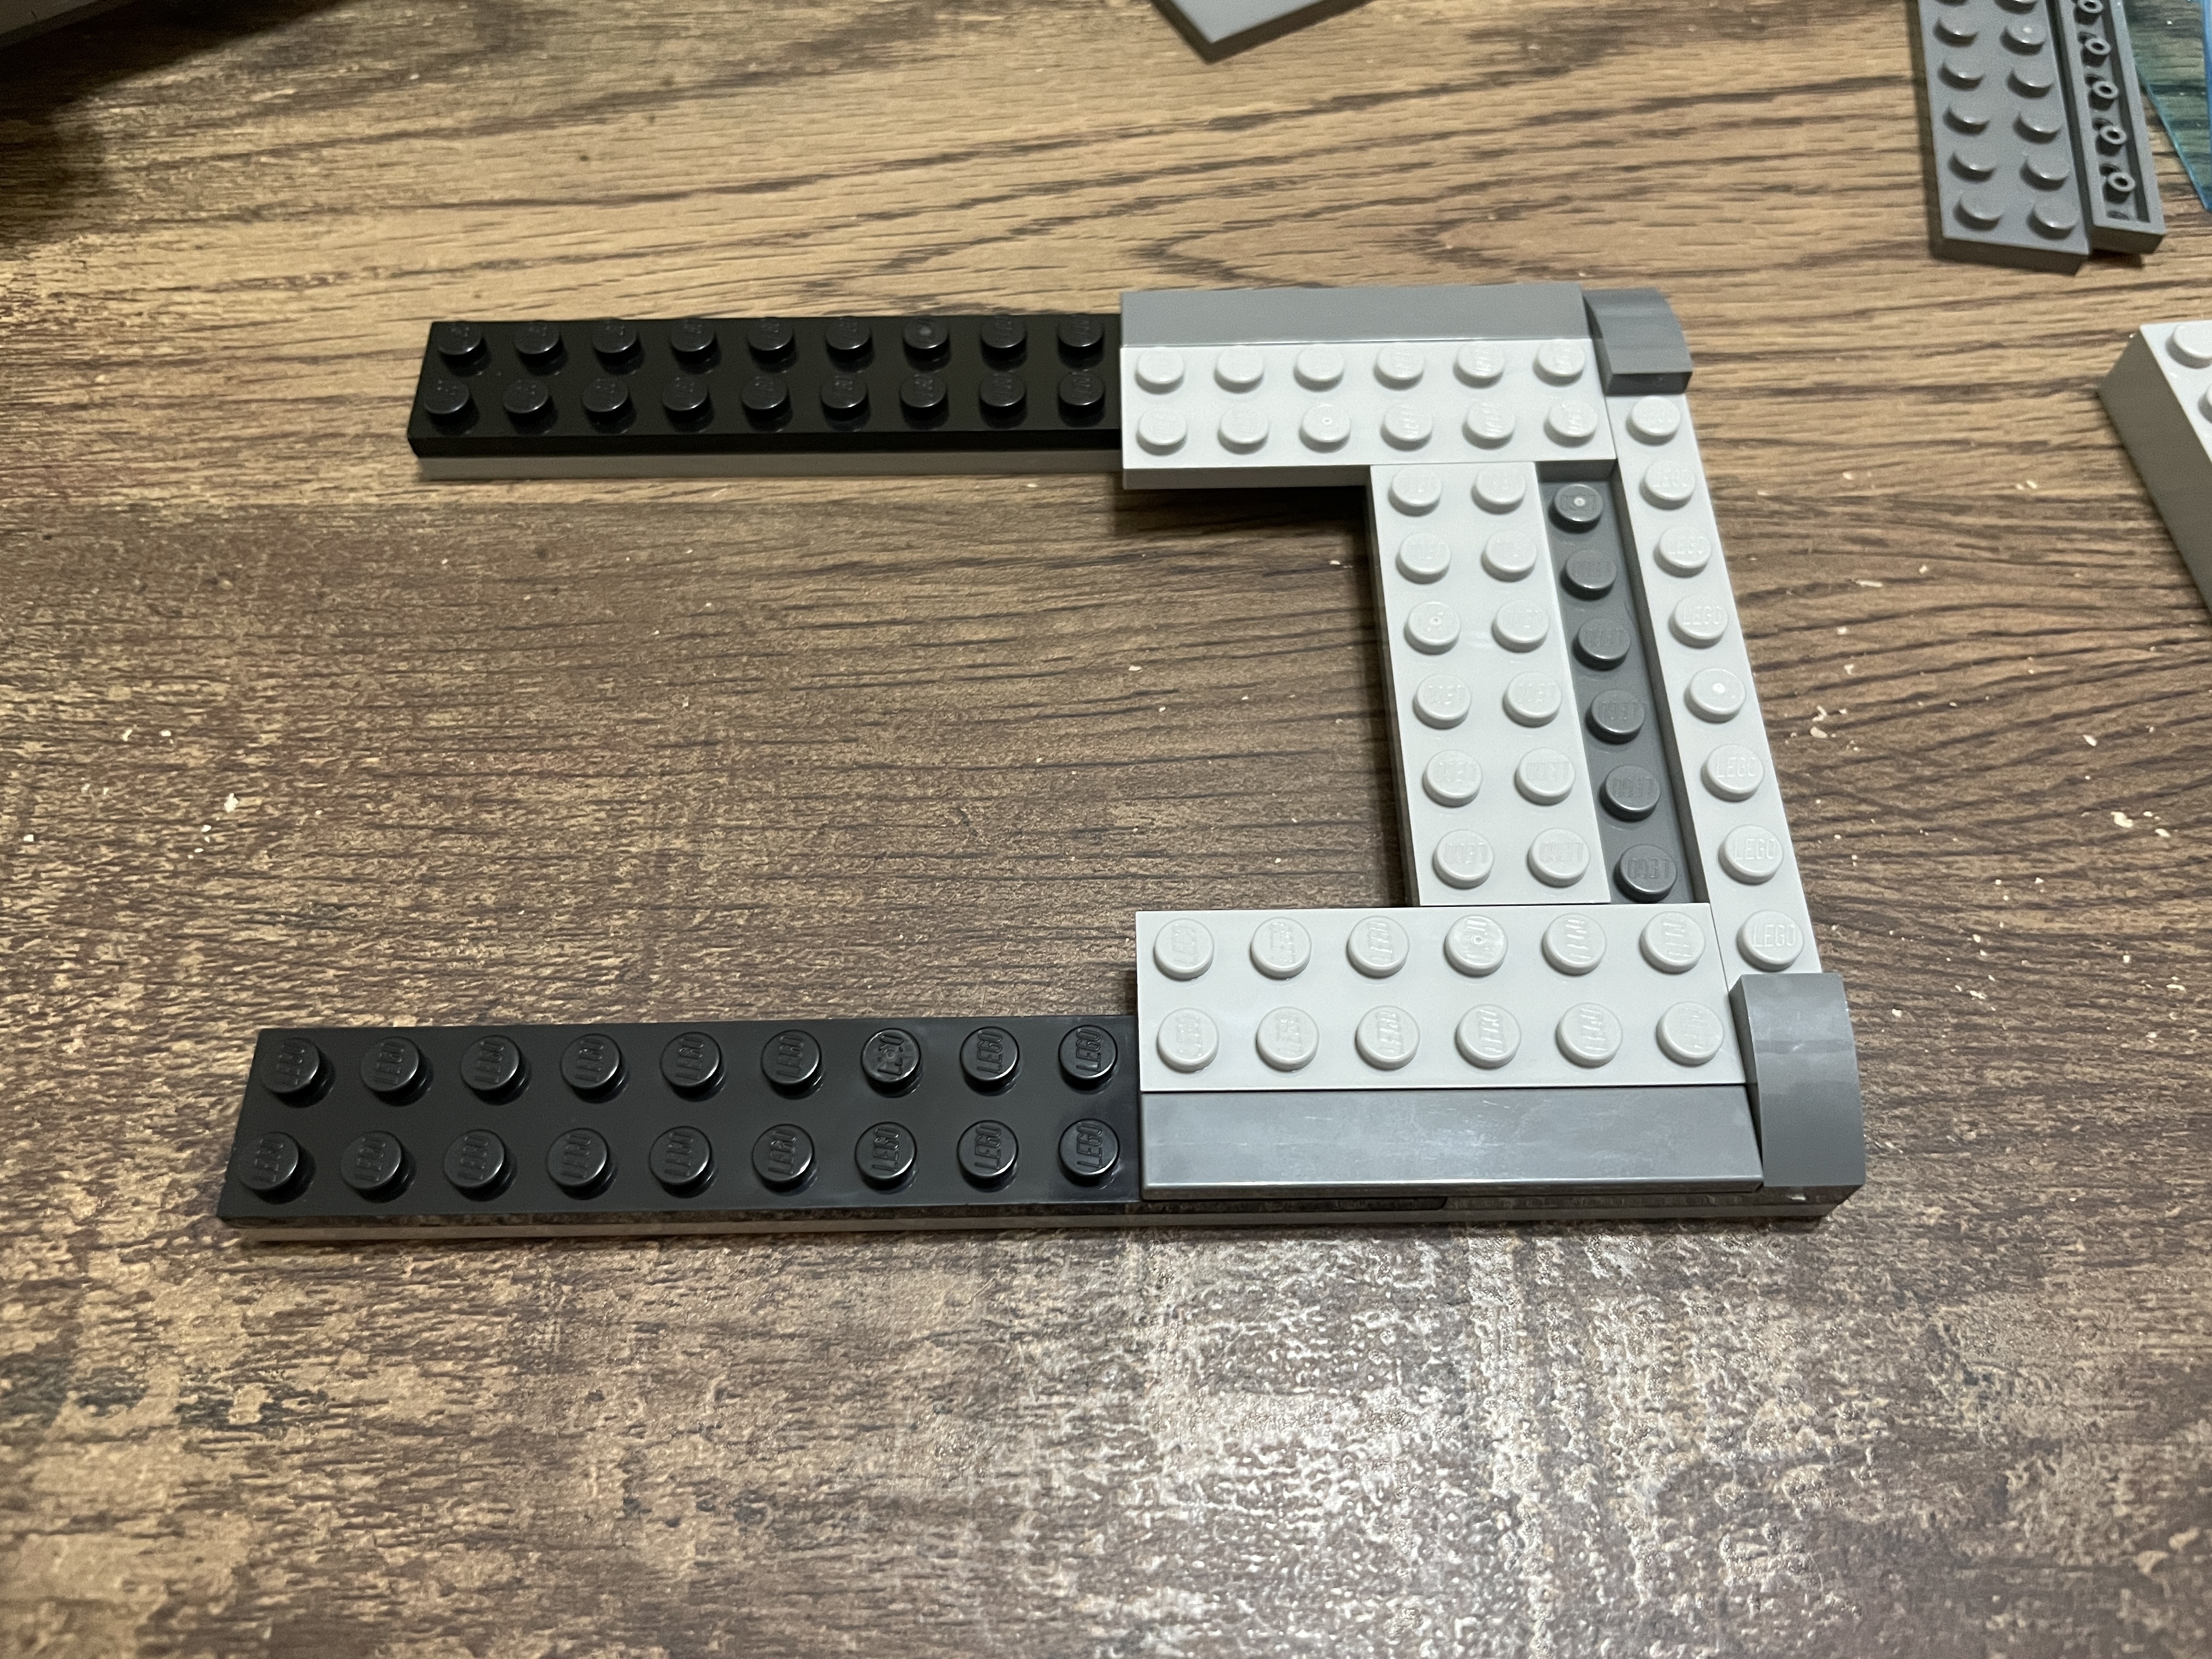
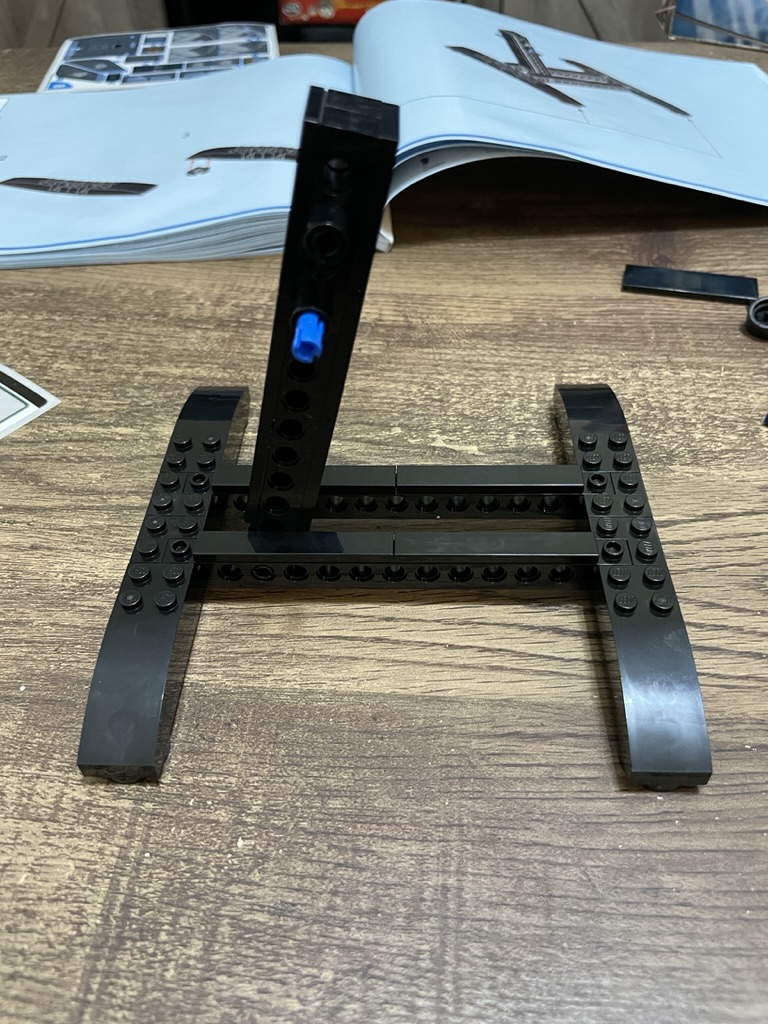
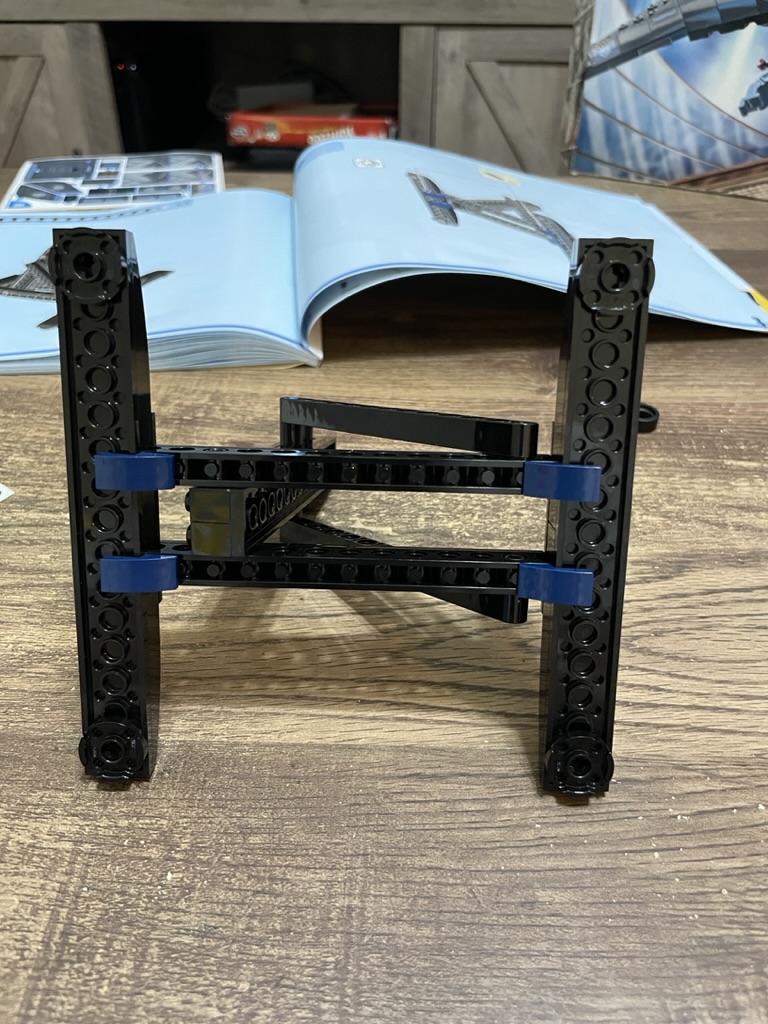
The black stand begins with technic bricks, connectors, and 2×4 tiles on top. Two additional technic bricks are covered in tiles, leaving an open stud at each end. These become the feet anchors, joining via the black connector. These are two mirror image builds consisting of slopes with exposed studs on top attaching to a long black plate. In the center, 2×2 corner bricks leave a gap for the feet anchors connection. Most of the exposed studs are then converted with 2×4 black tiles.
The stand needs some technic elements to bind the verticle stand to the base for stability – achieved by clipping in two pins. Underneath, theres a round 2×2 plate at each corner and 1×2 dark blue slopes at the feet junctions.
Alas, the tiled part of the stand shaft points toward the back, not the front, where you see the underside of the plate. I’d also have liked Lego to include four 1×2 black tiles to cover the few studs left on the base. I may be picky, but leaving these few exposed studs seems odd.


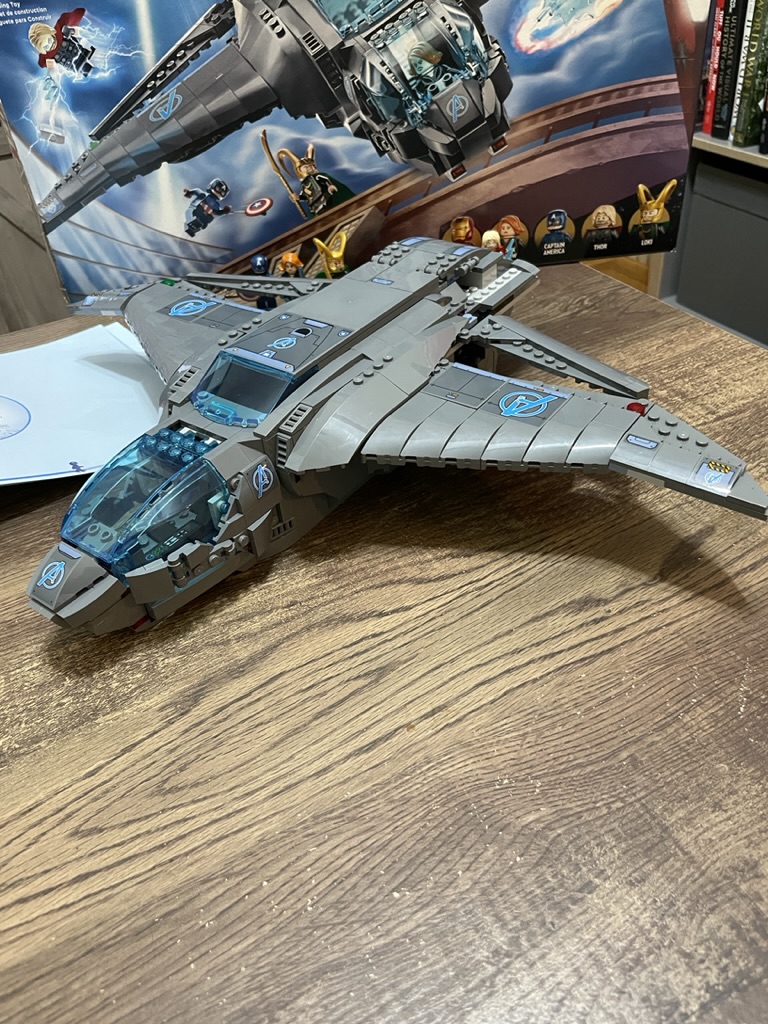
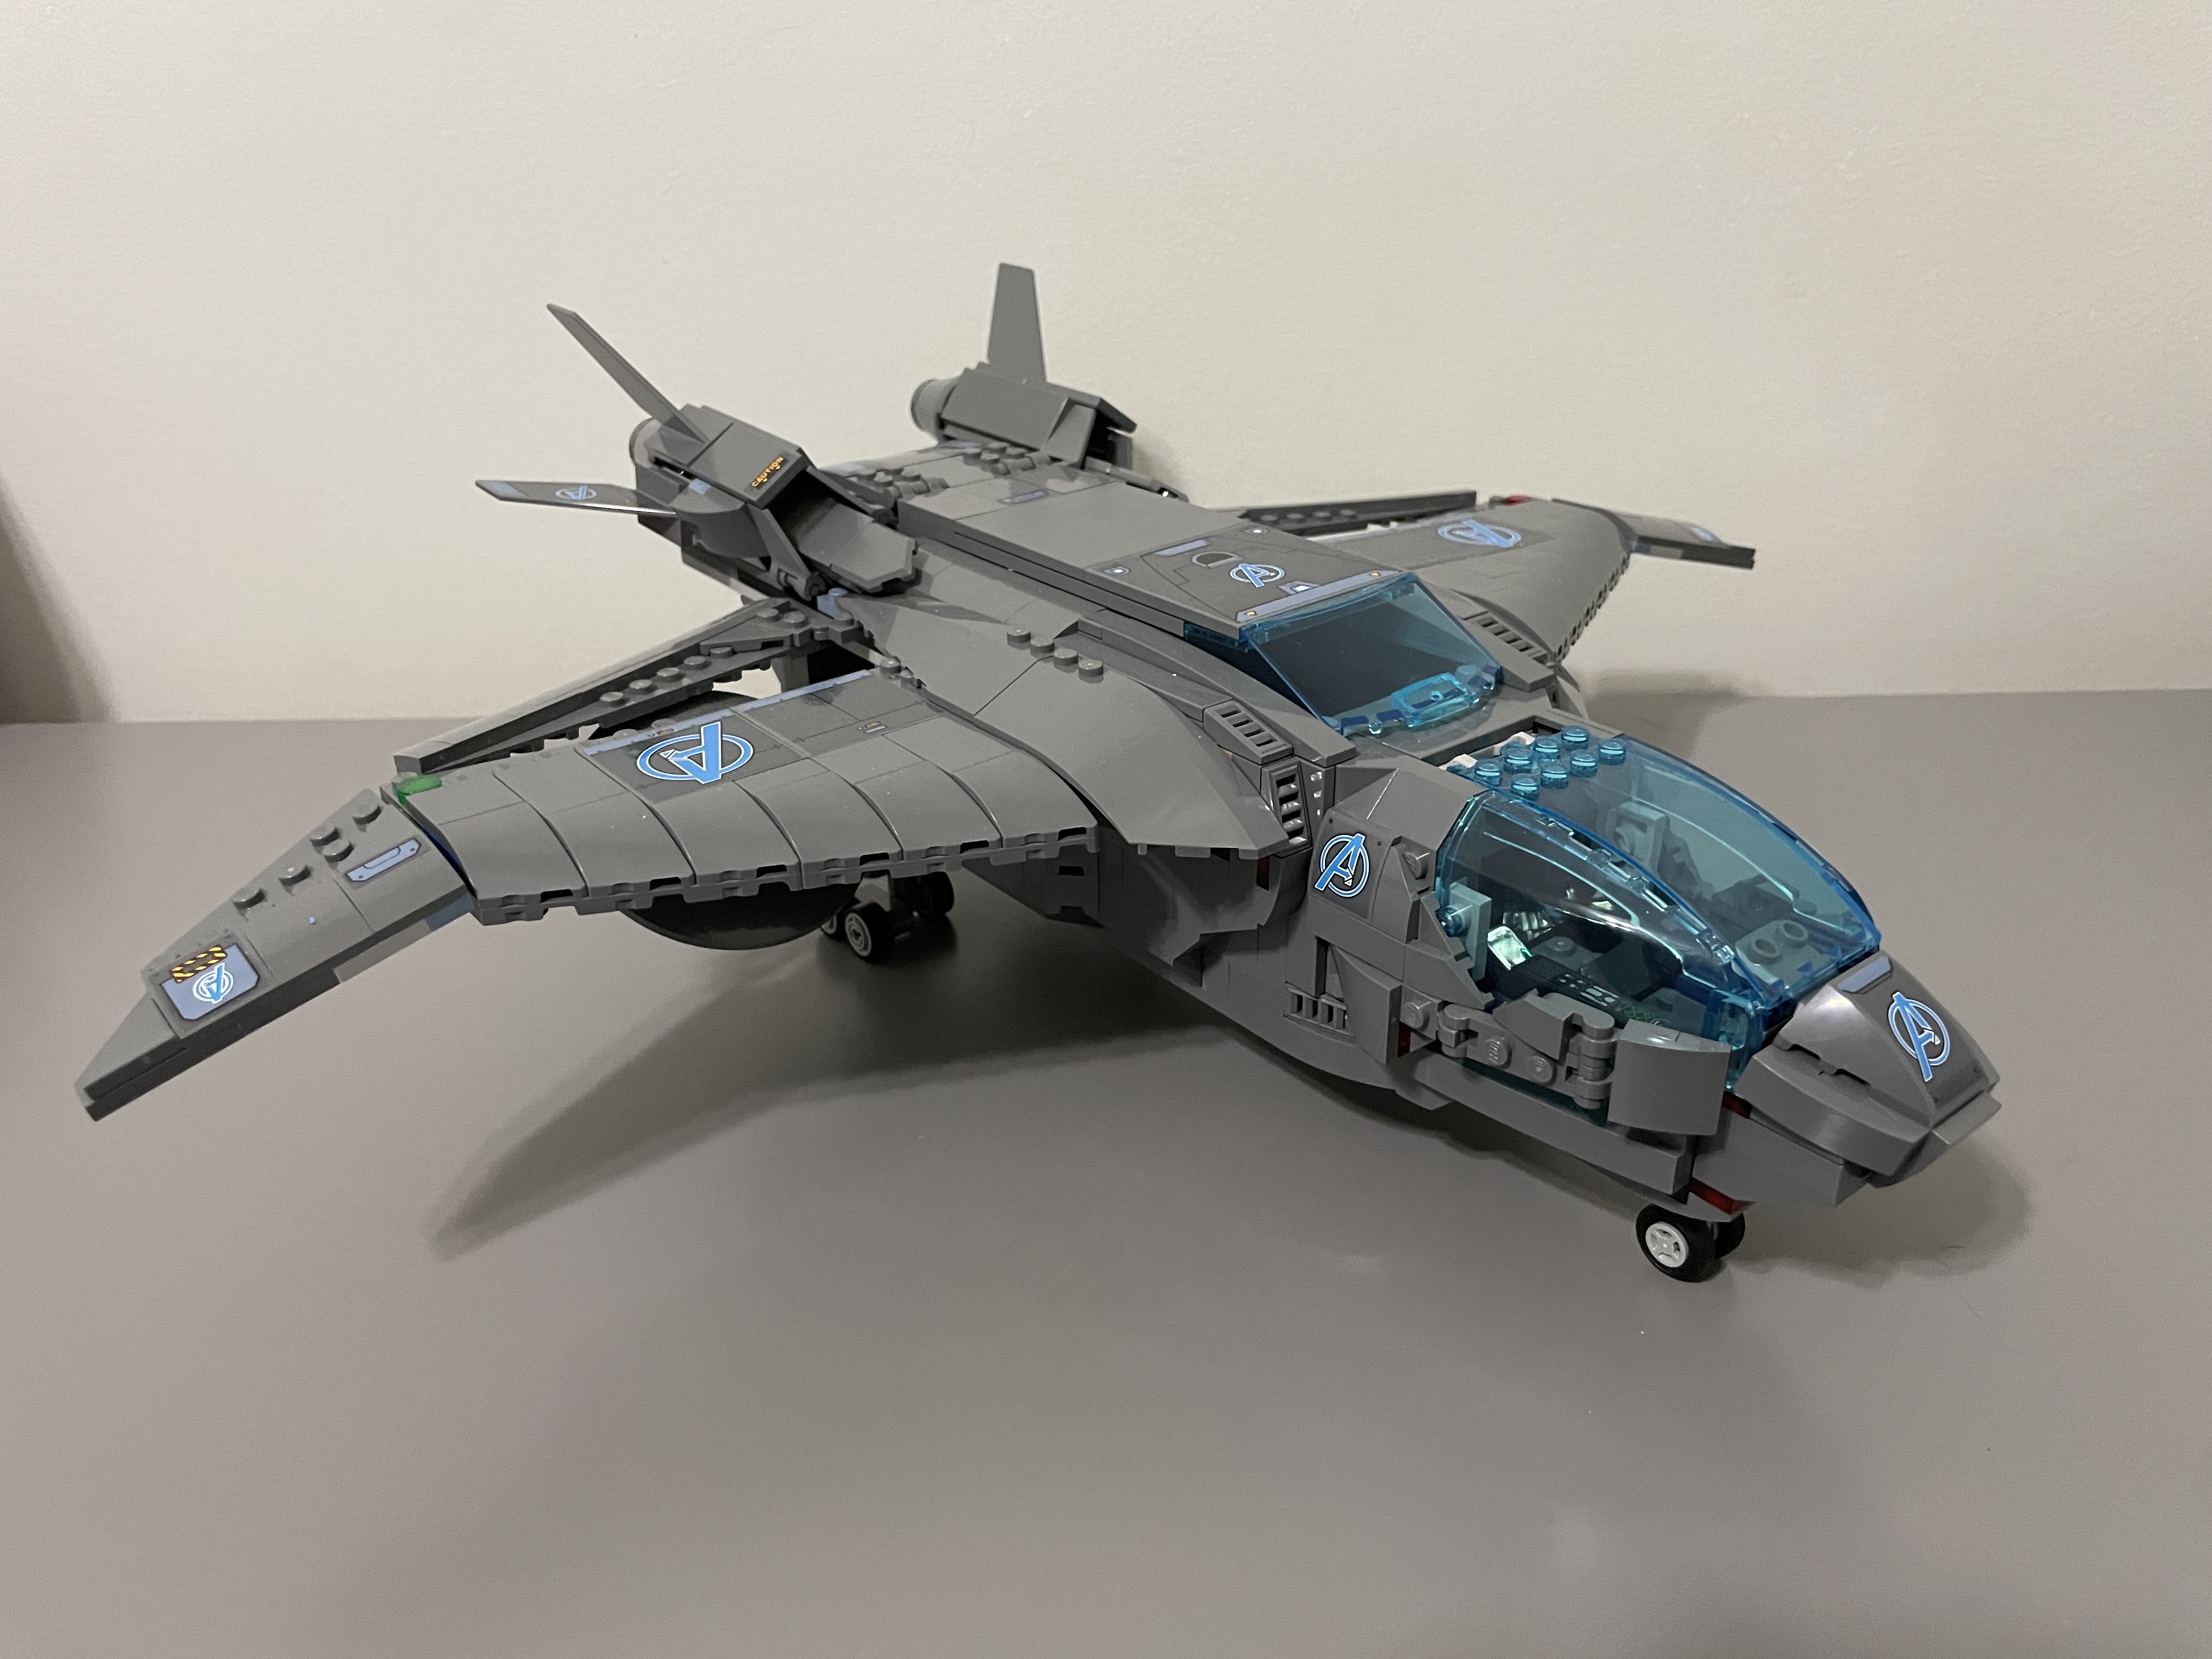
The Quinjet looks fantastic, both on its stand and with wheels down!


Minifigures
The Avengers Quinjet comes with five minifigures, all based on their 2012 selves. Four are unique to this set, with Thor being the exception (the same minifigure comes with Thor’s Hammer #76209). Each figure has a double-sided head and at least one accessory.
Loki’s headwear is as close as Lego has gotten to mimicking the films, and including his hair is great for making all versions of 2012 Loki come alive. Iron Man, too, has a typical hairpiece if you want the Tony Stark aesthetic instead.
Blackwidow lacks a cape or a helmet, but she does have beautiful arm printing to give her minifigure some flair. Iron Man and Loki have leg printing, and everyone has exquisite torso detail. Captain America’s shield is the latest rendition, with black outlining, which looks more lifelike than previous versions.
Overall, these are fantastic minifigures with tons of detail and display options. Likely, some of these minifigures will appear in other 2023 Marvel sets, but it’s an excellent way for Lego to kick off this year by upgrading each of these heroes.


Ratings
Build: 5/5
What an incredible build this was. Full of classic building techniques with excellent part usage – it was a joy to put together. I liked how the stages went together with creating the base, cockpit, fuselage, wings, and stand. After each phase, you felt tremendous progress and could appreciate each section as it came to life.
Yes, there are a lot of stickers in this set, and this is always a sore sport for me. However, you need them to add detail, and that set would have been far too expensive if these had been printed elements. A benefit of the sticker strategy is you can choose SHIELD or Avengers logos, but it is still disappointing that you need to source the extra parts yourself if you want to switch them out. I doubt it would have cost Lego much to add those 20 or so pieces to the set.
The techniques were relatively easy to execute, with most of the build using plates and slopes. I had no issues following the instructions or building any of the technical elements. I watched the first Avengers movie while I made this, demonstrating a build time of around 2.5 hours and that you don’t need to pay excessive attention while building.
Display: 5/5
Wow. It’s a dark grey plane/spaceship hybrid, yet it is stunning. The use of sand blue plate and brick throughout the Quinjet help accent the grey palette, and the color design is flawless with the windshield elements. My choice of the Avengers-style stickers helps with this, as they are blue and help bring out the subtle details of color; I imagine the SHIELD variant appears duller.
The Quinjet can be displayed in various ways to suit your desires. The landing gears can be down and rest on those wheels. However, when the rear landing gears are down, you have two holes in the rear from where they are stored. Alas, Lego did not include a little build to fill those gaps. I will keep mine on the stand beside the Guardians’ ships for continuity.
Price: 4/5
The Avengers Quinjet’s MSRP of $99.99 results in a price per piece (PPP) of 12.5 cents, which is above the benchmark of 10 cents. However, this set includes some large parts, many slopes, bows, and tiles. These elements always push the price up. There are five minifigures, too, with beautiful printing and accessories. You also have to factor in the licensing agreement fees. So, overall, this set seems reasonably priced, if not fantastic value.
After building the Avengers Quinjet, the price is more than fair, and it is a set worth $100 based on 2023 pricing.
Final thoughts
As soon as I heard about this set, I was excited. Waiting to pair it with the right GWP was agonizing but well worth it. I enjoyed this highly satisfying set and want to build again (to have a SHIELD version). If you like aircraft, Marvel, or both, this is a set you’ll want to pick up. Thankfully, its price point keeps that as an obtainable goal for most Lego fans.
Buy the set
LEGO US
LEGO CAD
LEGO AUS
LEGO UK

Leave a comment