
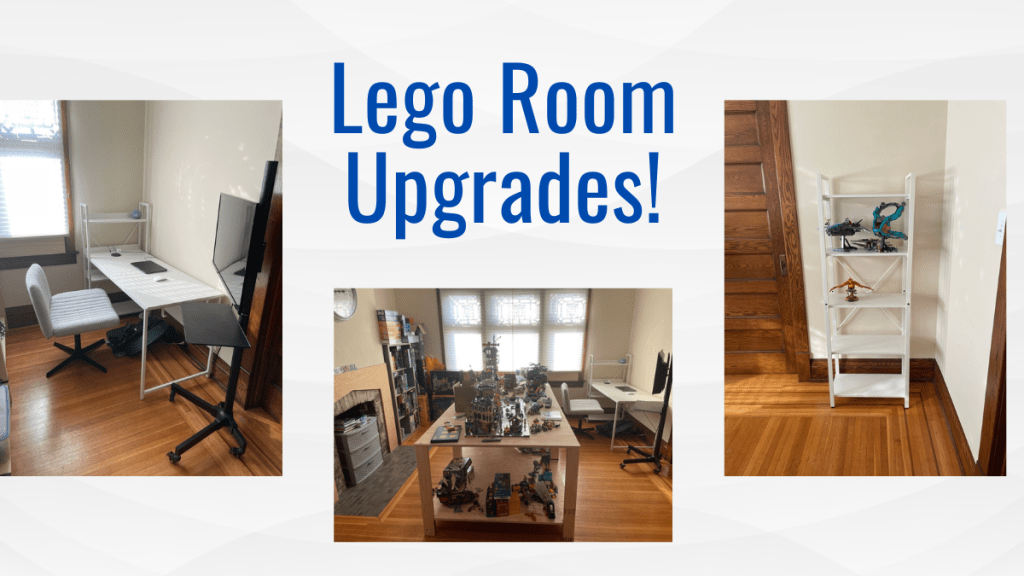
I converted my front room into a near-dedicated Lego space when I built custom tables in December. Since then, it’s been a place for Lego storage rather than the sanctuary I imagined. My main issue was that there needed to be somewhere to build in the room – there was no desk, table, or even chair if I wanted to work on the Lego tables directly. Consequently, my apartment had Lego everywhere – equally ruining the serenity of the hobby and placing my precious bricks in danger of a cat attack. Realizing these flaws, I set about making some changes to the room.
Goals
- Place the tables in the center of the room so it is easier to access all sides
- Create a dedicated building space
- Have a part inventory section
- Collate and organize my backlog aka to-be-built sets
- Make a display space for non-city sets
With five key goals in mind, I had a lot to do. Some tasks would require purchases, while others needed only time and effort. It was time to get to work.
Moving tables
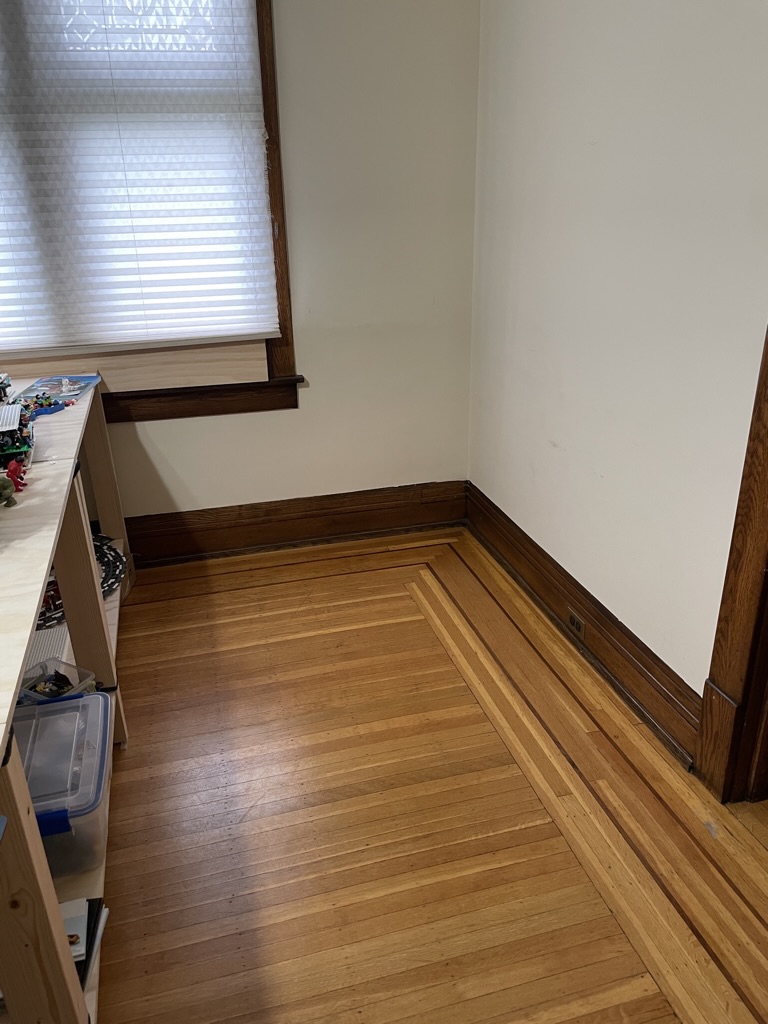
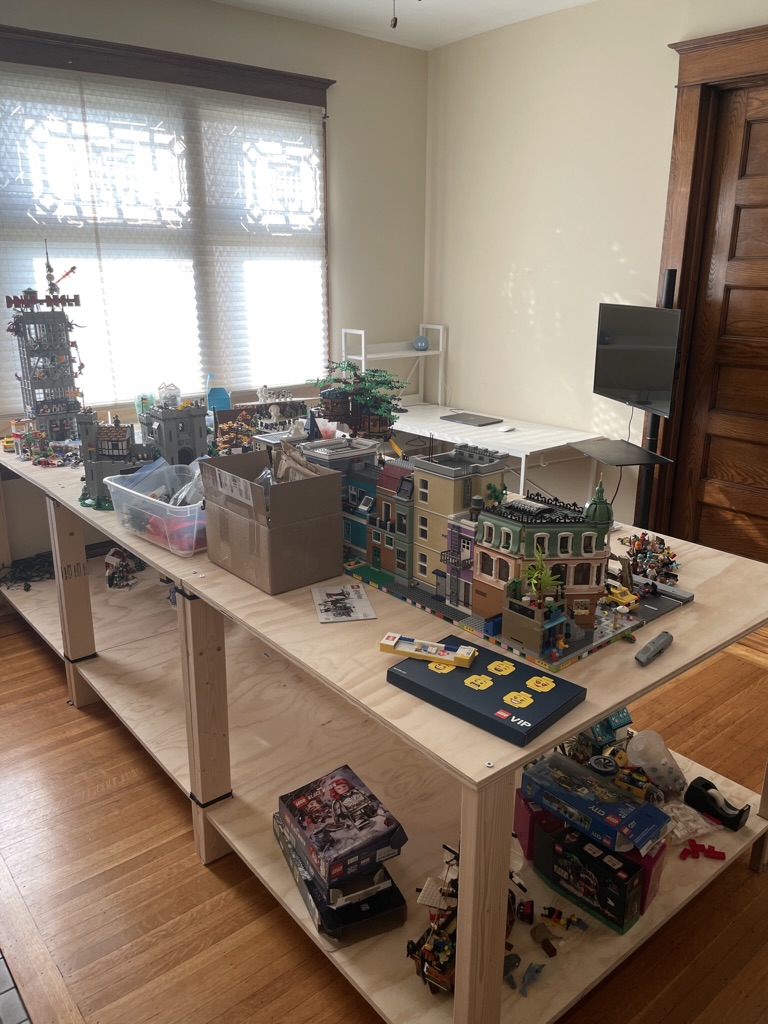
Admittedly, my friend and I are not skilled woodworkers, so my Lego tables are not the most sturdy or level items on the planet. Alas, I didn’t take a good overview picture before I moved them but imagine these tables with the start of my city on the right, a Daily Bugle with a mess in the middle, while the left was a bunch of pieces around the Lion Knights’ Castle and the remnants of my winter village underneath.

Moving the left table forward involved removing all the Lego before lifting off the bottom shelf. Then I could move the table itself. Once reconstructed, the legs required tightening. The right table was the last produced, thus the best made. I was able to move in one piece. Next, I aligned the tables to the center of the window, and the result was better than I thought (see below). The room will have to change as those tables fill up, but this is a good layout for now and allows the most access.
The tables weren’t perfectly level, and neither was the floor (the apartment was built over a century ago, so it’s to be expected). Using plates, I did my best to get the tables just about level – not perfect, but good enough. Finally, I used Velcro ties to bind the tables into one unit, hoping to add stability.
With the tables in place, I could readily appreciate the space I had to work with and started figuring out the best layout and what I’d need to order to complete my vision.
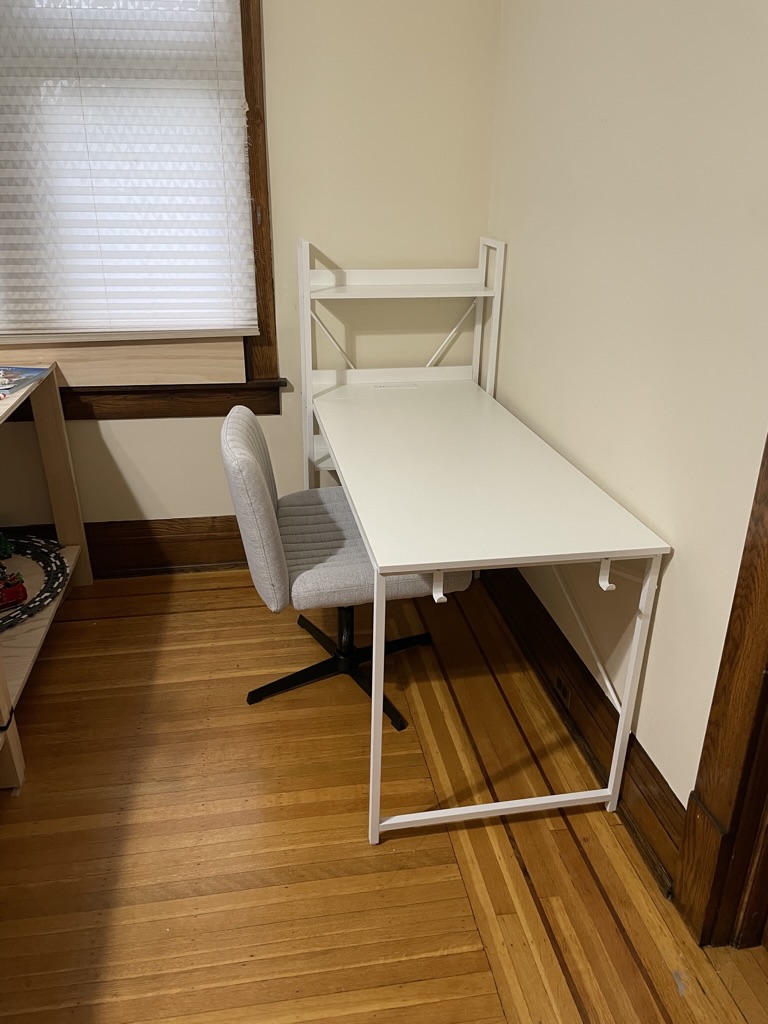
Desk and chair
With the tables in the center of the room, there was plenty of space on the right side for a desk or table to build at. For the last nine months, I have made my Lego sets on my coffee table, which has started to take a toll on my lower back. So, a better height to work at was a key deliverable in this room upgrade.
I wanted a white surface for building and taking pictures, as I reasoned this would be best for finding pieces and creating content!
After extensive web browsing, I found this desk: IRONCK computer desk 55″ that looked to do the job perfectly. Initially, I hadn’t considered a desk with shelves, but it makes sense, as I’ll have somewhere to put the box, spare bags, minifigures, or mini-builds from the set I am working on.
The built-in outlets are a great bonus feature for charging my phone and computer in a clean environment. This workspace should make the building, reviewing, and placing sets in the city turnaround much faster, which is needed as I continue to enjoy putting out content documenting my Lego journey.
Choosing a chair for the desk was a challenging decision. At first, I wanted a product with wheels to allow for moving around the room quickly. However, with wooden floors, I would need to buy a covering to protect the wood, and it would make a lot of noise (I respect my neighbors). I also have a Desk Cycle, which lets me exercise while building. It’s hard to use this with a wheeled chair. I did look for a model with wheel locks; however, I couldn’t find anything in my price range (even augmenting would be too expensive).
As a solution, I started looking for stationary options when I came across the LEMBERI fabric padded chair. I was drawn to it as it was fabric (slightly more cat-proof), and it was wide so I could sit cross-legged. Sold.
Then, I waited patiently for a week for the desk and chair to arrive.
The desk came well packaged, with plastic coverings over the corners to prevent any damage during shipping. The instructions were self-explanatory, though I constructed the shelves incorrectly the first time. Oh well! You don’t need additional hardware to build this, which is always a plus for those with only a few tools.
Similarly, the chair was a breeze to put together. It’s very comfortable and is everything I could hope for. I’m glad I went for a stationary model.
I was thrilled once the desk was in place, with the chair underneath. It looks clean, fresh, and an inviting workspace. I completed the area with a Bluetooth speaker, Desk Cycle, and television.
Trying out the chair and desk combo, I knew my back would appreciate these upgrades. Mentally, it was a boost too.

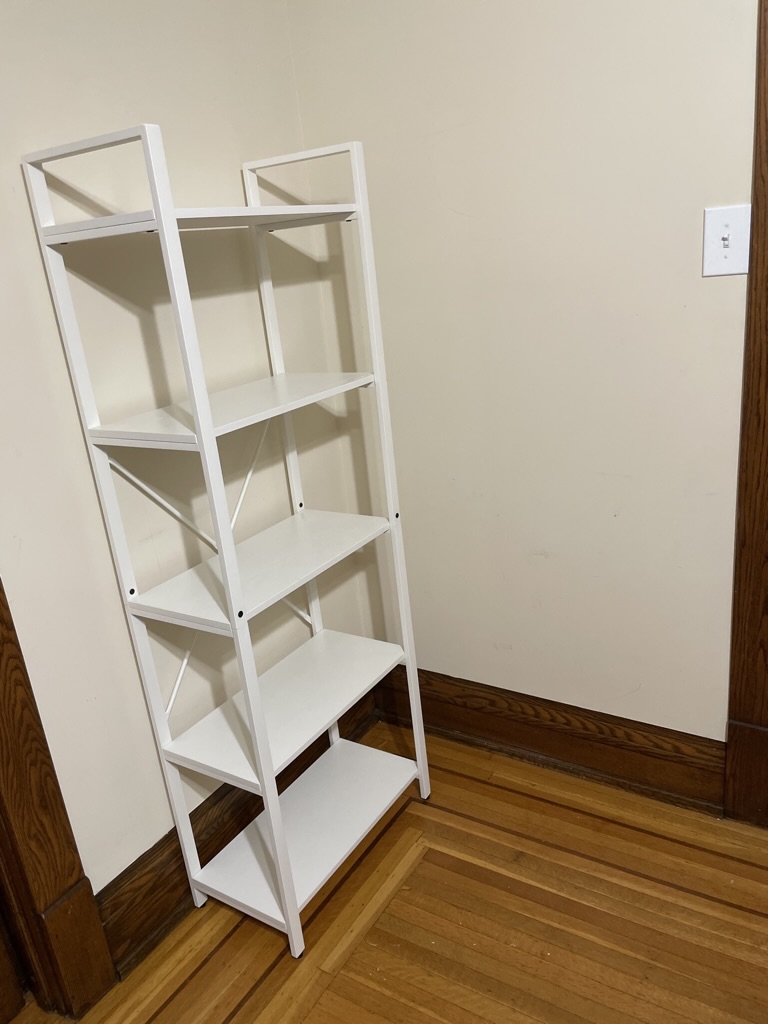
Shelves
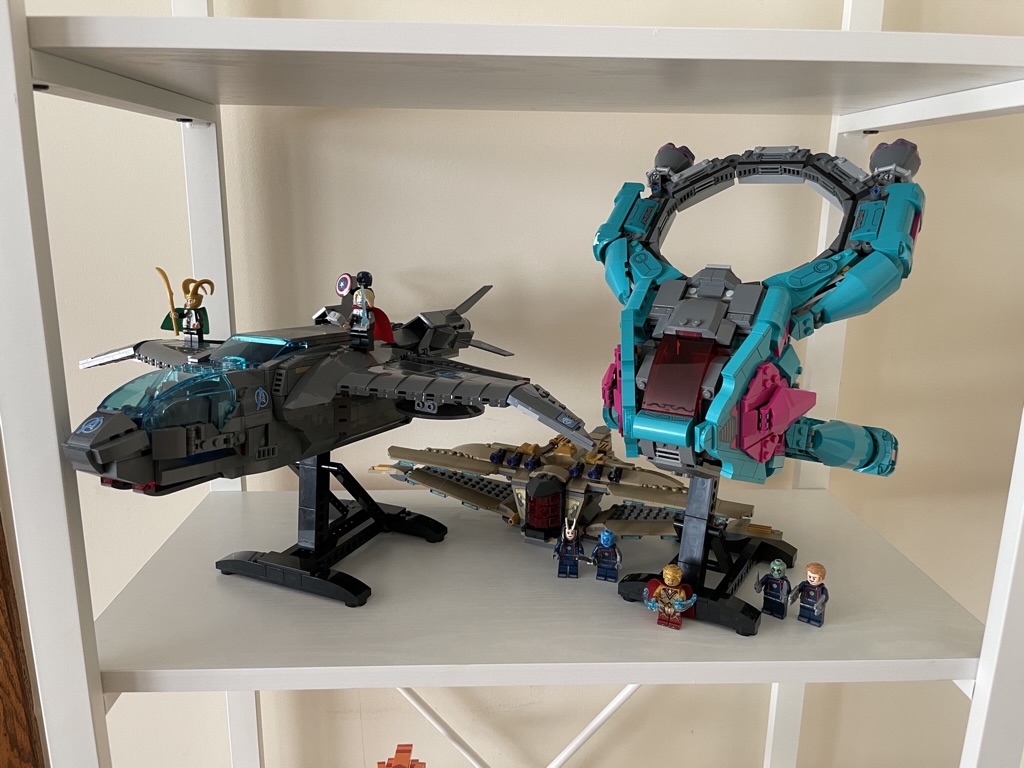
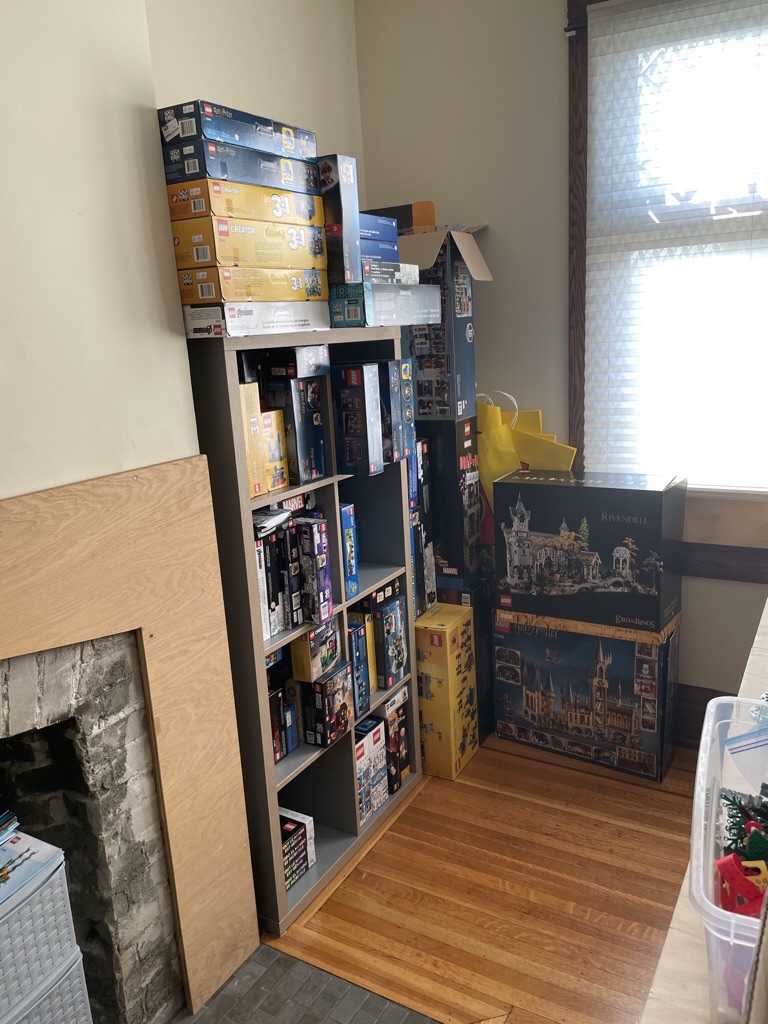
I have an IKEA Kallax unit in the room, hoarding my backlog. I cleared it off, thinking it could be used to display some pieces that are not city-appropriate. It didn’t work for several reasons. The cubes are too small and deep, so it’s hard to see any sets but those at the front. I struggled to get the Avengers Quinjet into one of them. I would have persisted with this for a while and bought a shelf in a few months, but then I needed sleeves for my backlog. When I stacked all the sets up on the floor, it looked a total mess, ridiculous, and it was far too difficult to see what I had.
So, I had a shelving issue to solve!
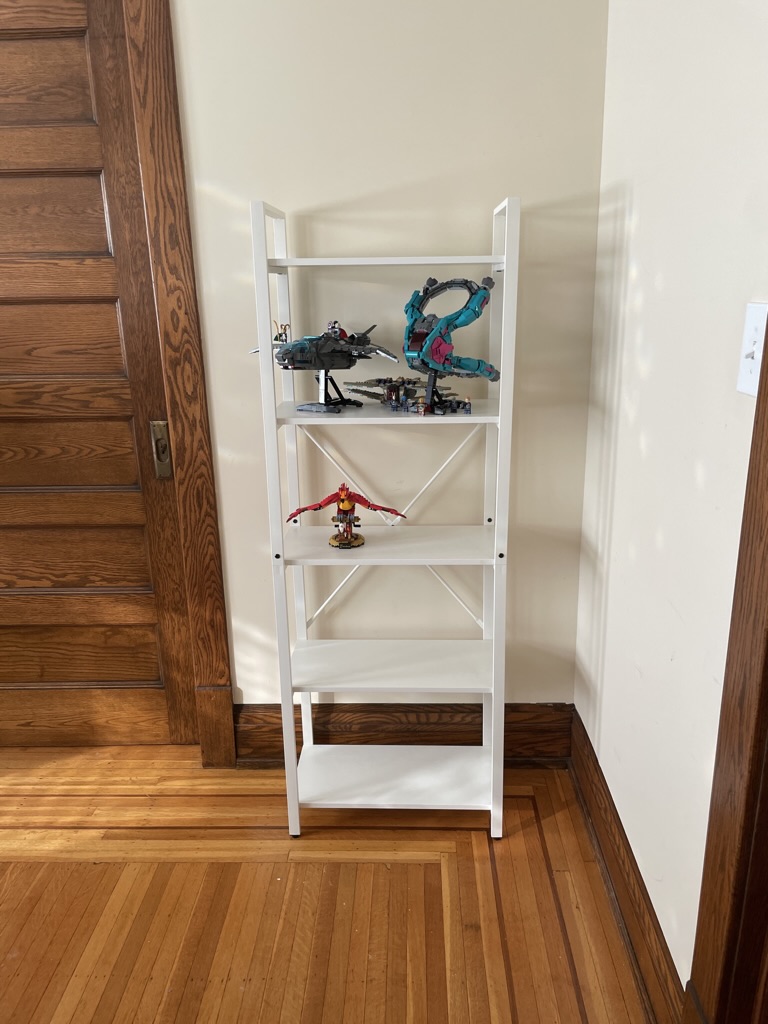
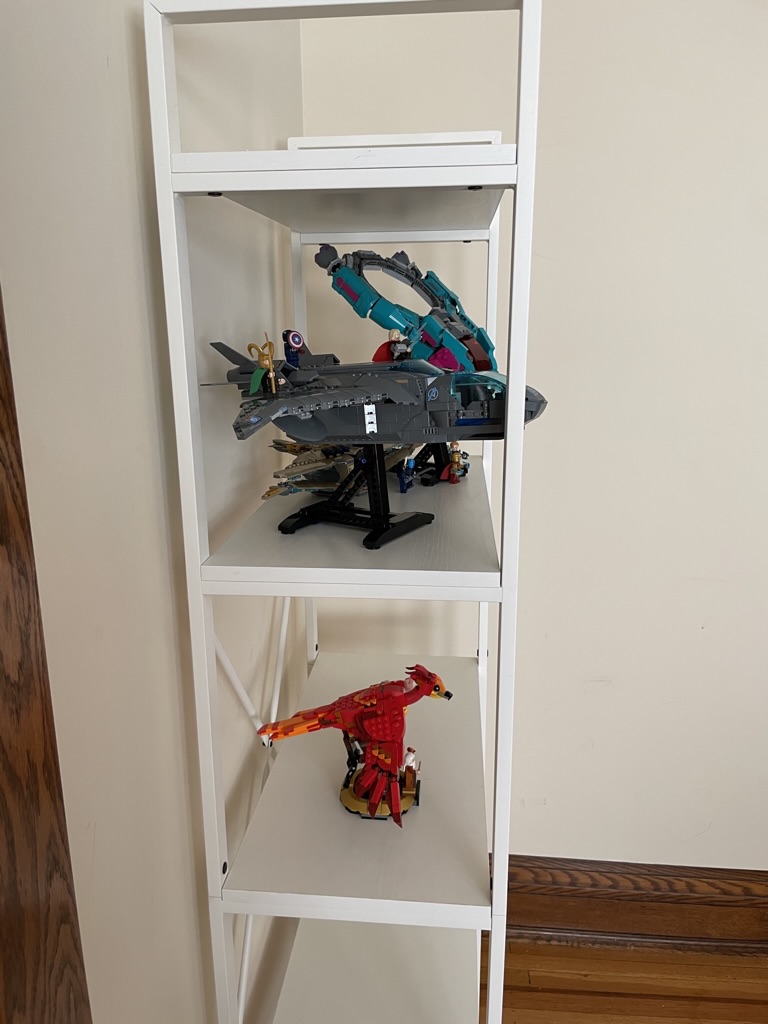
Like my desk, I wanted white shelves so nothing would distract from the Lego. IRONK made a matching shelving unit (to the desk) at a reasonable price point, so I went with that to have some uniformity in the room. Naturally, I will need another, but hopefully not until Christmas! It has five tiers and is open at the back and sides so that you can appreciate the sets from many angles.
I waited for the shelves to arrive and was not disappointed when they did.
Excellent packaging once again, and I’m thrilled with the quality of the product. I have built a lot of flat-packed furniture, and this does stand out on the quality rating. The finish is exceptional and is as crispy white as I could desire.
The shelves are on the smaller side, and only a few sets will fit on each tier, but that is my preference, so the builds have plenty of room to breathe. You cannot adjust the shelf heights, which could be an issue for some sets. The company makes other options, and I am attracted to their corner bookcase. Alas, it doesn’t come in white.


Parts and backlog organization
With the room’s right side upgraded, the space’s left side required organizing.
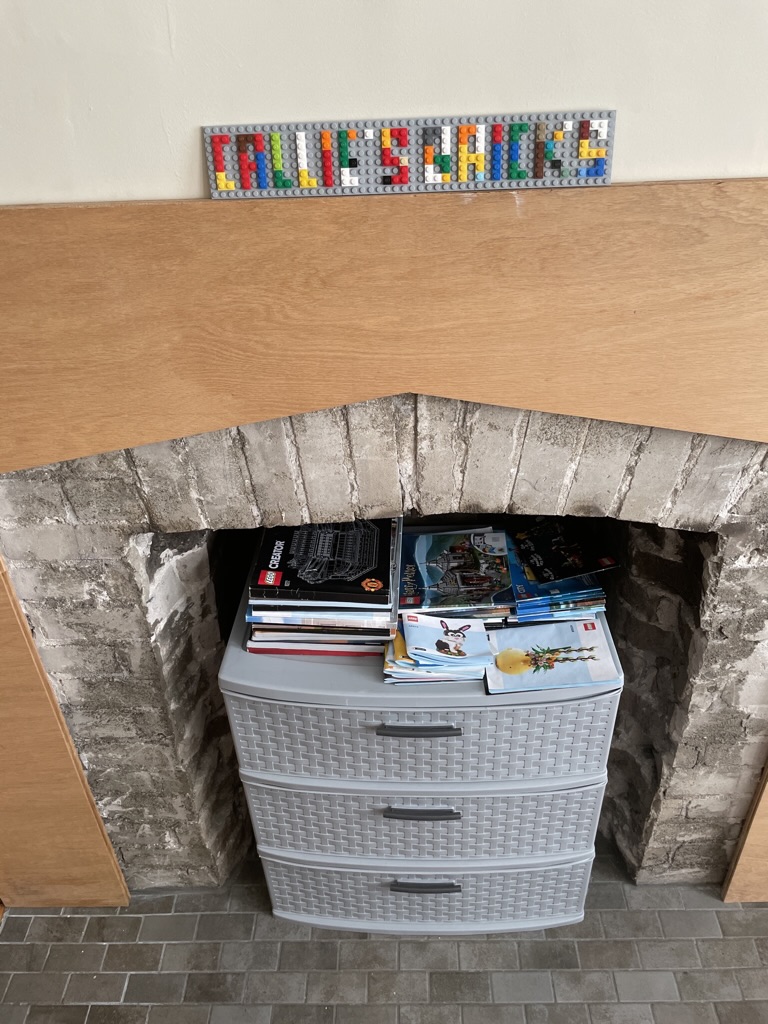
I already had my part inventory organized in plastic drawers; however, those drawers were against various walls. On the left side of the room, there is a fireplace with 4-foot recesses. I moved my part bins to the left side of the fireplace, and I am delighted with how tidy it looks. There’s room for expansion too, which will be needed as my hobby grows. For reference, I use the IRIS 6-quart stacking drawers and stacking storage cabinets for my pieces. I adore the quality, size, and they stack perfectly.
In the fireplace is a little storage unit with items from the bulk lot I snagged back in November. It’s a sorted mess that I need to work through (pieces with stickers, vehicle components, and half-built sets I will restore). On top of that, I have my manuals – I know I’ll need a better storage solution for these soon too. At least they are all in one place and not dispersed all over my house. Above is a cute sign my friend made for me!
The IKEA Kallax unit with my backlog is to the right of my fireplace. It’s sorted by theme (Harry Potter, Creator, City, Marvel, Gift with Purchases, etc.), so finding my next build is straightforward. Beside those are my large open boxes, which I keep flat-packed empty boxes in. Once they are full, I will move them from the room into a long-term storage area.

With these upgrades, my Lego room is looking fantastic. I am delighted with the result and have met all the goals I set for the project. Of course, attention must now turn to the Lego tables – my collection is a total mess. That’s my plan for this weekend!


So, that’s my new and improved dedicated Lego space! What do you think? Let me know in the comments below. 🙂

Leave a comment